Desserts

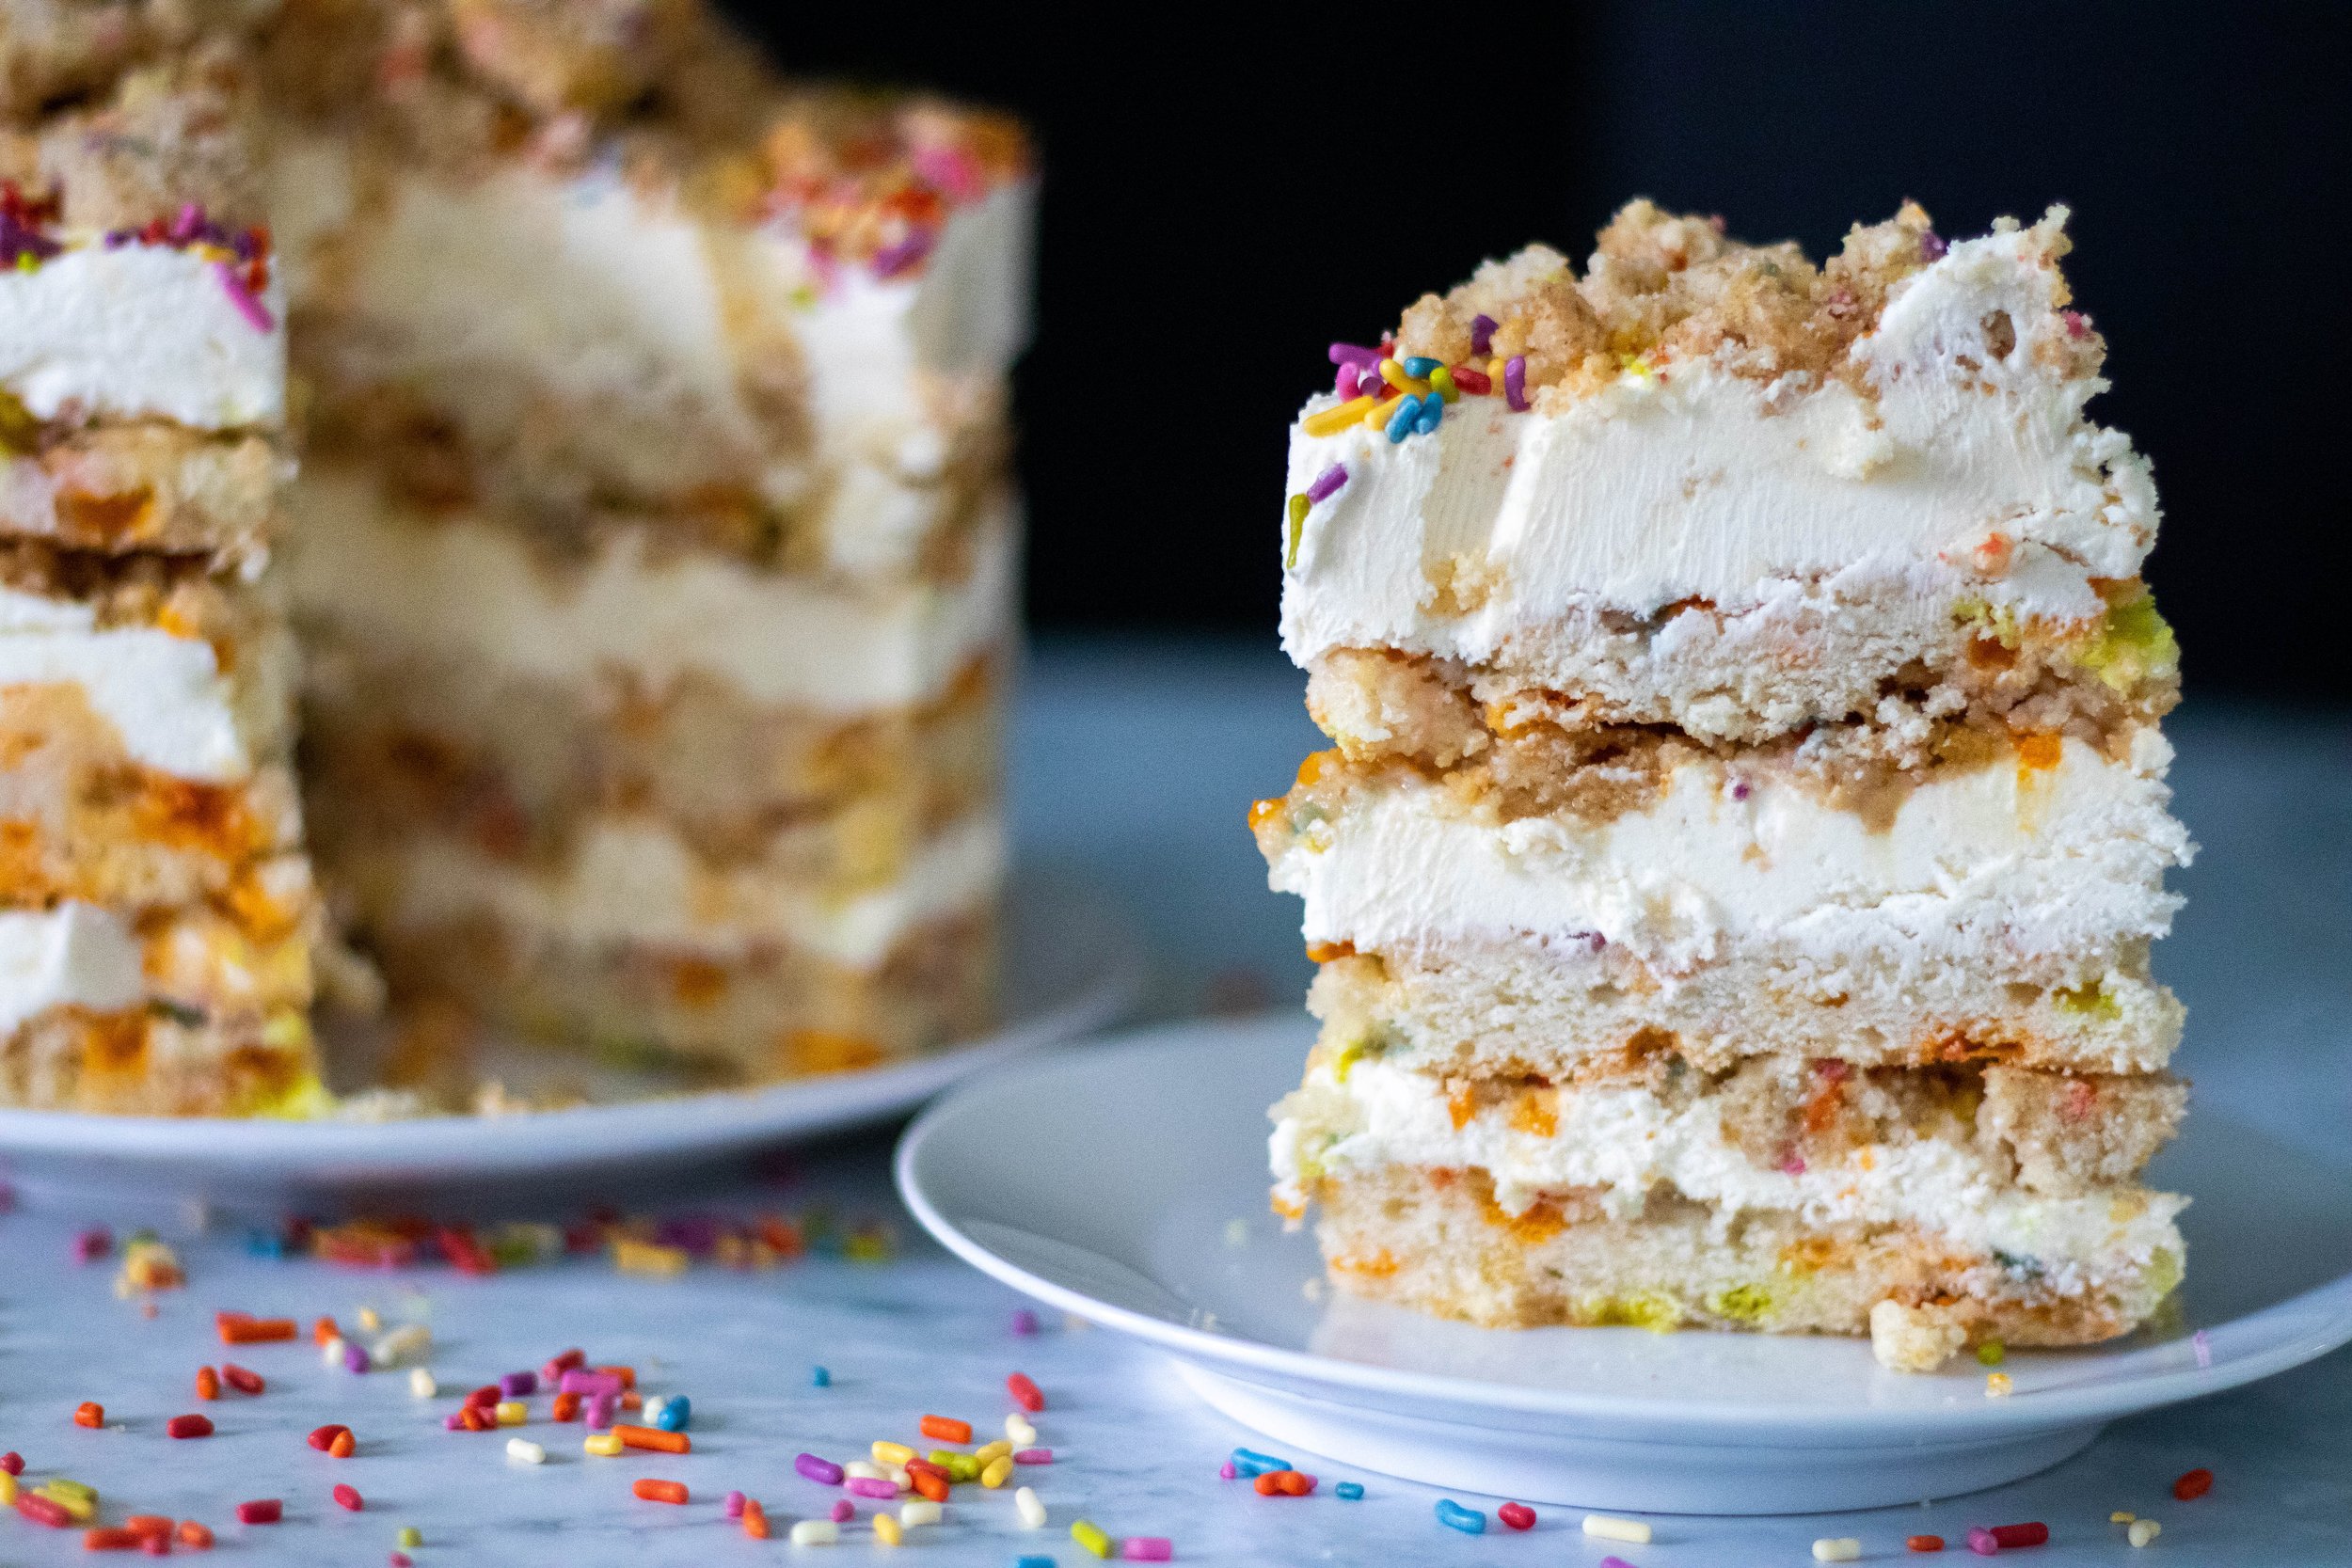
Vegan Milk Bar Birthday Cake

So here is the truth. I have never in my life eaten a Milk Bar anything. BUT, I have always wanted to.

I have seen countless friends post pics of delicious looking Milk Bar cakes and cookies. I have seen the mixes in the grocery store, and every part of me has dreamed of a vegan version of their sprinkle filled original birthday cake.

I mean I love sprinkles, and funfetti was my go to box cake pre vegan.

And here is another thing, I LOVED BOXED CAKE AND CANNED ICING before going vegan. I can bake from scratch and am pretty good at it. My daughter is a crazy amazing baker. But sometimes I just crave artificial tasting, buttery, boxed cake.

So this year for my mother-in-laws birthday we sent her a Milk Bar cake. She is not vegan and she has not had a birthday cake in like 20 years or something crazy like that. So we sent her one because Milk Bar delivers their famous cakes all over, with just a couple days notice, even to the middle of nowhere mountain towns with no local bakery to order from.

My oldest daughter was like “hey why cant we get a cake” and I was like “umm they are nowhere close to vegan, or allergy friendly, but why don’t I just try to make one.” At which point I had committed to this venture and also expect it to be a total failure. I have veganized a lot of recipes with success but when I dug into this one I got scared!

For starters I used the Boston Girl Bakes recipe for reference. She explains EVERYTHING so well and with great detail. I strongly suggest you read through what she has to say about this famous cake. I obviously had to make several changes since I am making the vegan version. But I followed her advice as closely as I could while making the necessary vegan changes.

I had to test several ideas to get this Milk Bar Vegan Cake right. Now remember, I have not had an original Milk Bar Cake to compare it to, so I had to rely mostly on pictures and descriptions online to see that mine was close, and then I shared samples with friends who HAVE EATEN the famous sprinkle cake, and got their feedback. Even my “failed” attempts were so delicious. The tricky part for me was getting the crumb right and I think the combo of starch eggs and aquafaba did the trick and also making sure you use CAKE FLOUR. I used a high protein flour in my first attempt because I didn’t have any cake flour and thought I might not really matter, IT MATTERS, A LOT!!!

If you have never heard of Milk Bar or seen this or any of their other desserts then let me help educate you at least on this particular cake. You NEED this cake in your life. I PROMISE!

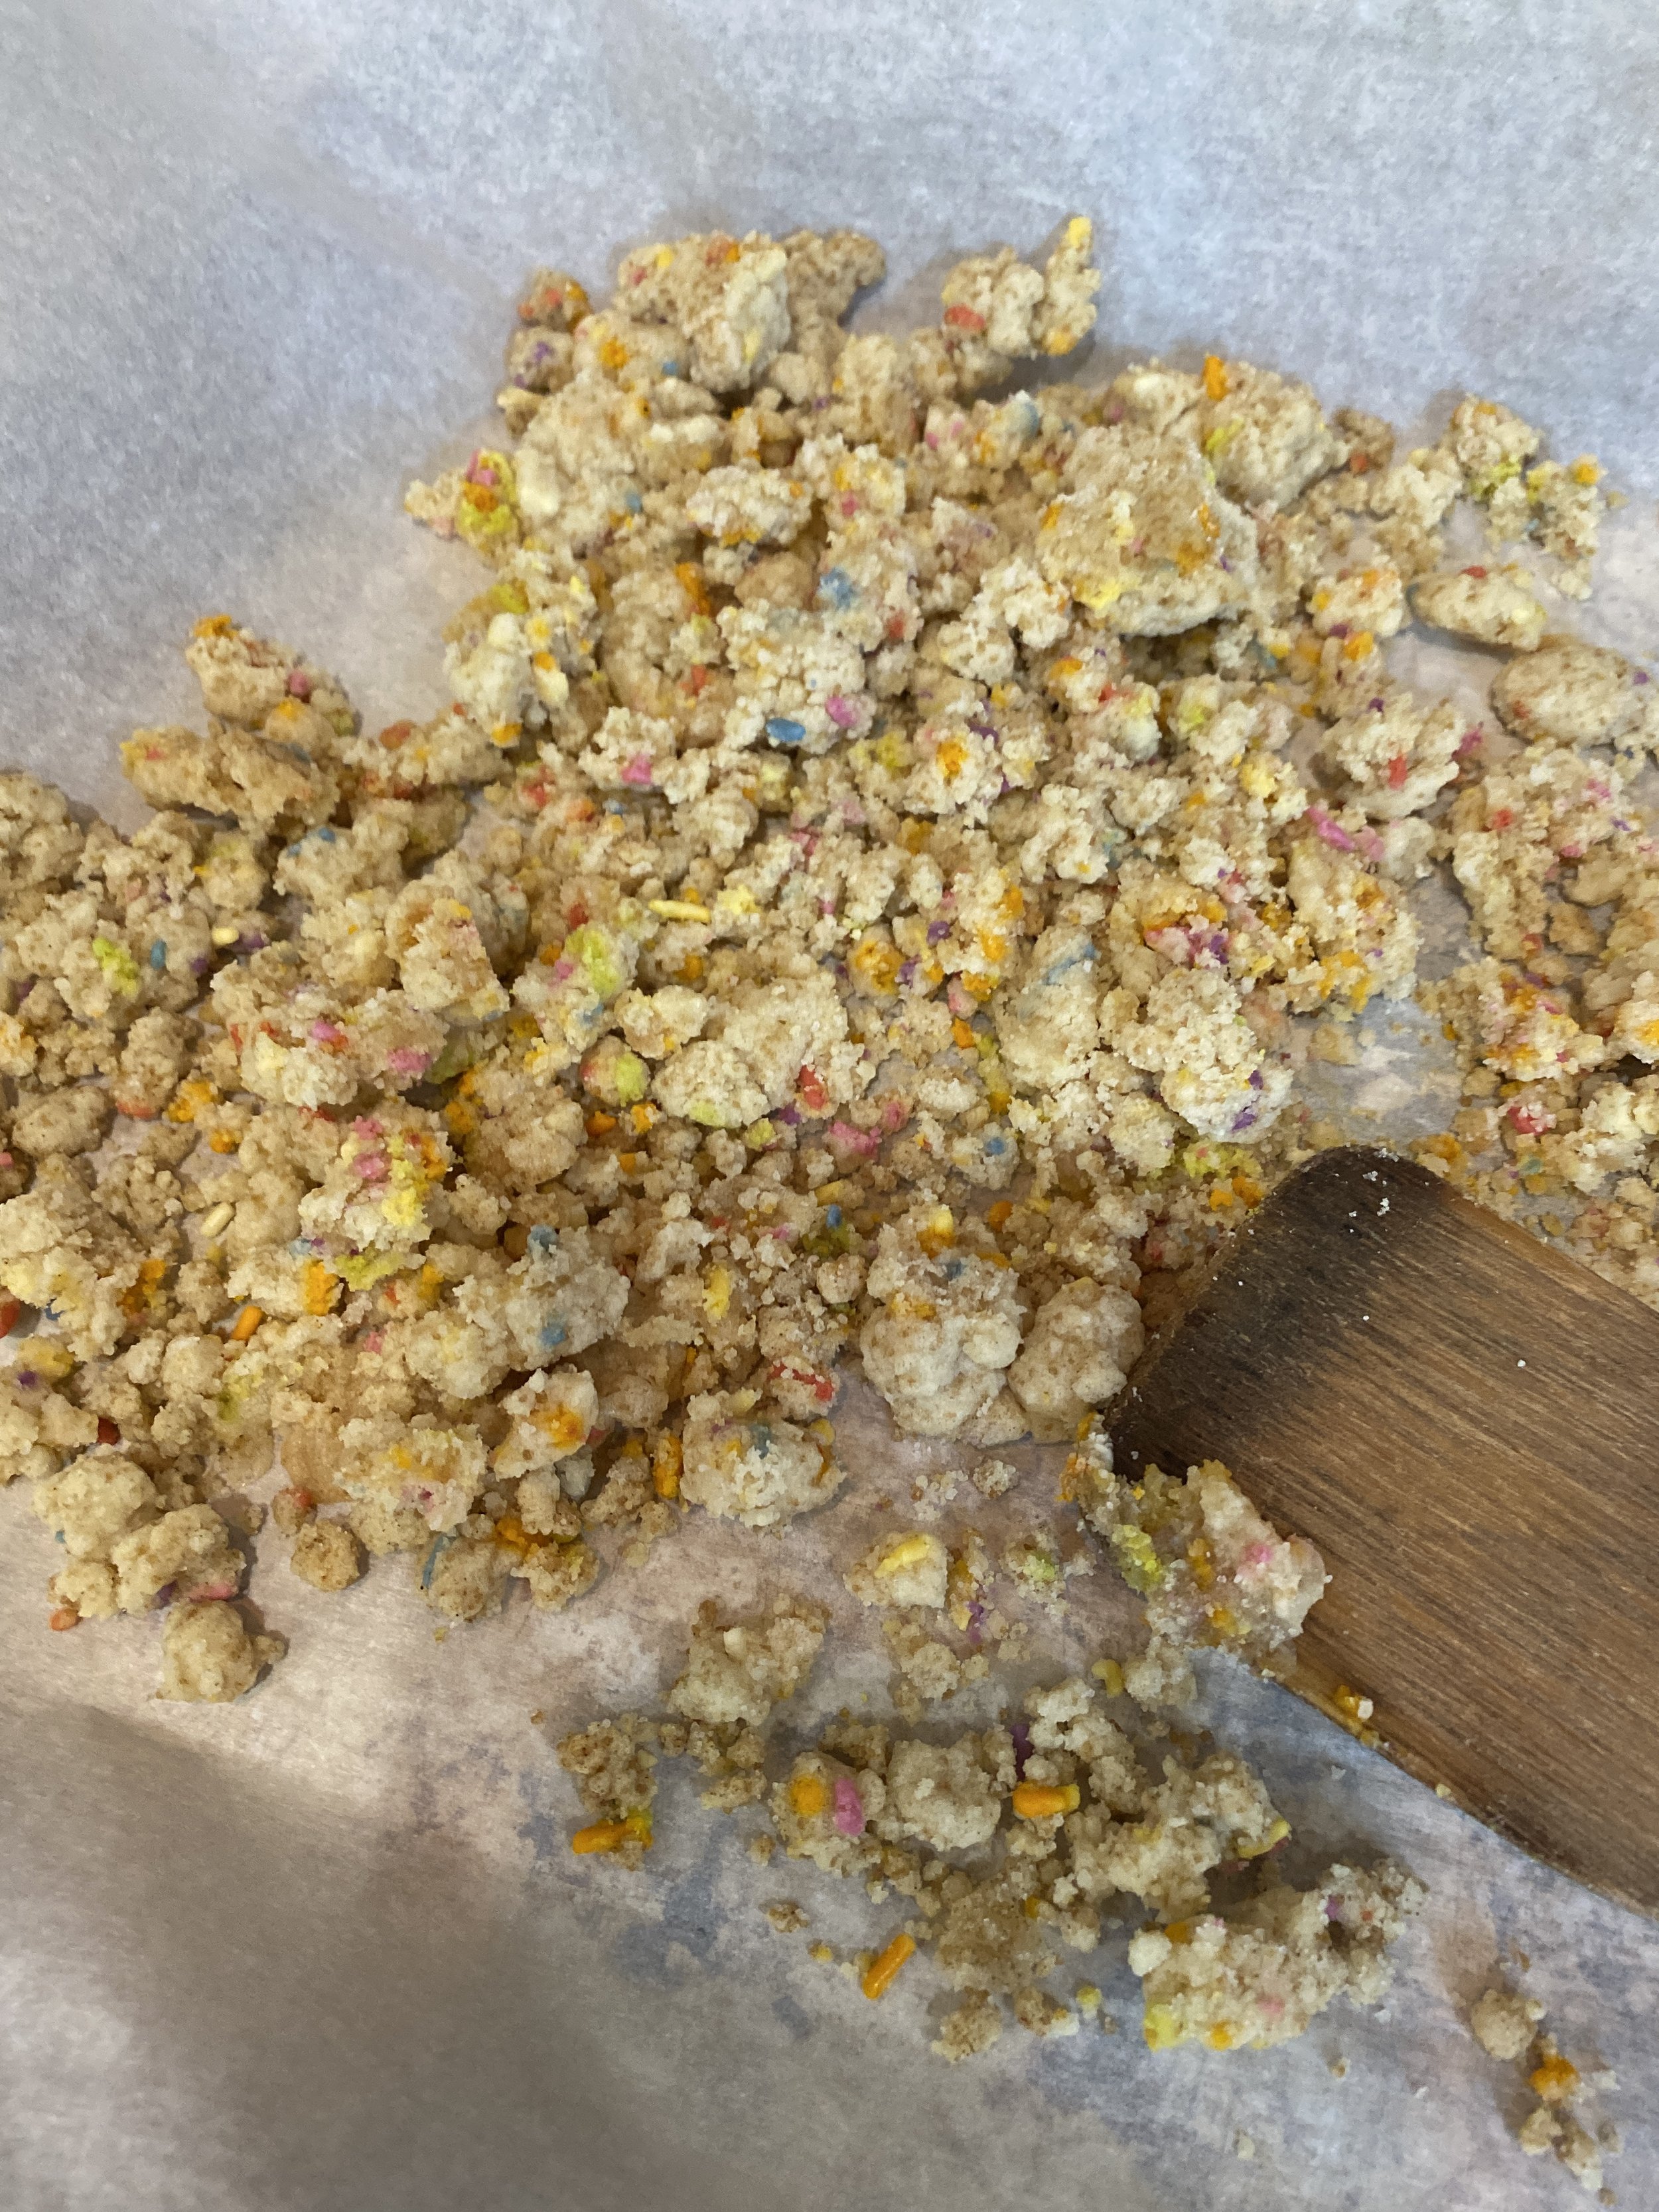
The Milk Bar is a bakery that started in New York. There are locations all over now and you can order online. You can also buy their mixes in Target stores. Their Sprinkle Birthday Cake is like a boxed funfetti cake on steroids. The cake is light and fluffy and buttery and packed full of sprinkles. The frosting is my new favorite buttercream. Seriously I will be using this as the base of all my future butter creams. And then there are the CRUMBS. The perfect little crunchy cake crumble crumbs you bake separately, and put between every layer of cake. I could make a double batch of just the crumbs to snack on and be one happy lady.

The cake calls for clear vanilla extract…so artificial vanilla flavor, and this is the magic of this cake. You NEED TO GET THE CLEAR VANILLA!! It’s important not to skip this part. This is what gives you that boxed vanilla flavor!! The cake originally calls for glucose syrup but I just doubled my corn syrup and believe that works just fine.

You also have to have a cake ring and some acetate to form the cake. I ordered mine together on amazon. I feel like now that I am not intimidated anymore about using a cake ring, I will be using it a lot. It is so much fun to use!! Stacked cakes for everyone from here on out!!

And there you have it, my best effort a veganizing the classic Milk Bar Sprinkle Birthday Cake.

So if you are like me and dreamed of a day this cake was vegan, or you have never heard of Milk Bar and this cake, trust me when I say I think you will love this vegan milk bar sprinkle birthday cake. And really, no need to wait for a birthday to make it. Everyday is worth celebrating with sprinkles!


INGREDIENTS:

You will need the following for this recipe:

For the Cake Crumbs:

  • 1/2 cup granulated sugar

  • 1 1/2 tablespoons brown sugar

  • 3/4 cup cake flour ( cake flour is a must for this recipe)

  • 1/2 teaspoon baking powder

  • 1/4 teaspoon salt

  • 2 tablespoons vegan rainbow sprinkles

  • 1/4 cup grapeseed or canola oil

  • 1 tablespoon clear vanilla extract ( this is an important ingredient, don’t substitute with real vanilla extract)

For the Cake:

  • 4 tablespoons vegan butter. (I used Trader Joes block of butter. I recommend a vegan butter block or Follow your heart. Not all vegan butters are created equal)

  • 1/3 cup vegetable shortening ( I use Spectrum)

  • 1 1/4 cup granulated sugar

  • 3 tablespoons brown sugar

  • 2 tablespoons tapioca starch mixed with 6 tablespoons water

  • 2 tablespoons aquafaba ( liquid from a can of chickpeas or white beans. We are not using the whipped version, rather just the liquid this time)

  • 1/2 cup oat or almond milk

  • 1 teaspoon apple cider vinegar

  • 1/3 cup grapeseed or canola oil

  • 2 teaspoons clear vanilla extract

  • 2 cups cake flour (I used Swans Down)

  • 2 teaspoons baking powder

  • 1/4 teaspoon salt

  • 1/4 cup plus 2 tablespoons rainbow sprinkles, divided

For the Frosting:

  • 16 tablespoons vegan butter

  • 1/2 cup vegetable shortening

  • 4 oz vegan cream cheese (I used Trader Joes brand)

  • 4 tablespoons corn syrup

  • 2 tablespoons clear vanilla extract

  • 3 cups powdered sugar

  • 1/4 teaspoon salt

  • 1/8 teaspoon baking powder

  • 1/8 teaspoon lemon juice

For the Cake Soak:

  • 1/4 cup almond or oak milk

  • 1 teaspoon clear vanilla extract


INSTRUCTIONS:

For the Cake Crumbs:

preheat oven to 300 degrees

  1. Add all of the dry ingredients to a bowl of a stand mixer ( I have been using a Hauswirt for the last year and am in love after having my one year old kitchen aid break and not being able to get a replacement in the pandemic) and mix until combined. Add the wet ingredients and mix just until clusters form.

  2. Line a cake sheet with parchment paper. Pour the cake crumb clusters onto the pan and spread them out.

  3. Bake for 20 minutes. Halfway through the bake, use a wooden spoon to break up the chunks a bit.

  4. The crumbs will still seem a little soft when you take them out of the oven but they will harden more as you allow them to cool. You can make these ahead of time if you like, just store them in an airtight container at room temp. And try not to eat them all before you get around to using them (I had to bake a second batch for snacking)

For the Cake:

preheat oven to 350 degrees

  1. In a small bowl combine milk, vinegar, oil, and vanilla.

  2. In a medium bowl whisk the flour, baking powder, salt, and 1/4 cup of sprinkles.

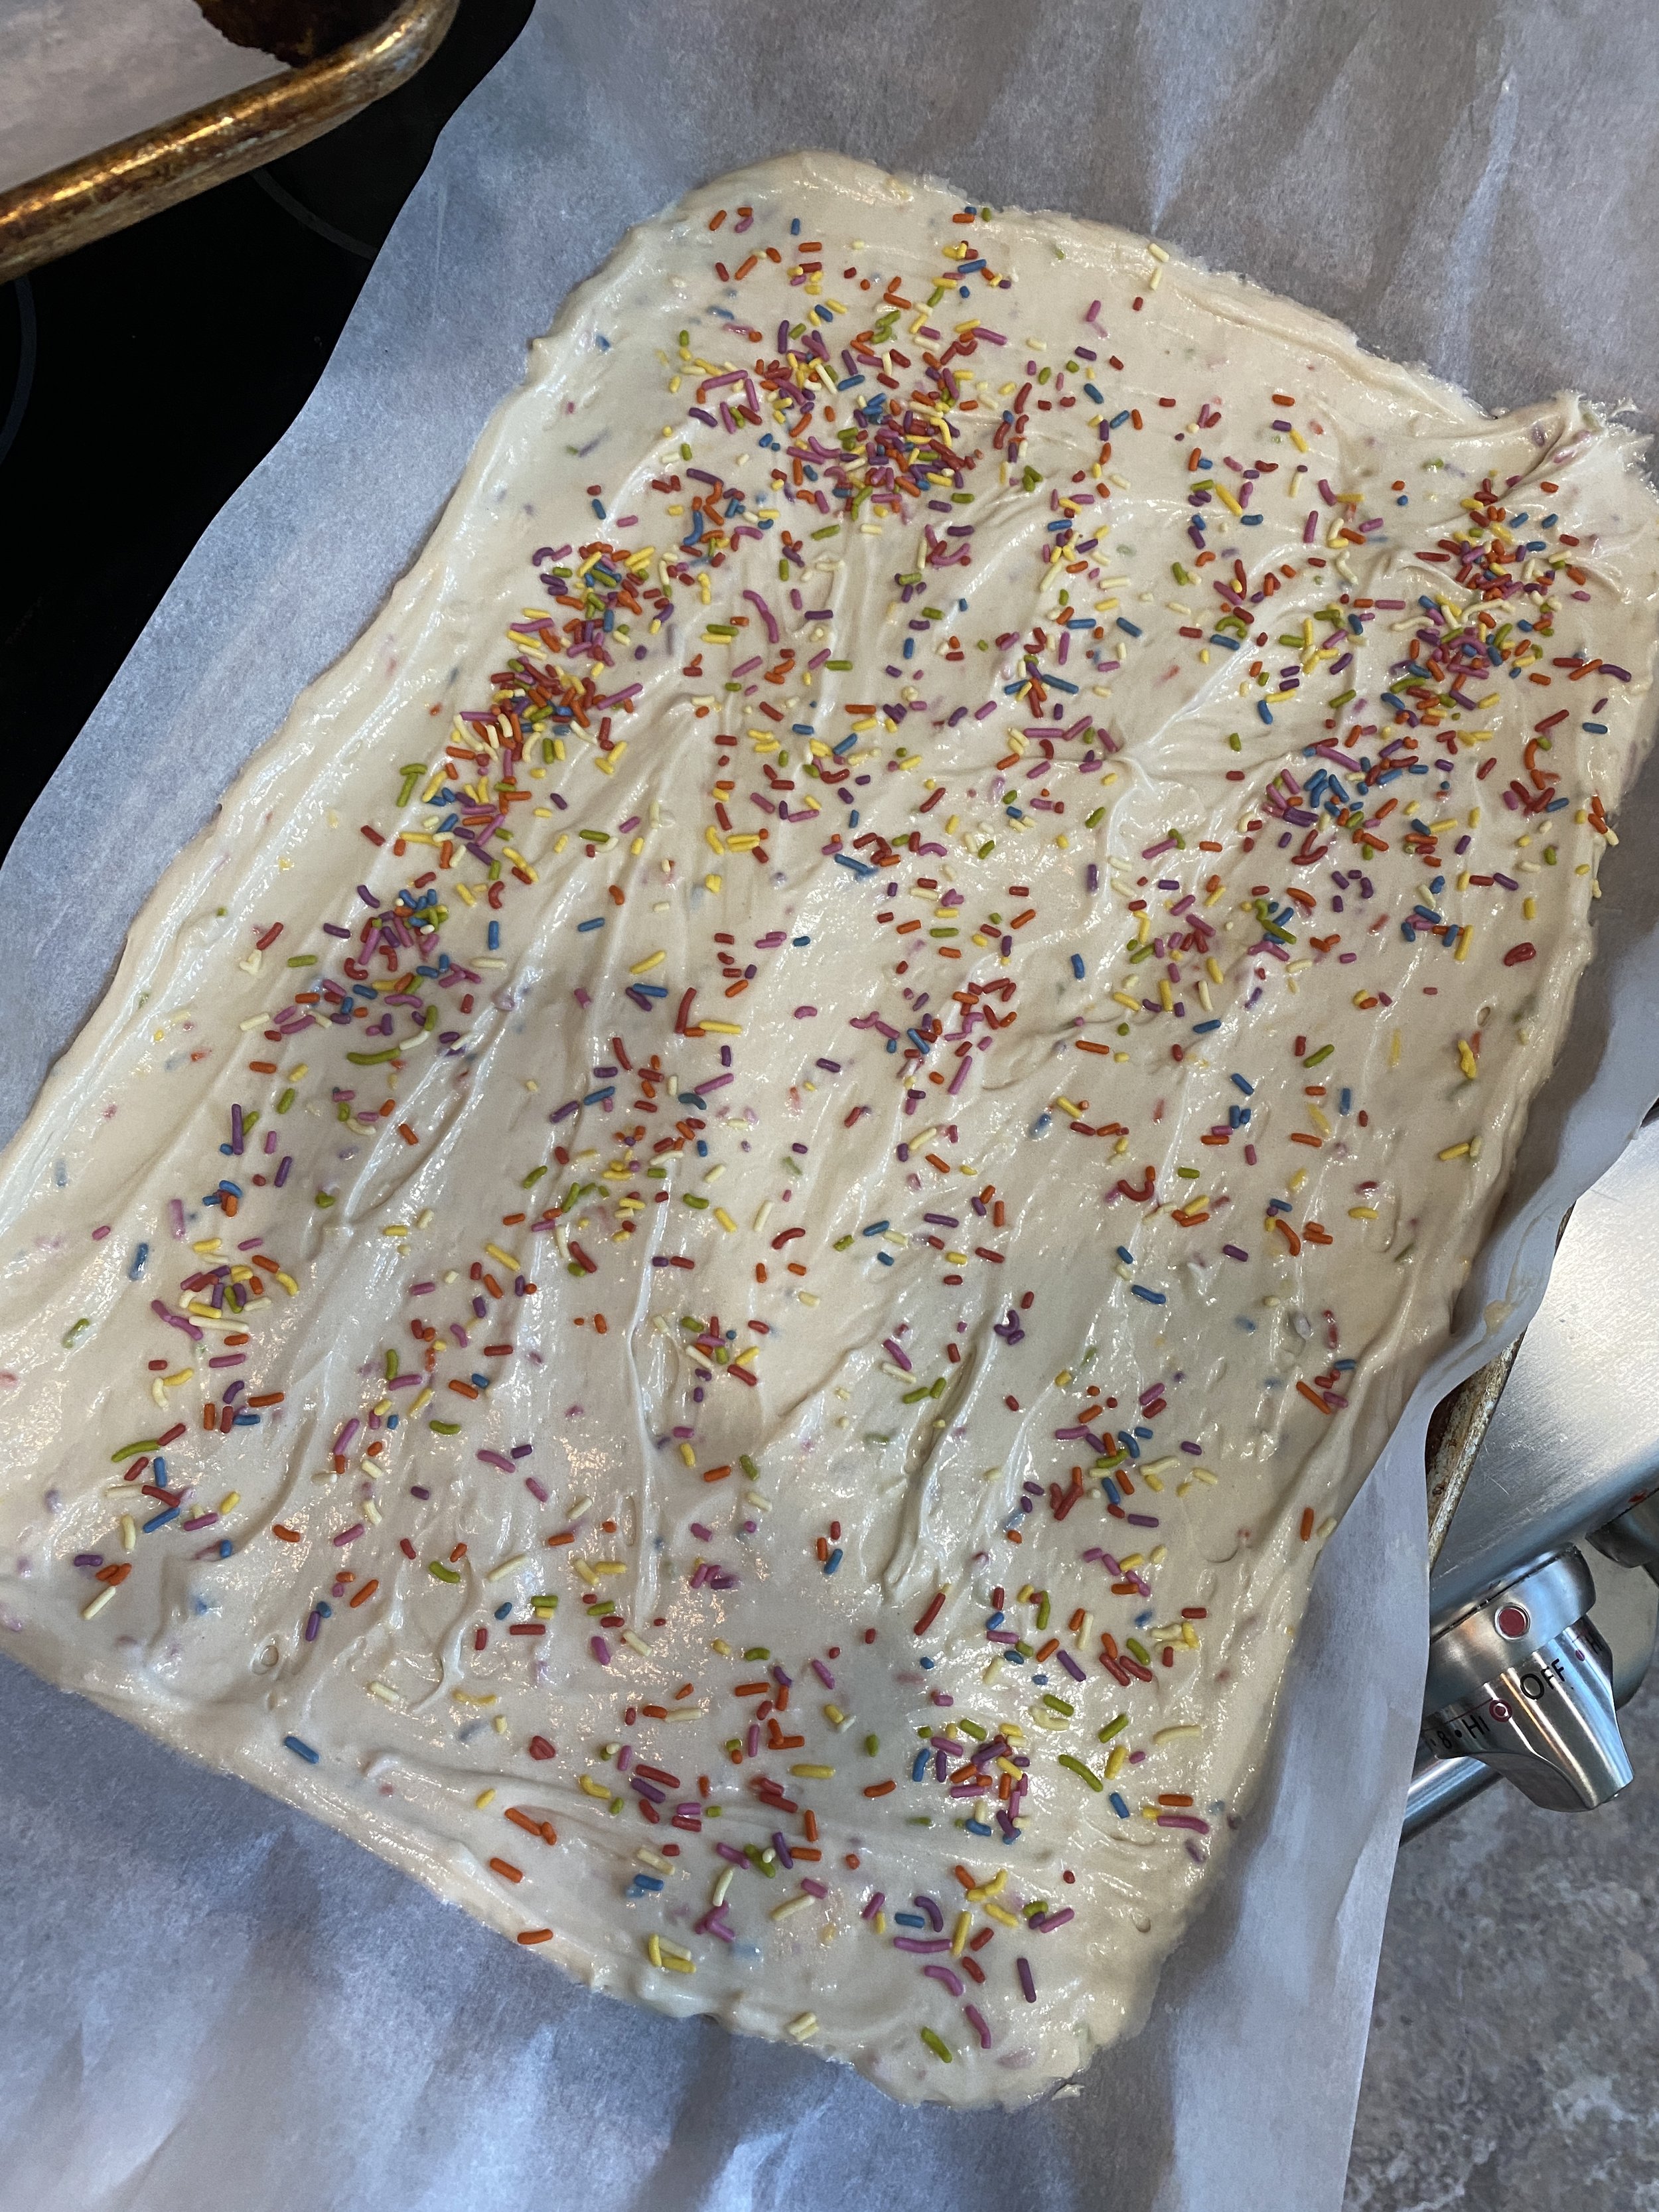
  3. In the bowl of your stand mixer, combine the butter, shortening, and both sugars. Using the paddle attachment, mix on medium high for 2 to 3 minutes until the butters and sugars are creamed together. Scrape down the sides of the bowl and add the tapioca starch mixed with water, and the 2 tablespoons of aquafaba. Mix on high for 3 minutes. Scape down the sides of the bowl again.

  4. On low speed, slowly pour in the milk mixture. Once the mixture is all in the bowl, increase the speed to high and allow to beat for 5 minutes. This step is important so make sure you let it mix that entire 5 minutes. Scrape down the sides of the bowl again.

  5. On low speed once again, slowly add in the flour mixture and mix only unit the batter has come together. Do not overmix!! Use a rubber spatula to scrape the sides and make sure the flour on the very bottom got mixed in.

  6. Cover your 10x15 jelly roll pan in parchment paper and evenly pour the cake batter over the pan. You may need to use a spatula to even out the batter. Cover the top of the batter with the remaining 2 tablespoons of sprinkles and kind of press them in.

  7. Bake for about 30 minute or until a cake tester or tooth pick inserted in the middle comes out clean.

  8. Remove cake from oven and place the pan on a wire cooling rack.

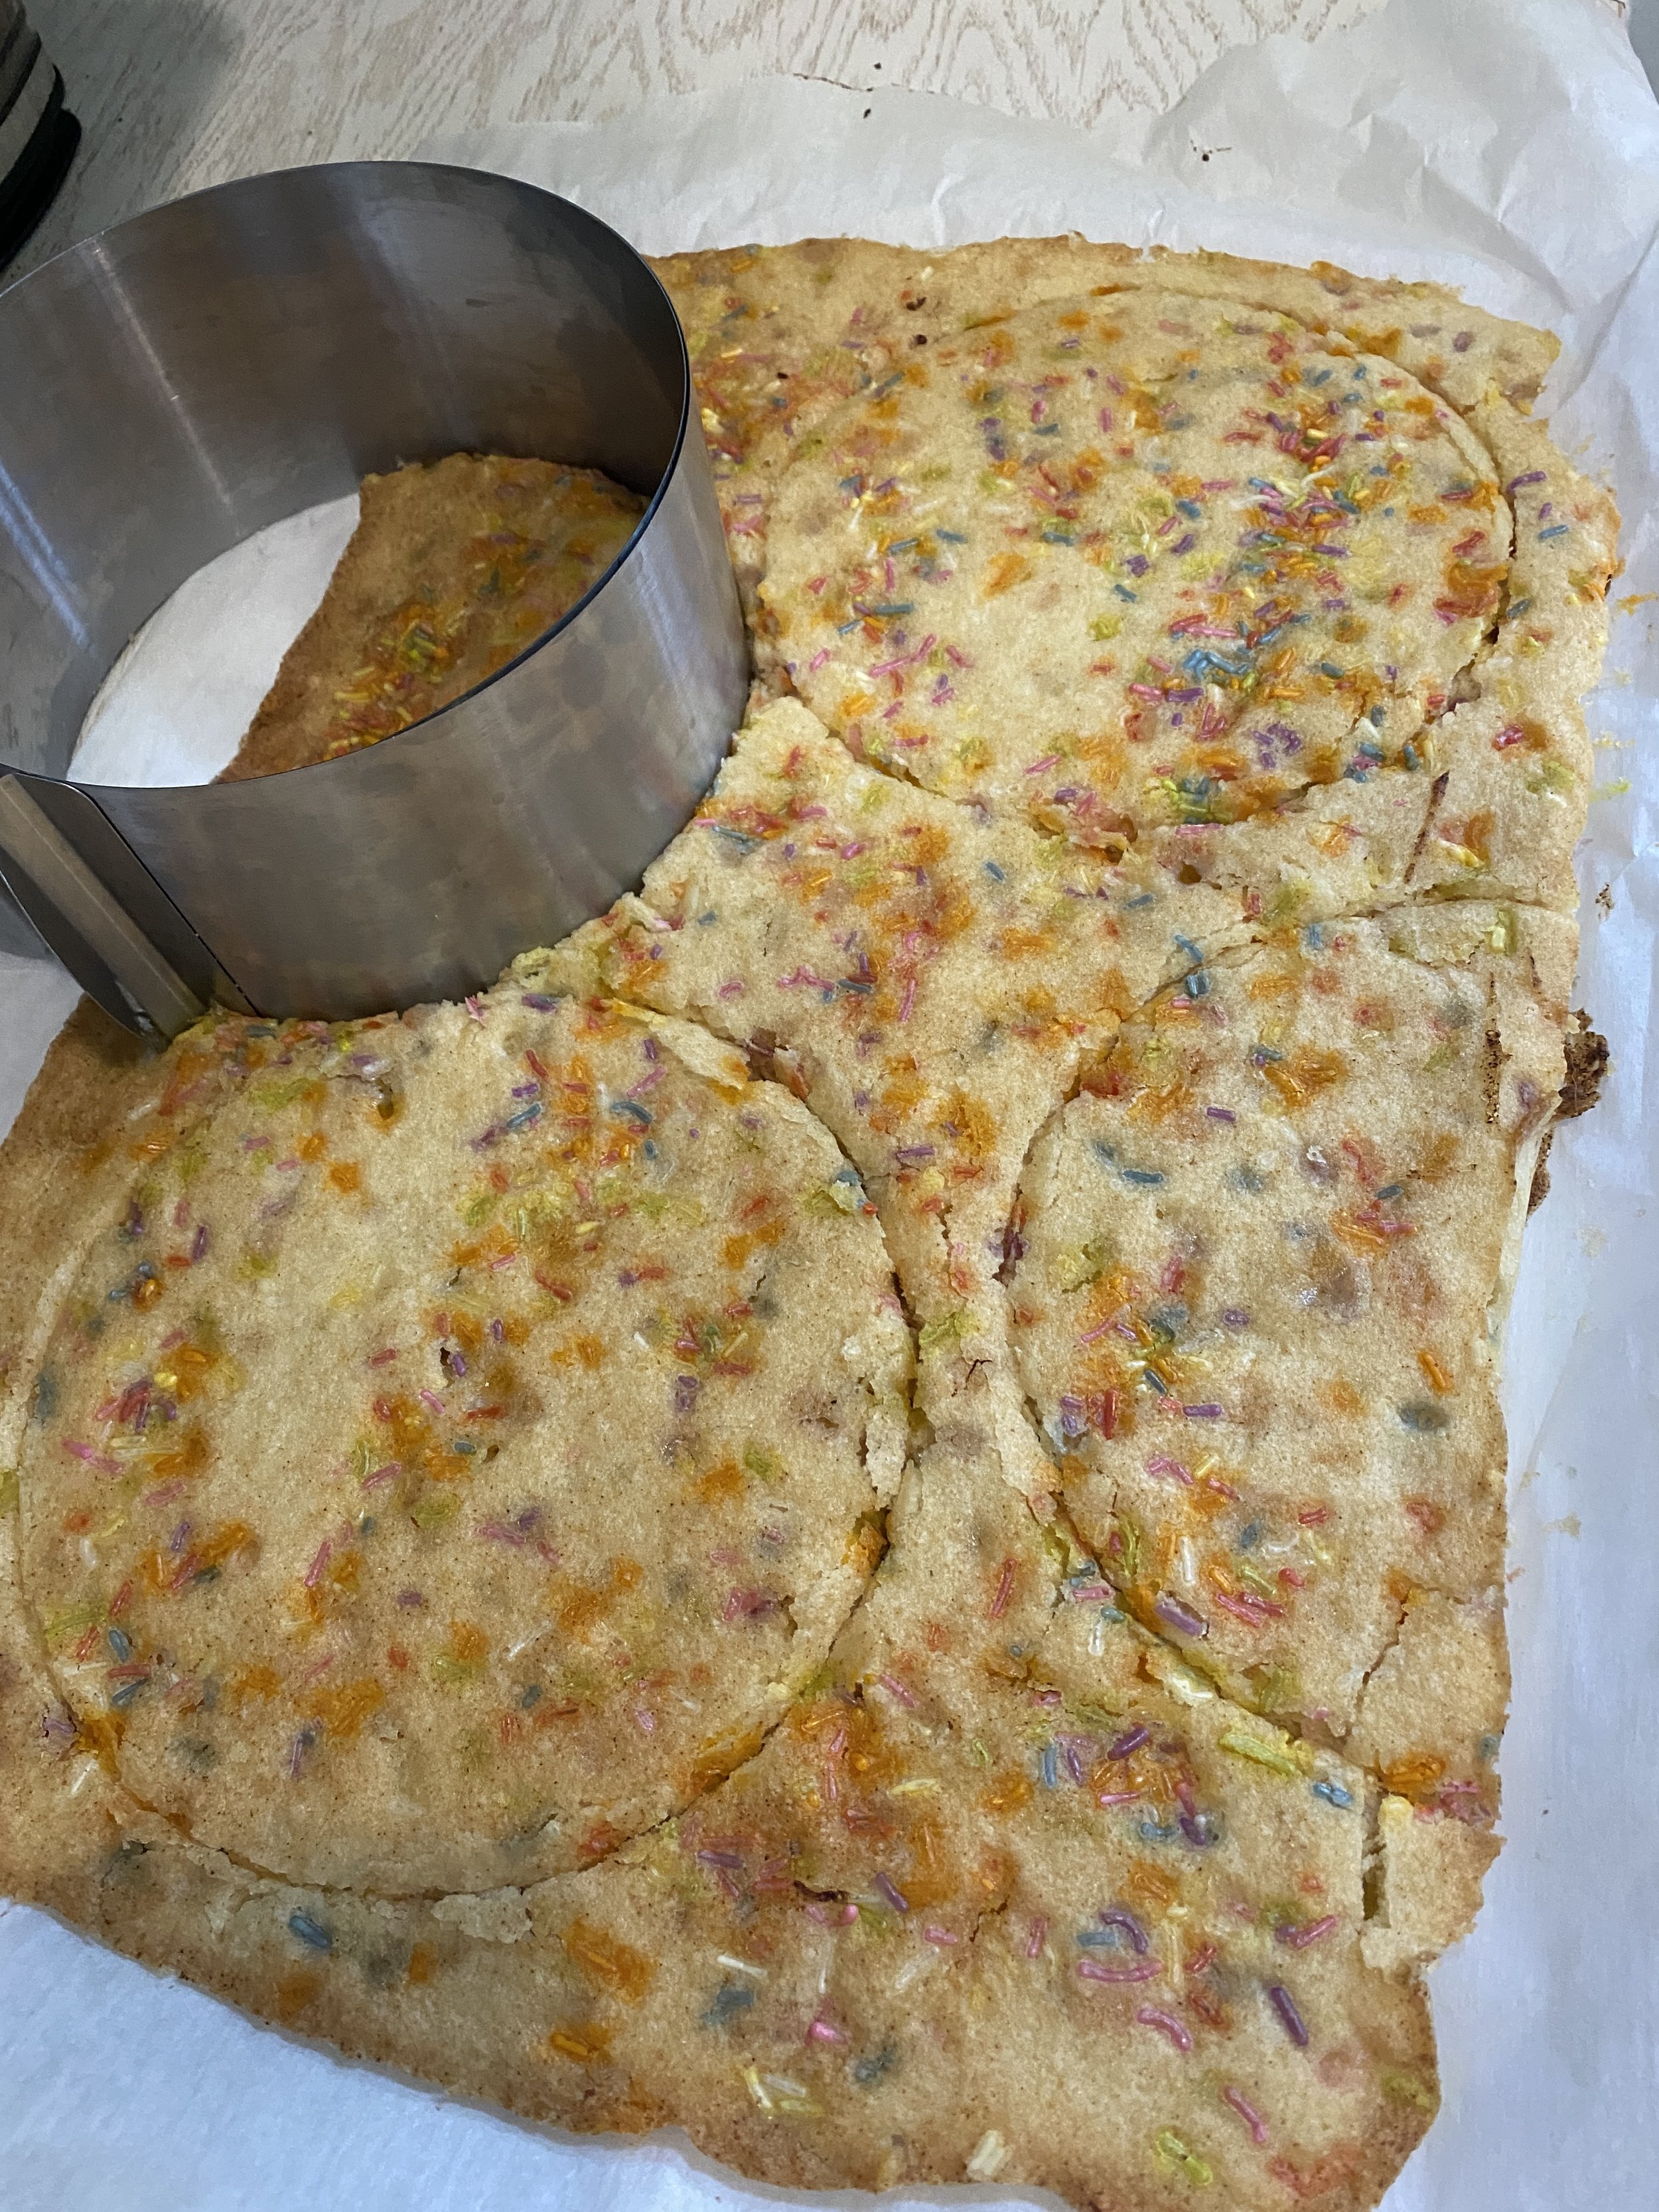
  9. Once the cake has completely cooled, use your cake ring to press 2 full circles, and 2 half circles from the sheet cake. (look at pictures above to see how to do this) There will be plenty of cake scraps leftover. Seriously y’all, these are “snacking scraps” not waste. Not one crumb of this cake was “wasted” in my house.

For the Frosting:

  1. In the bowl of your stand mixer add the butter, cream cheese, and shortening. Beat for a few minutes until creamy, fluffy, and smooth. No lumps. Scrape down the sides of the bowl.

  2. Add the corn syrup and mix another minute or 2, until the mixture is silky and kind of shiny.

  3. In a bowl, whisk the powdered sugar with the salt, and baking powder. I do this to help if there are any clumps in the sugar. Just put it all in a bowl and whisk it good to mix it all up and break up any sugar clumps.

  4. Add the mixute to the mixer along with the lemon juice and mix on medium speed a few minutes until the frosting is creamy and smooth.

Build the Cake:

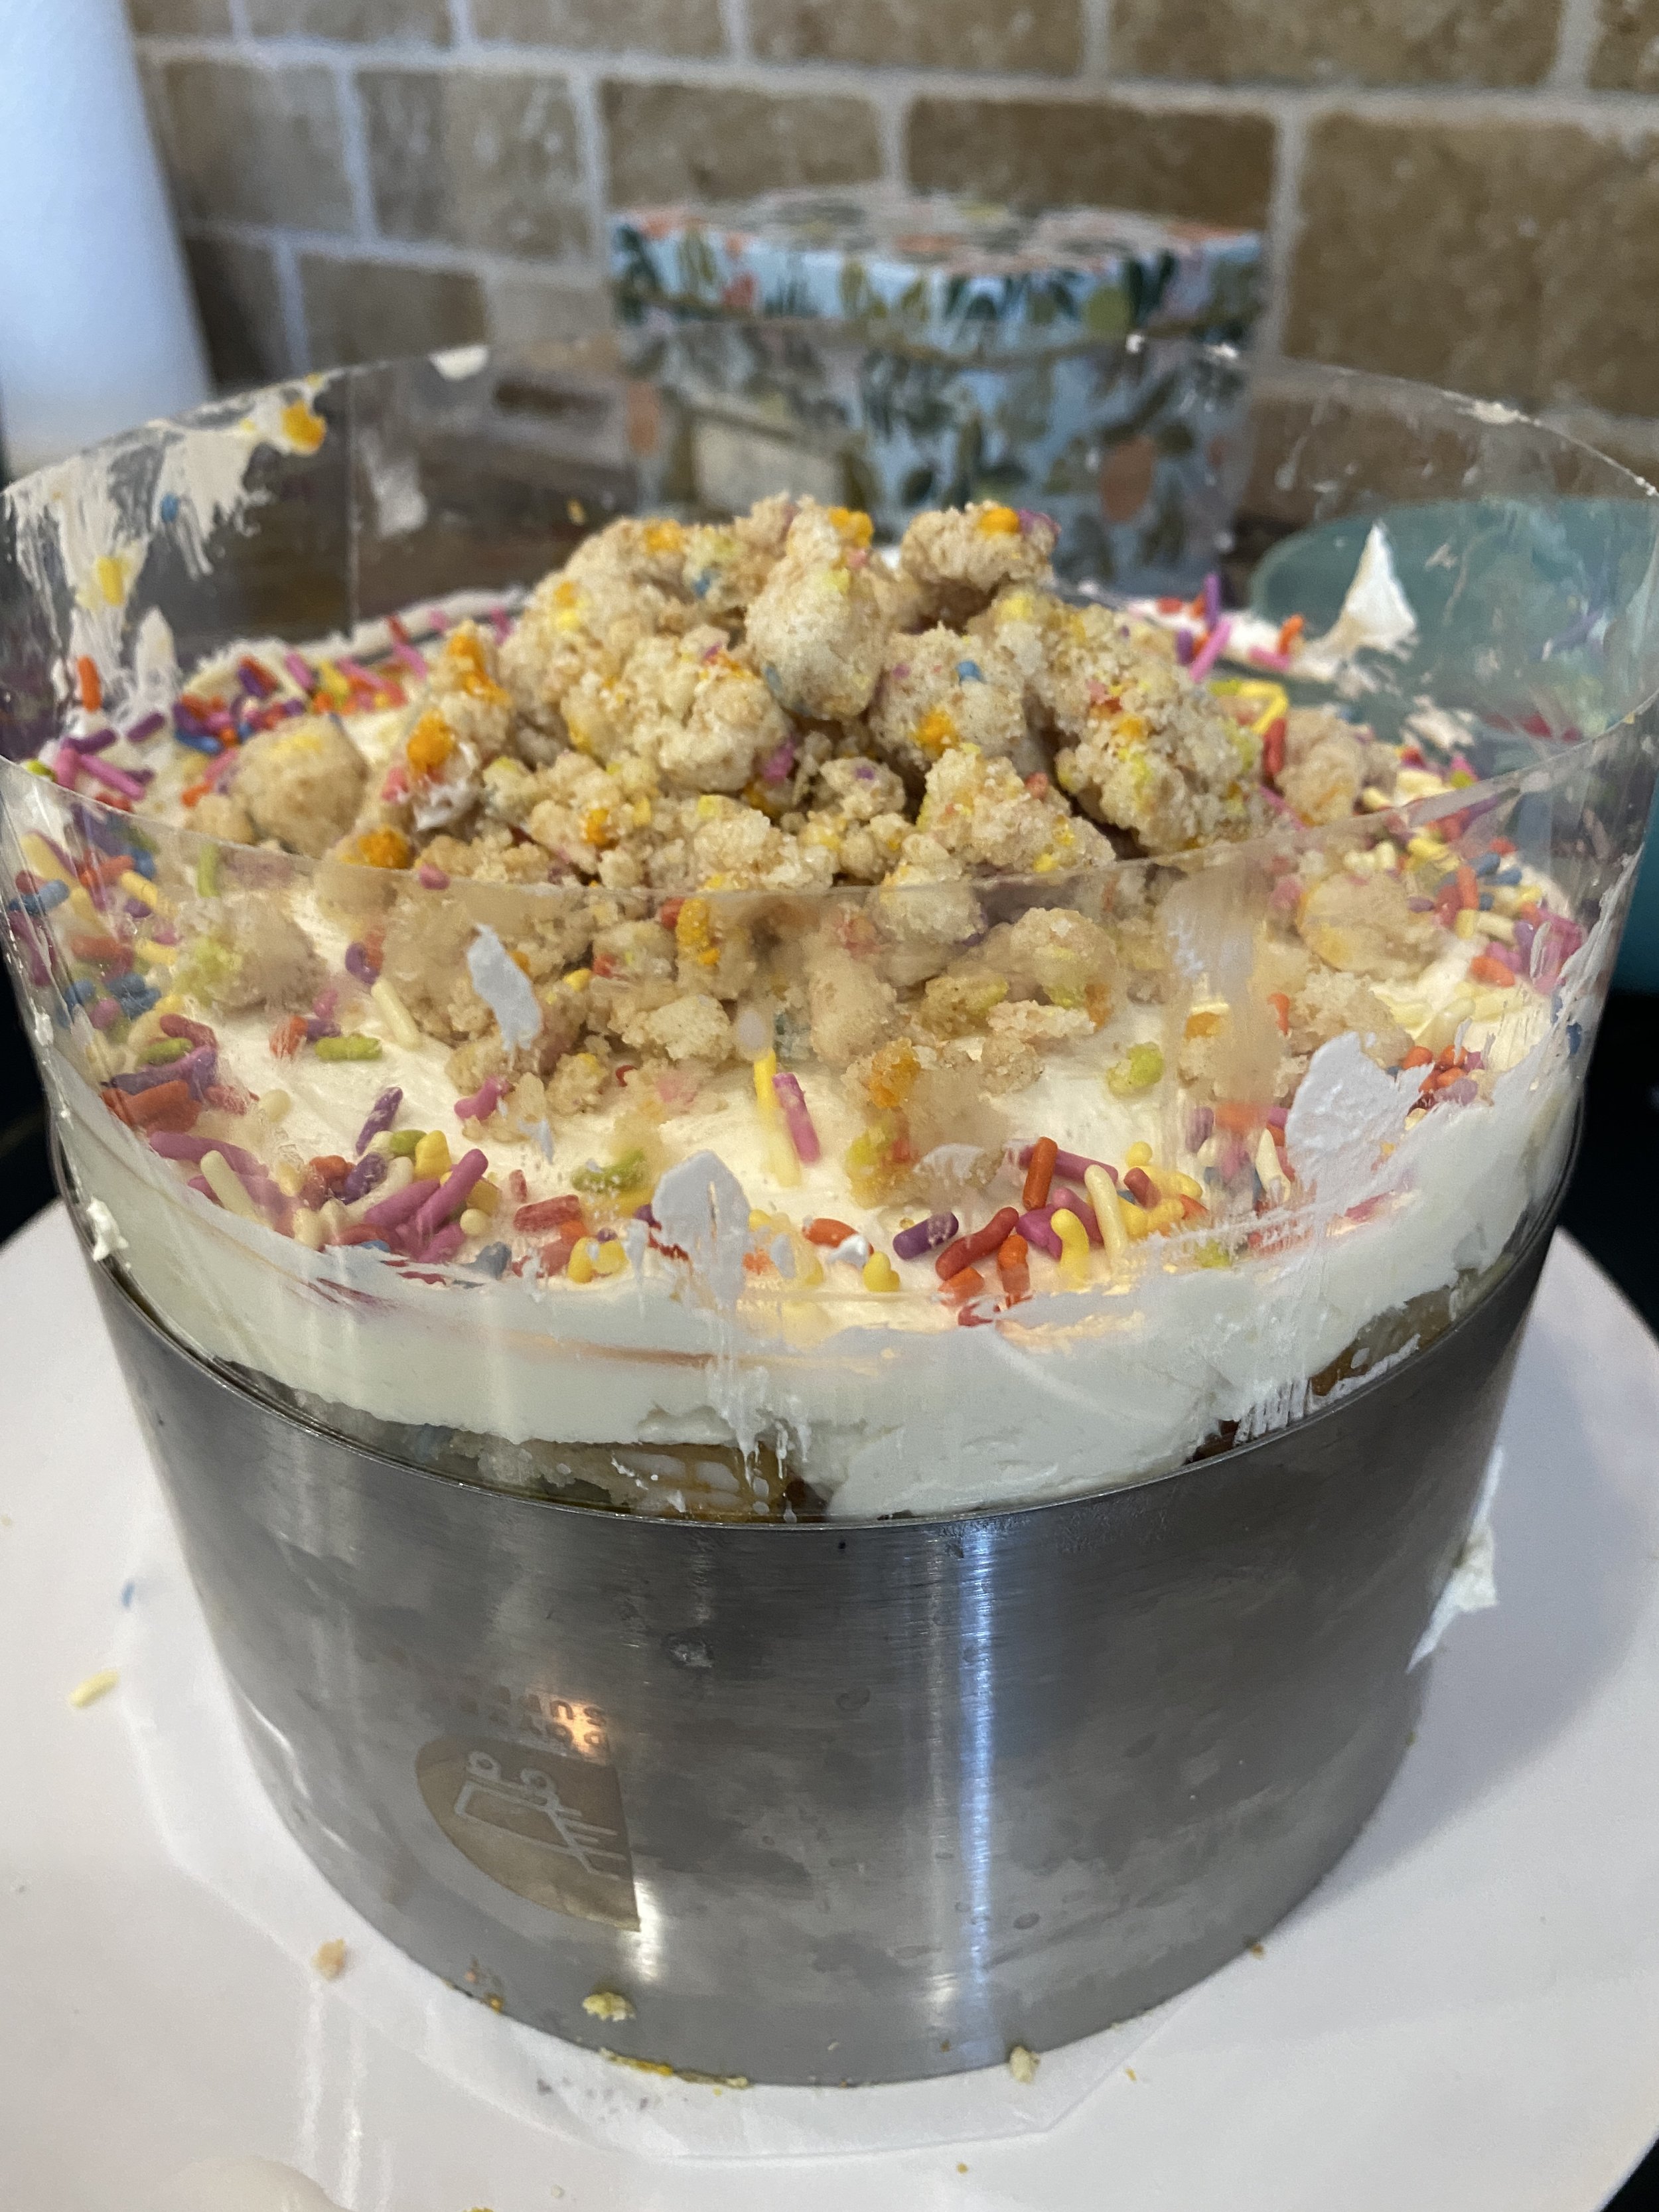
  1. Set your cake ring set to six inches if it is one that adjust. Some are adjustable so if yours is, get it to the right size. Cut a circe or parchment the same size as you cake ring. Place the parchment on a cake board or plate and place the ring in the center. Unroll and cut a piece of acetate cake collar big enough to wrap around the ring. Fit the acetate inside the ring. It should stick up higher than the cake ring!

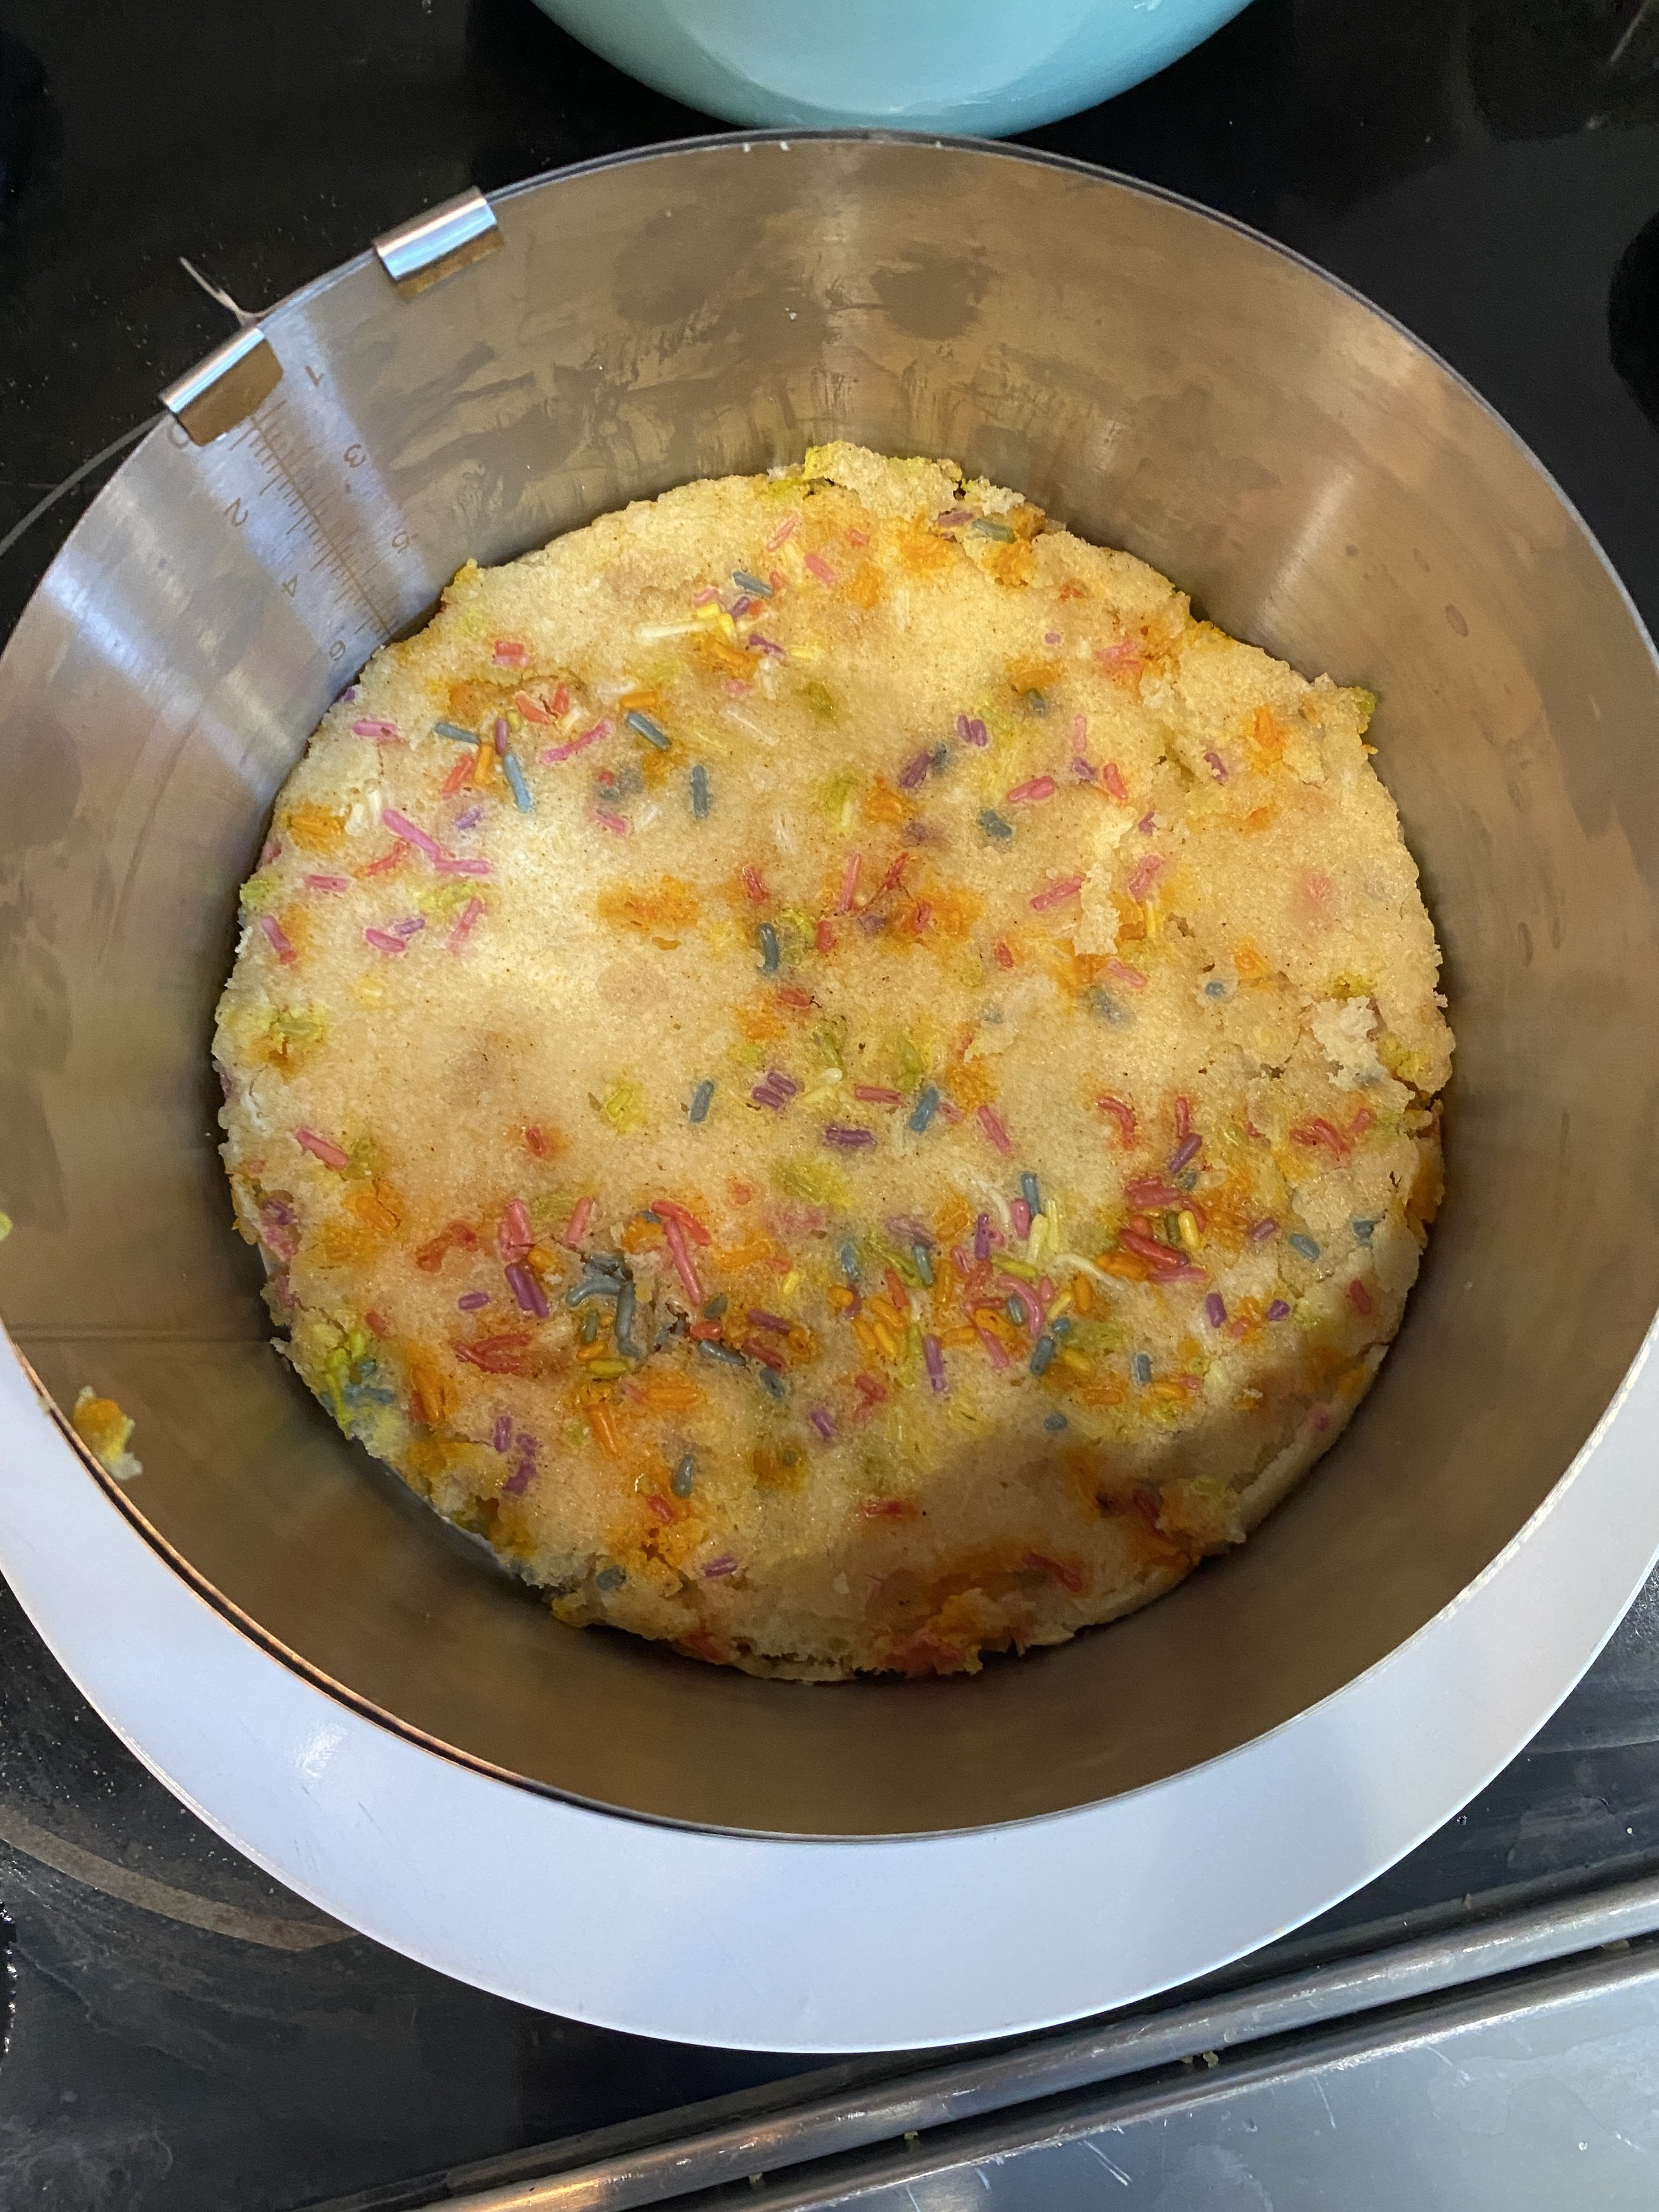
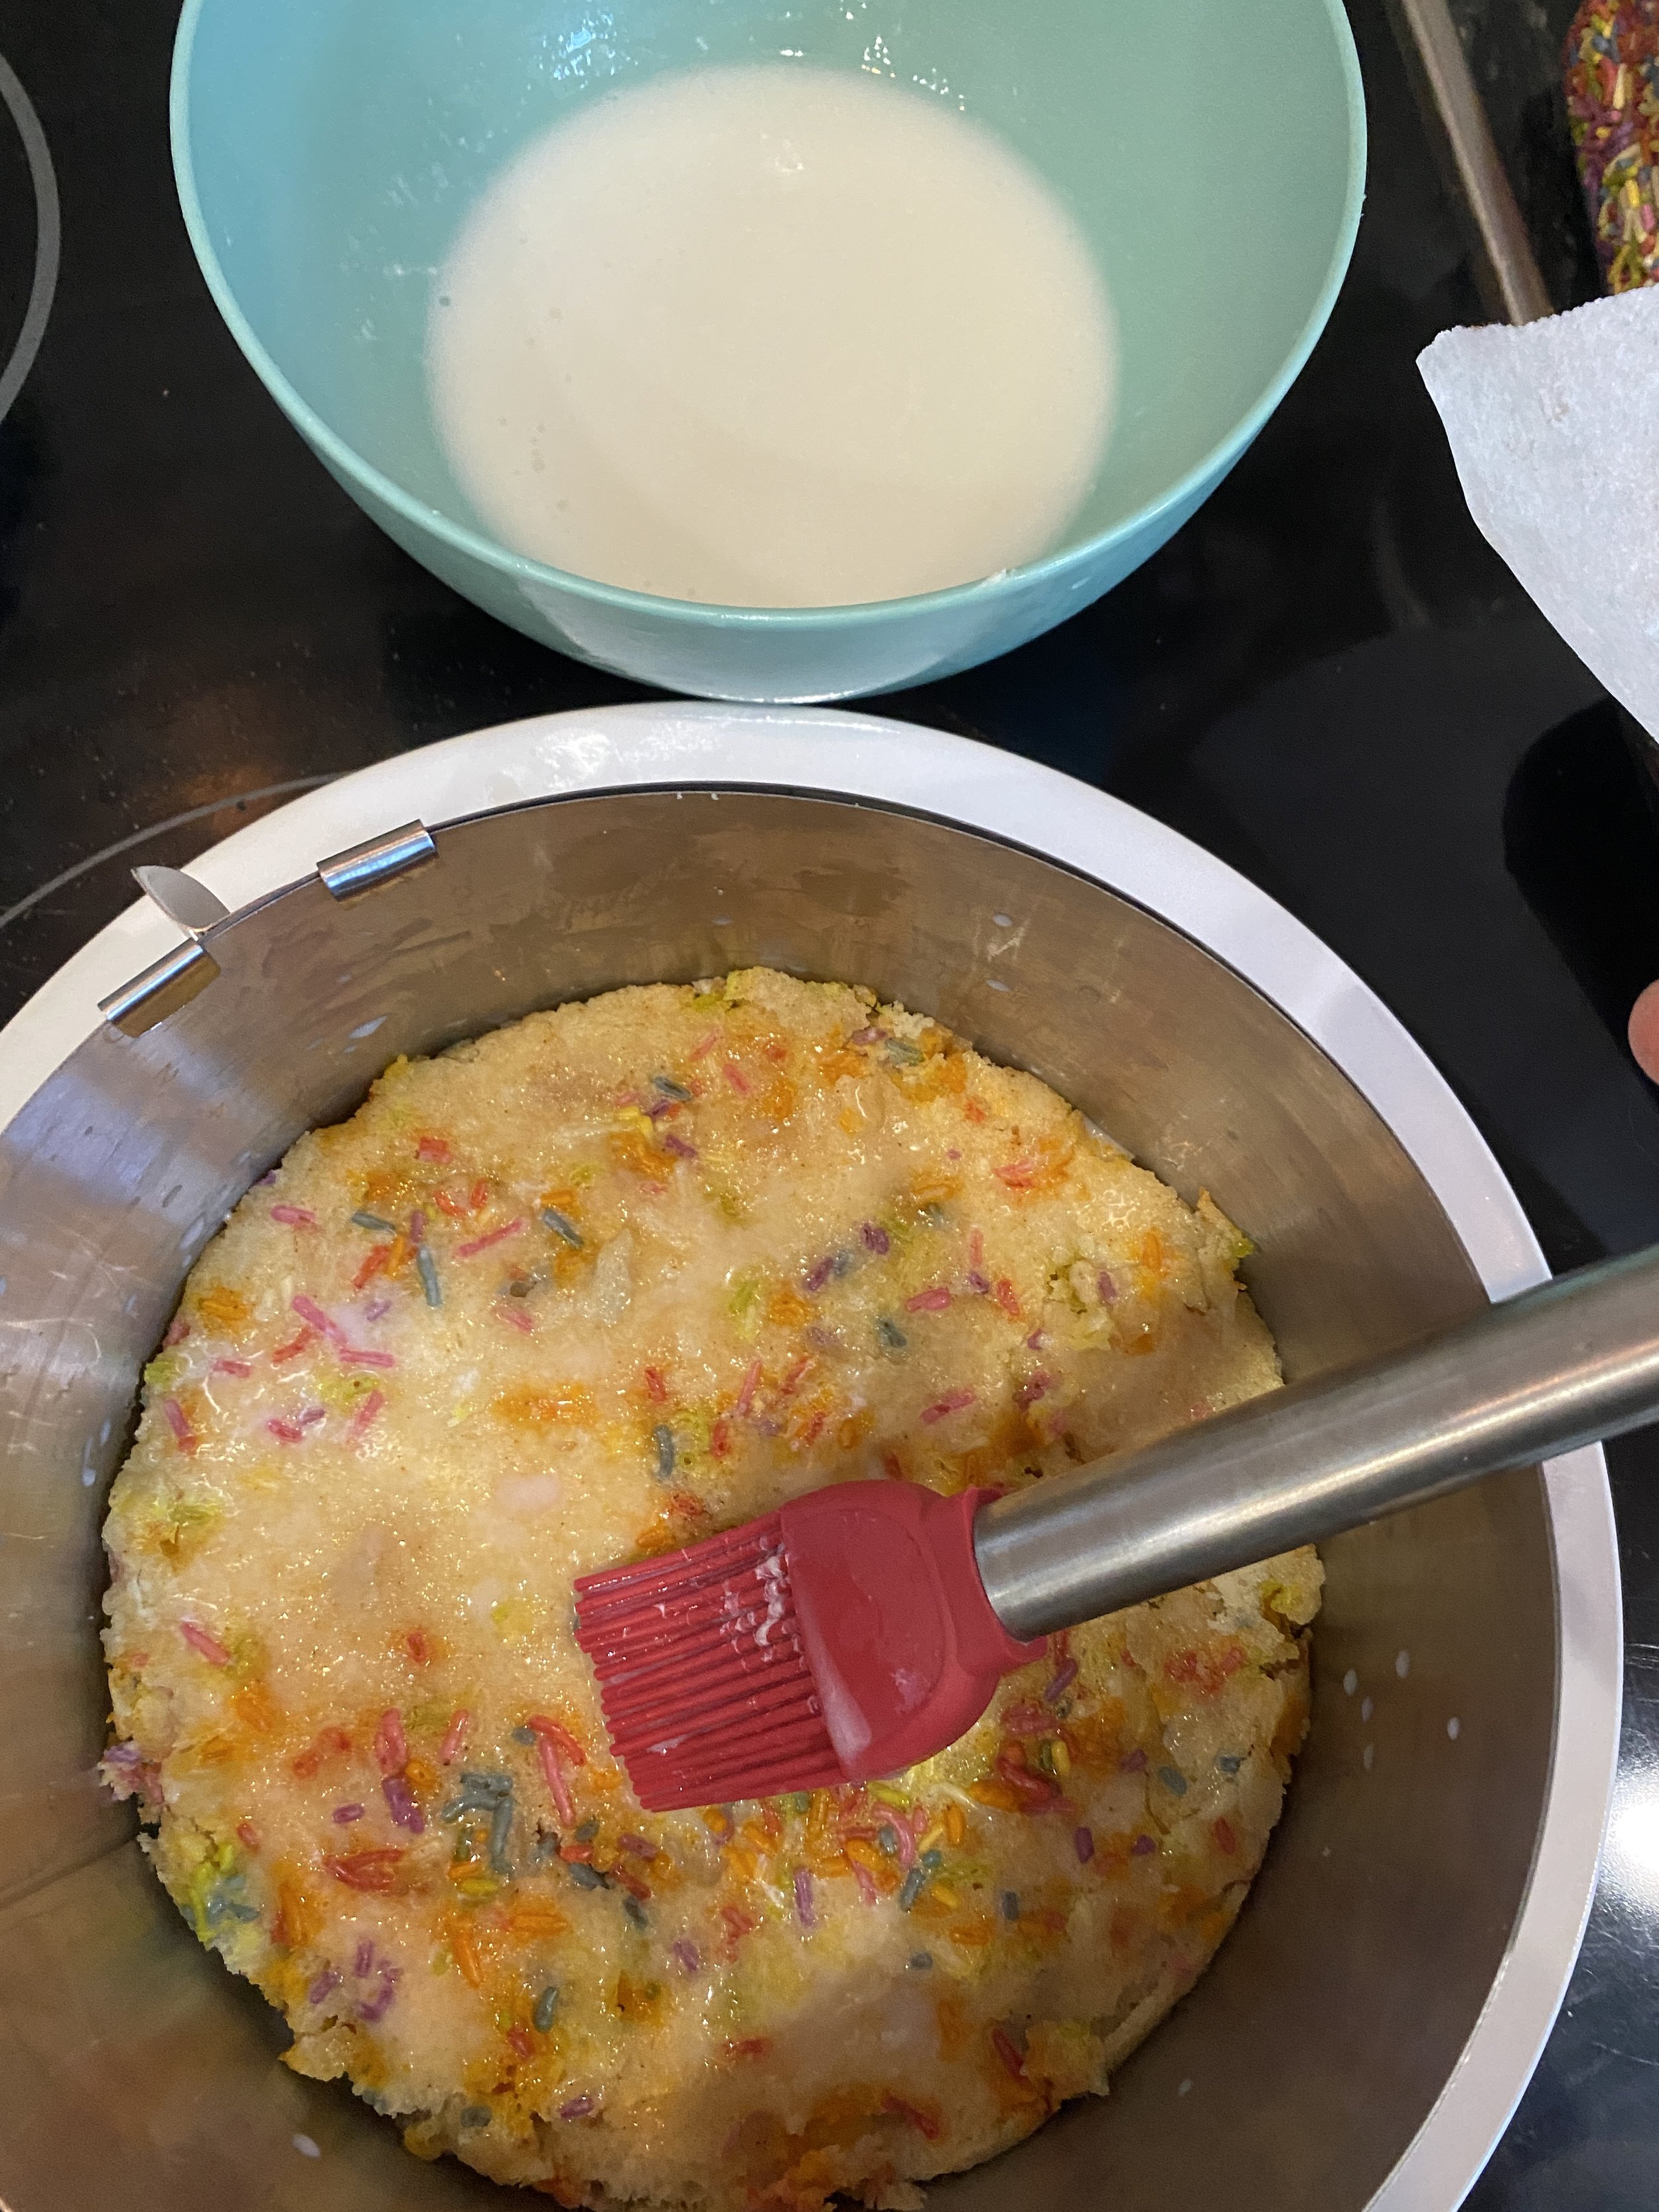
  2. Place one of your full circles of cake in the bottom of the ring. Brush the cake with 1/3 of your milk soak.

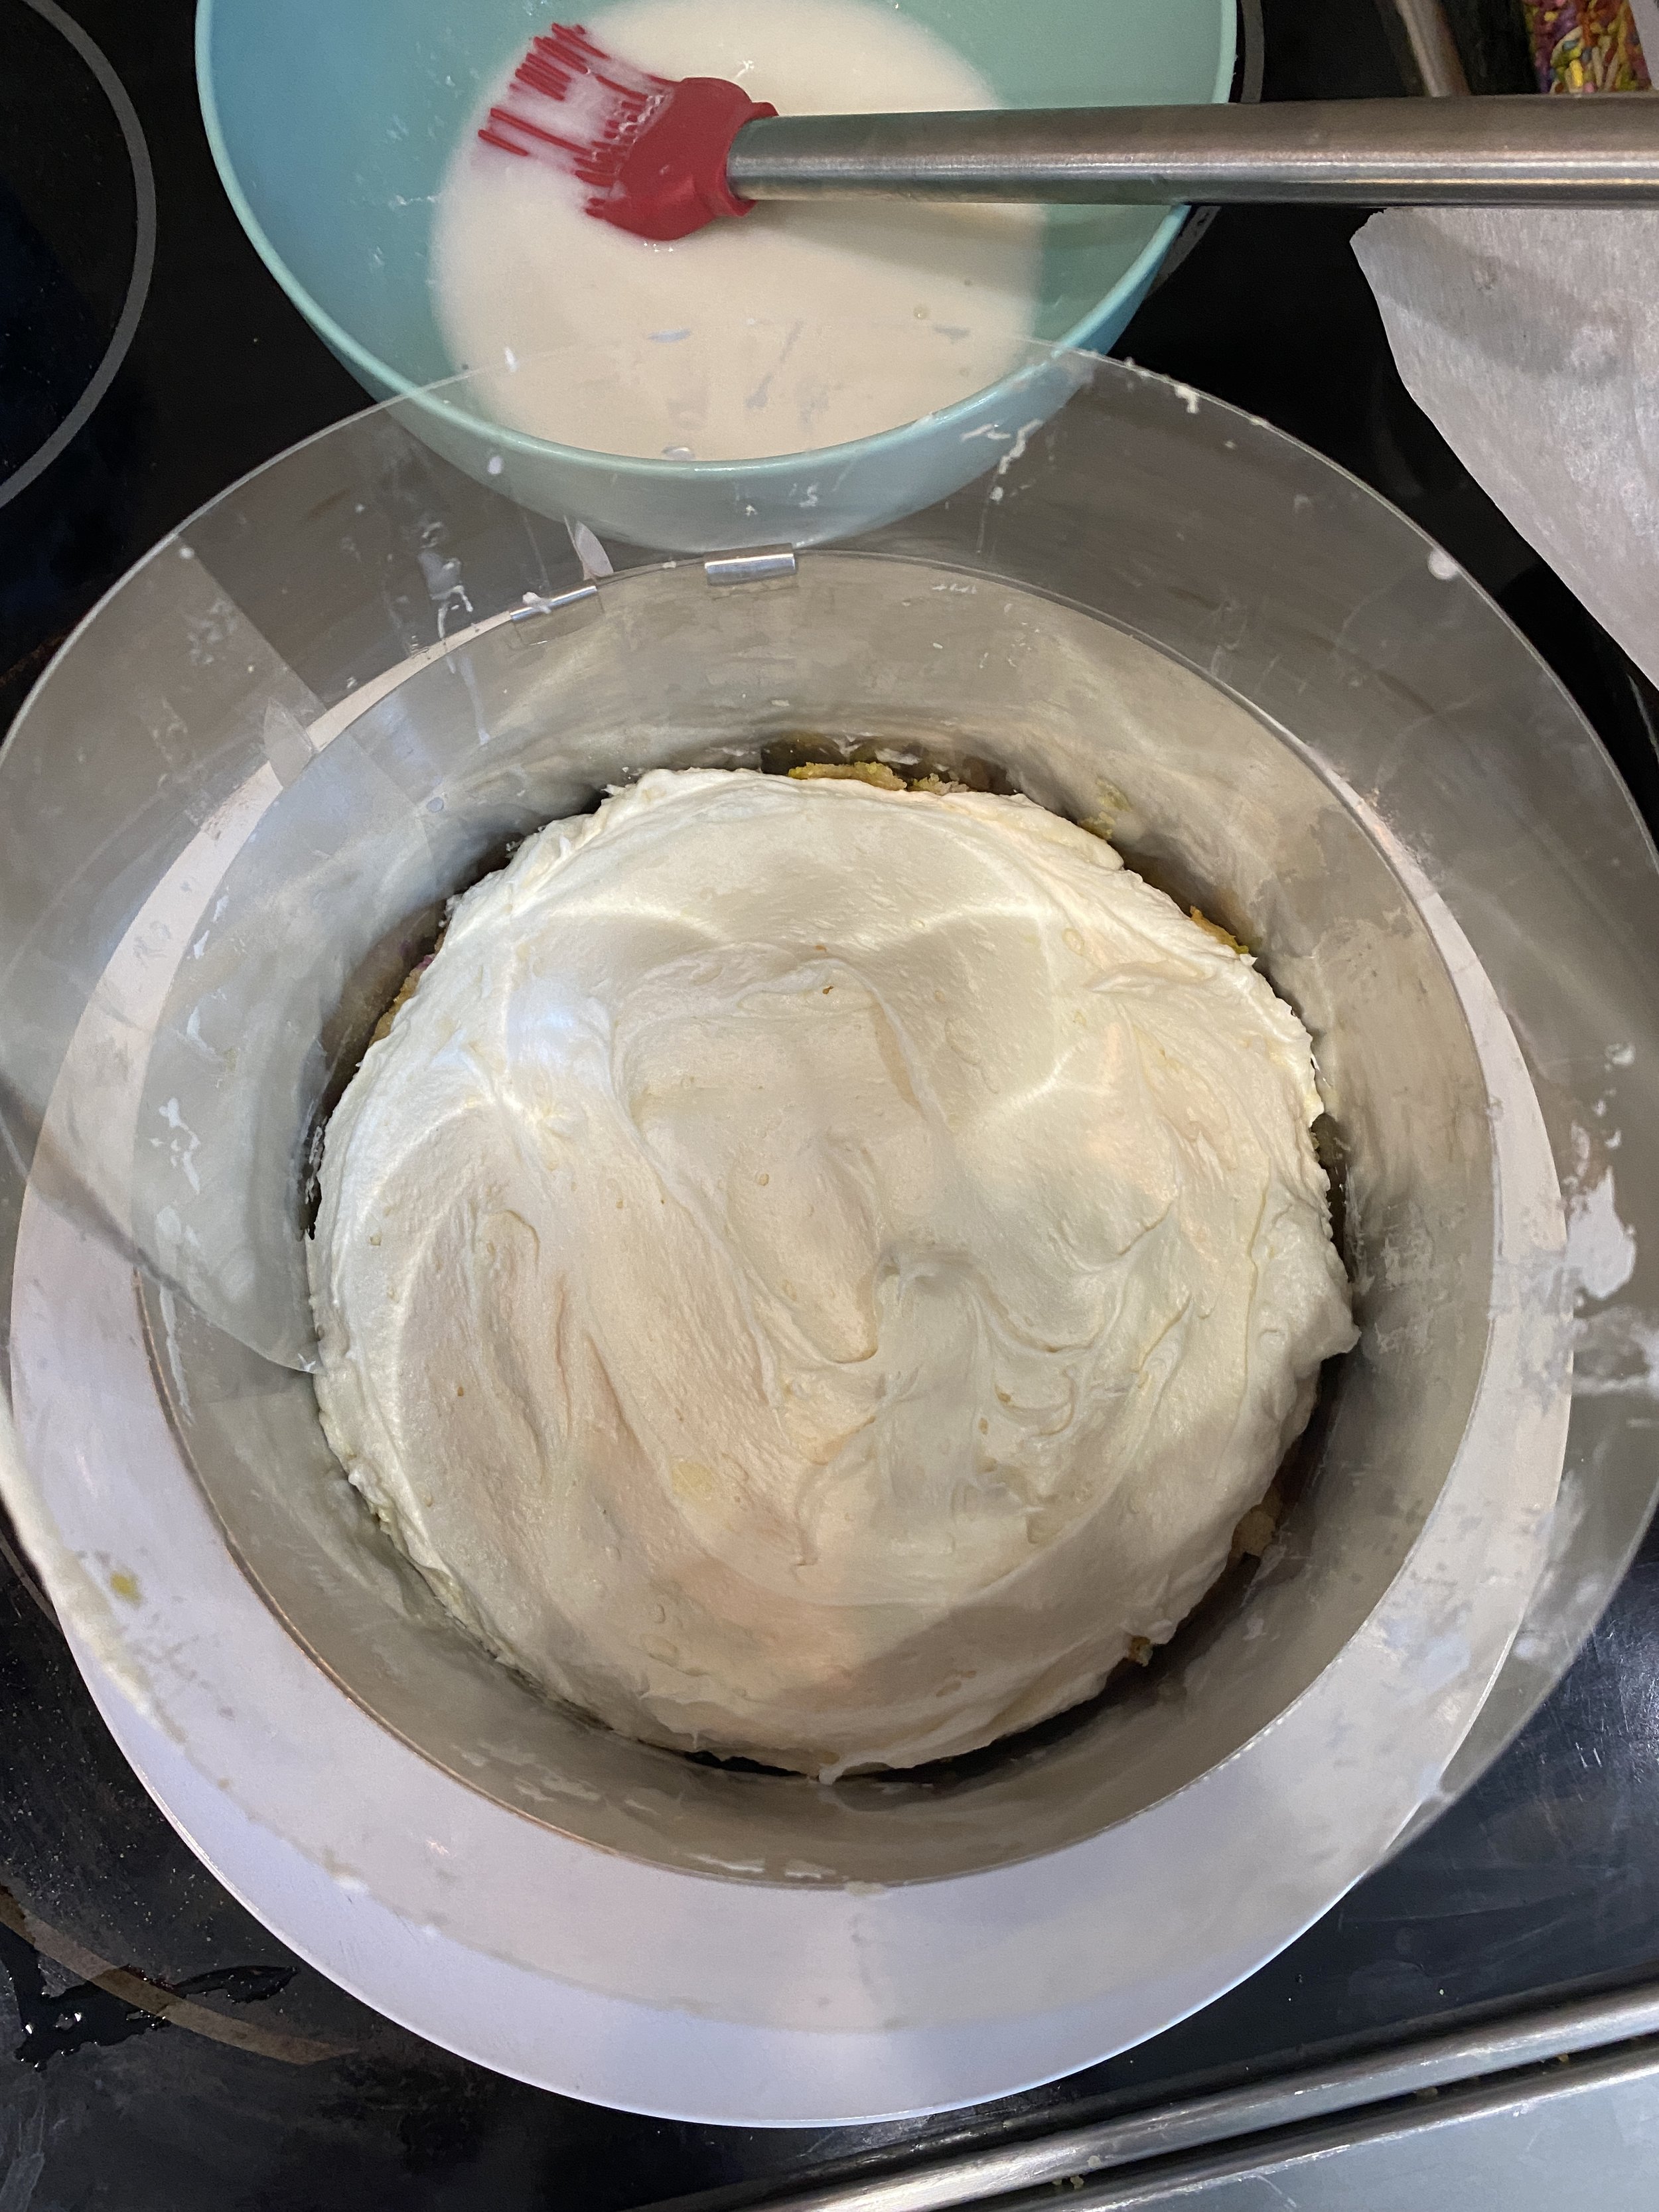
  3. Divide up the frosting into thirds. I just kind of eyeball it in bowl and cut through it with my rubber spatula to give me an idea of how much to scoop up. Put 1/3 of the frosting onto of the cake. Use an offset spatula to evenly spread the frosting over the cake. Add 1/3 of the cake crumbs evenly over the frosting and kind of press them down into it a bit!. Repeat this process this time using the two cake halves to make a whole circle for you middle layer. Then repeat with the last layer, this time instead of spreading the cake crumbs out, I like to pile them up in the middle and sprinkle more rainbow sprinkles around the edge.

  4. Place the cake in the freezer for at least 12 hours (these are instructions I read on the original recipe) This is going to help everything set up and stay put. When you are ready to serve, thaw the cake in the fridge for 3 hours. Remove the cake ring and gently peal off the acetate. Slice and serve. Store cake in the fridge covered in plastic wrap or in a cake carrier for up to 5 days. You can keep the cake frozen for up to 2 weeks.

** Again, I have just tried to turn the original recipe into a vegan version. I have researched why for example you would add baking powder to the frosting and can not find a good answer (I predict some of y’all will ask the same question) But I could not find anything to really clarify that would have been done. If you have any insight on this I would love it! I have never seen a recipe use baking powder in a frosting so it is definitely a new concept to me.

If you like this recipe, then try these:

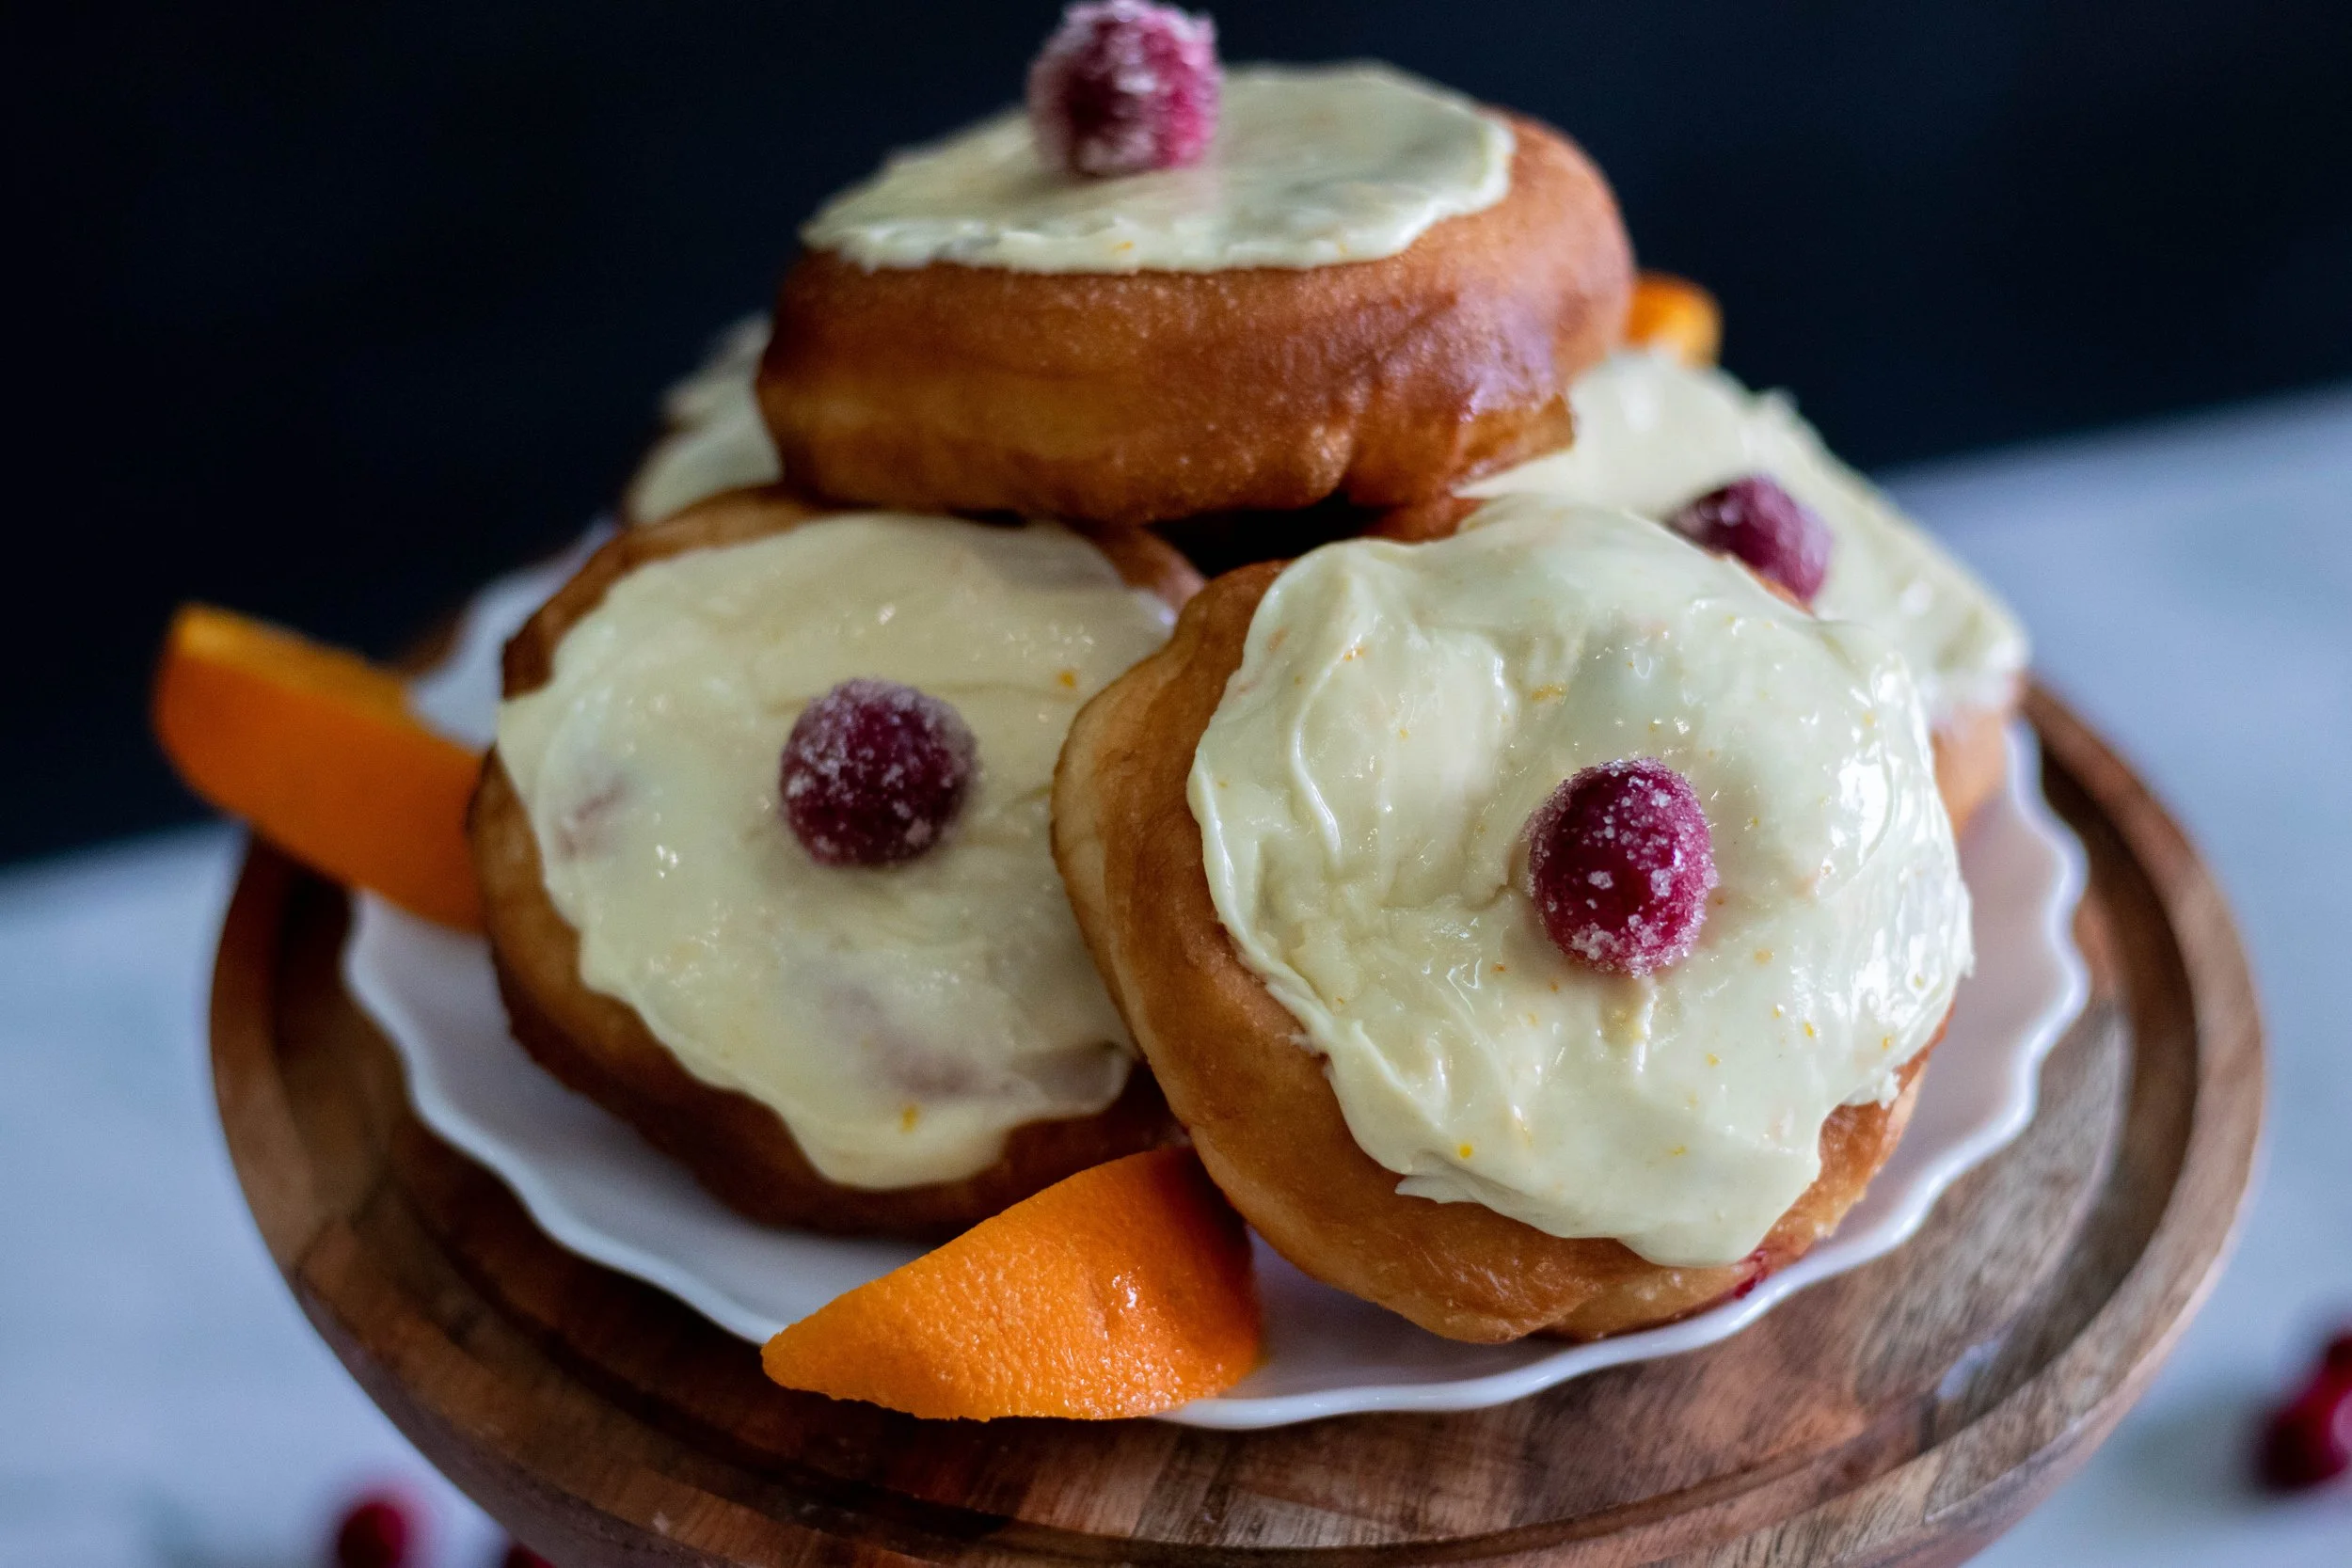
Vegan Challah Cranberry Orange Jelly Donuts

Donuts how I love thee, let me count the ways….

If I were counting, I would love them a million different ways, including this one.

I make love making vegan donuts and make them often enough and my regular glazed donut recipe is DELICIOUS! I always make homemade vegan donuts for Hanukkah, but never until recently did it occur to me to try and make them with challah dough. I mean why, WHY did this revelation take me so long. They are both yeast doughs and pretty similar, but challah dough is an easier dough to make with less ingredients!

I make challah almost every week for shabbat. I make plain challah, stuffed challah, challah pretzels, challah rolls..all the challah things, but never a donut. I have never until now fried challah dough. And I am from the south and we fry everything down here.

After a week of testing various holiday challah recipe, I was honesty challahed out….I didn’t even think it was possible, but it is. I didn’t want to make another loaf of challah this week.

Never the less it is Friday and I feel like every shabbat NEEDS challah so I went to mix up my dough when it occurred to me to try and fry it up as a donut!! AND further more, try and make a Thanksgiving themed jelly filled donut on shabbat because on this particular year Hanukkah begins 3 days after Thanksgiving! A holiday donut mashup if you will.

Not that you could only eat this vegan challah donut for Thanksgiving or Hanukkah.. This cranberry orange challah donut would be good any and every day.


I LOVE, LOVE, LOVE cranberry and orange together! It might be one of my all time favorite desserts combos. I think I love it so much because the tartness fo the cranberries offsets the sweetness of a desert and that I can appreciate. I don’t love super sweet desserts, and I want frosting in very measured portions. So this donut has now become my favorite that I have ever made, and filing a donut with cranberry is now my favorite vegan donut jelly filling!!

If you don’t want to make cranberry sauce, you can use store bought as well. If using whole cranberry sauce, make sure the cranberries are mashed up pretty well. If you don’t want the cute little cranberry on top, that Is no issue either, but candied cranberries are super easy to make and a real tasty snack. or cute cocktail garnish…just sayin.


So if you love donuts, love challah, and love all things orange cranberry, these donuts are for you. And even if you have never made or had challah, it is an easy dough that fries up to one amazing donut!

And if you are celebrating a shabbat, Thanksgiving, Hanukkah, or whatever, Happy Challah days, y’all! And if you are making challah donuts just because, then happy eating!!

INGREDIENTS:


INSTRUCTIONS:

  1. Follow instructions for preparing challah dough but add 1 teaspoons of vanilla and zest from half an orange to the dough…follow the remaining instructions up until the first rise.

  2. Prepare cranberry sauce while dough is rising.

  3. Prepare candied cranberries while dough is rising.

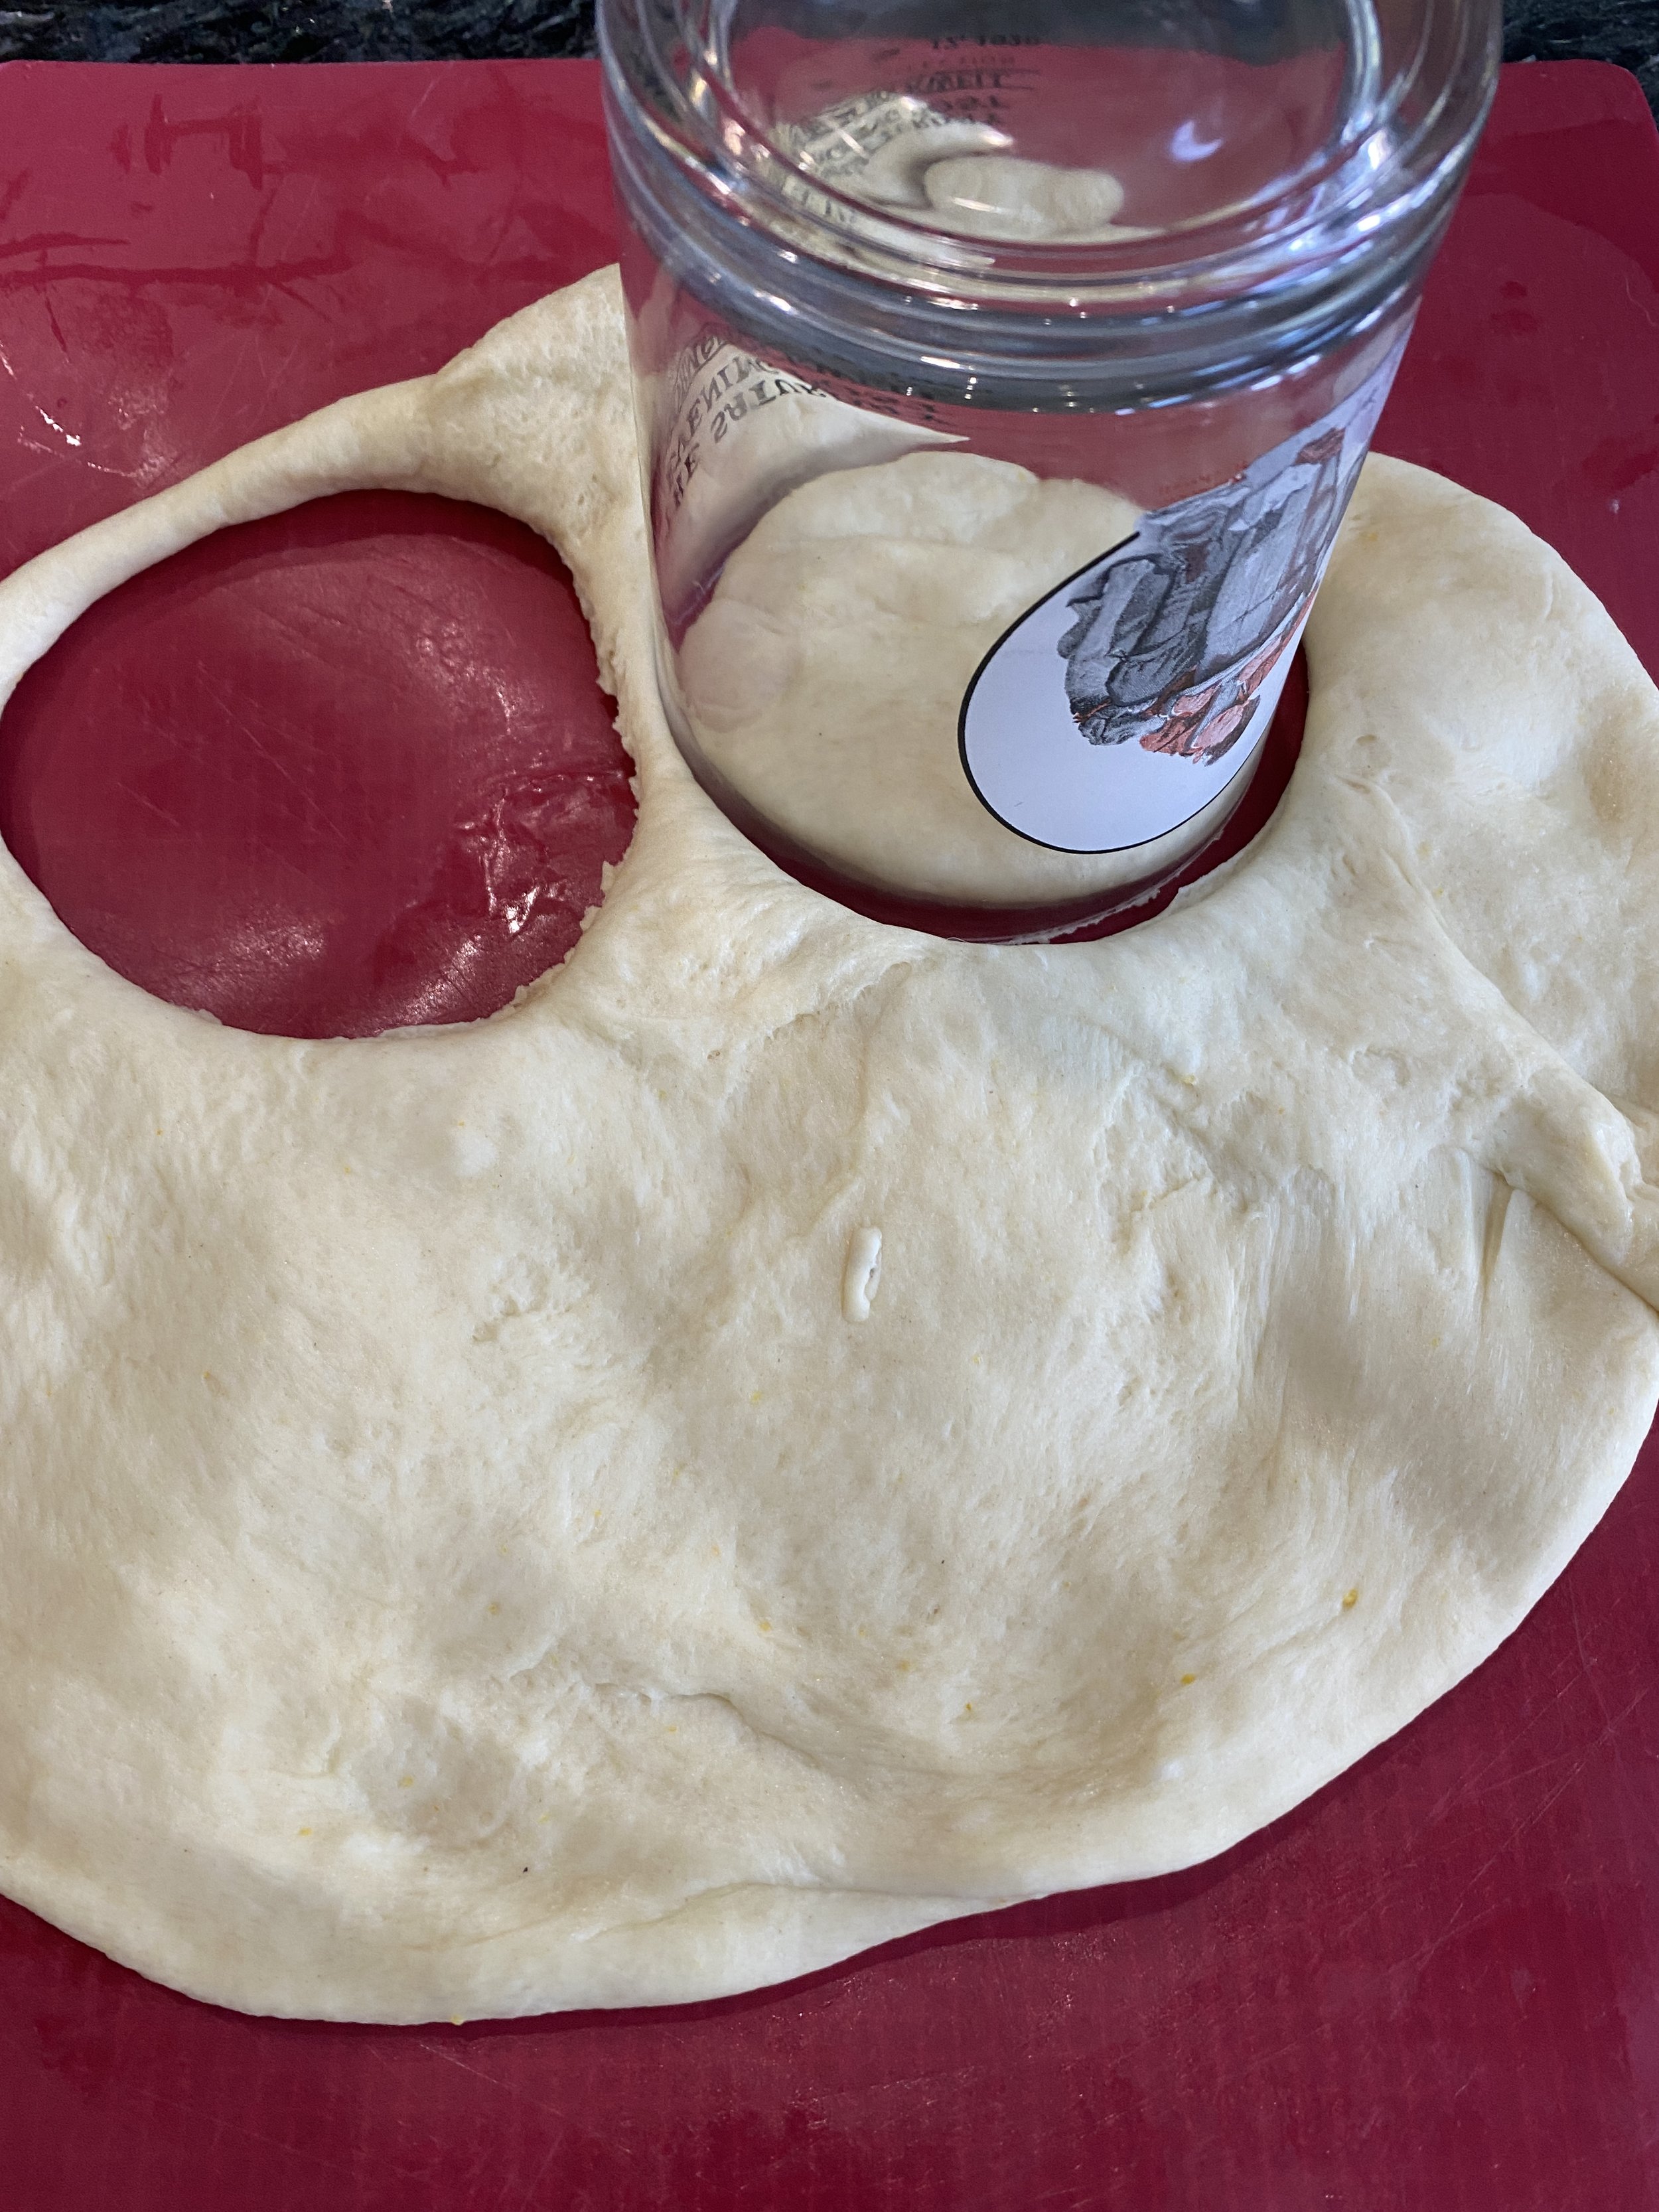
  4. Once the dough has finished its first rise, transfer to a lightly floured countertop. I like to divide the dough in half and work it in two batches. It makes it easier to roll out. Roll out one half of the dough to about 1/4- 1/2 inch thick. Using a 3 inch circle biscuit or cookie cutter (or donut cutter if you have one) begin cutting circles. Repeat with other half of dough. You should get 14-18 donuts depending on cutter size.

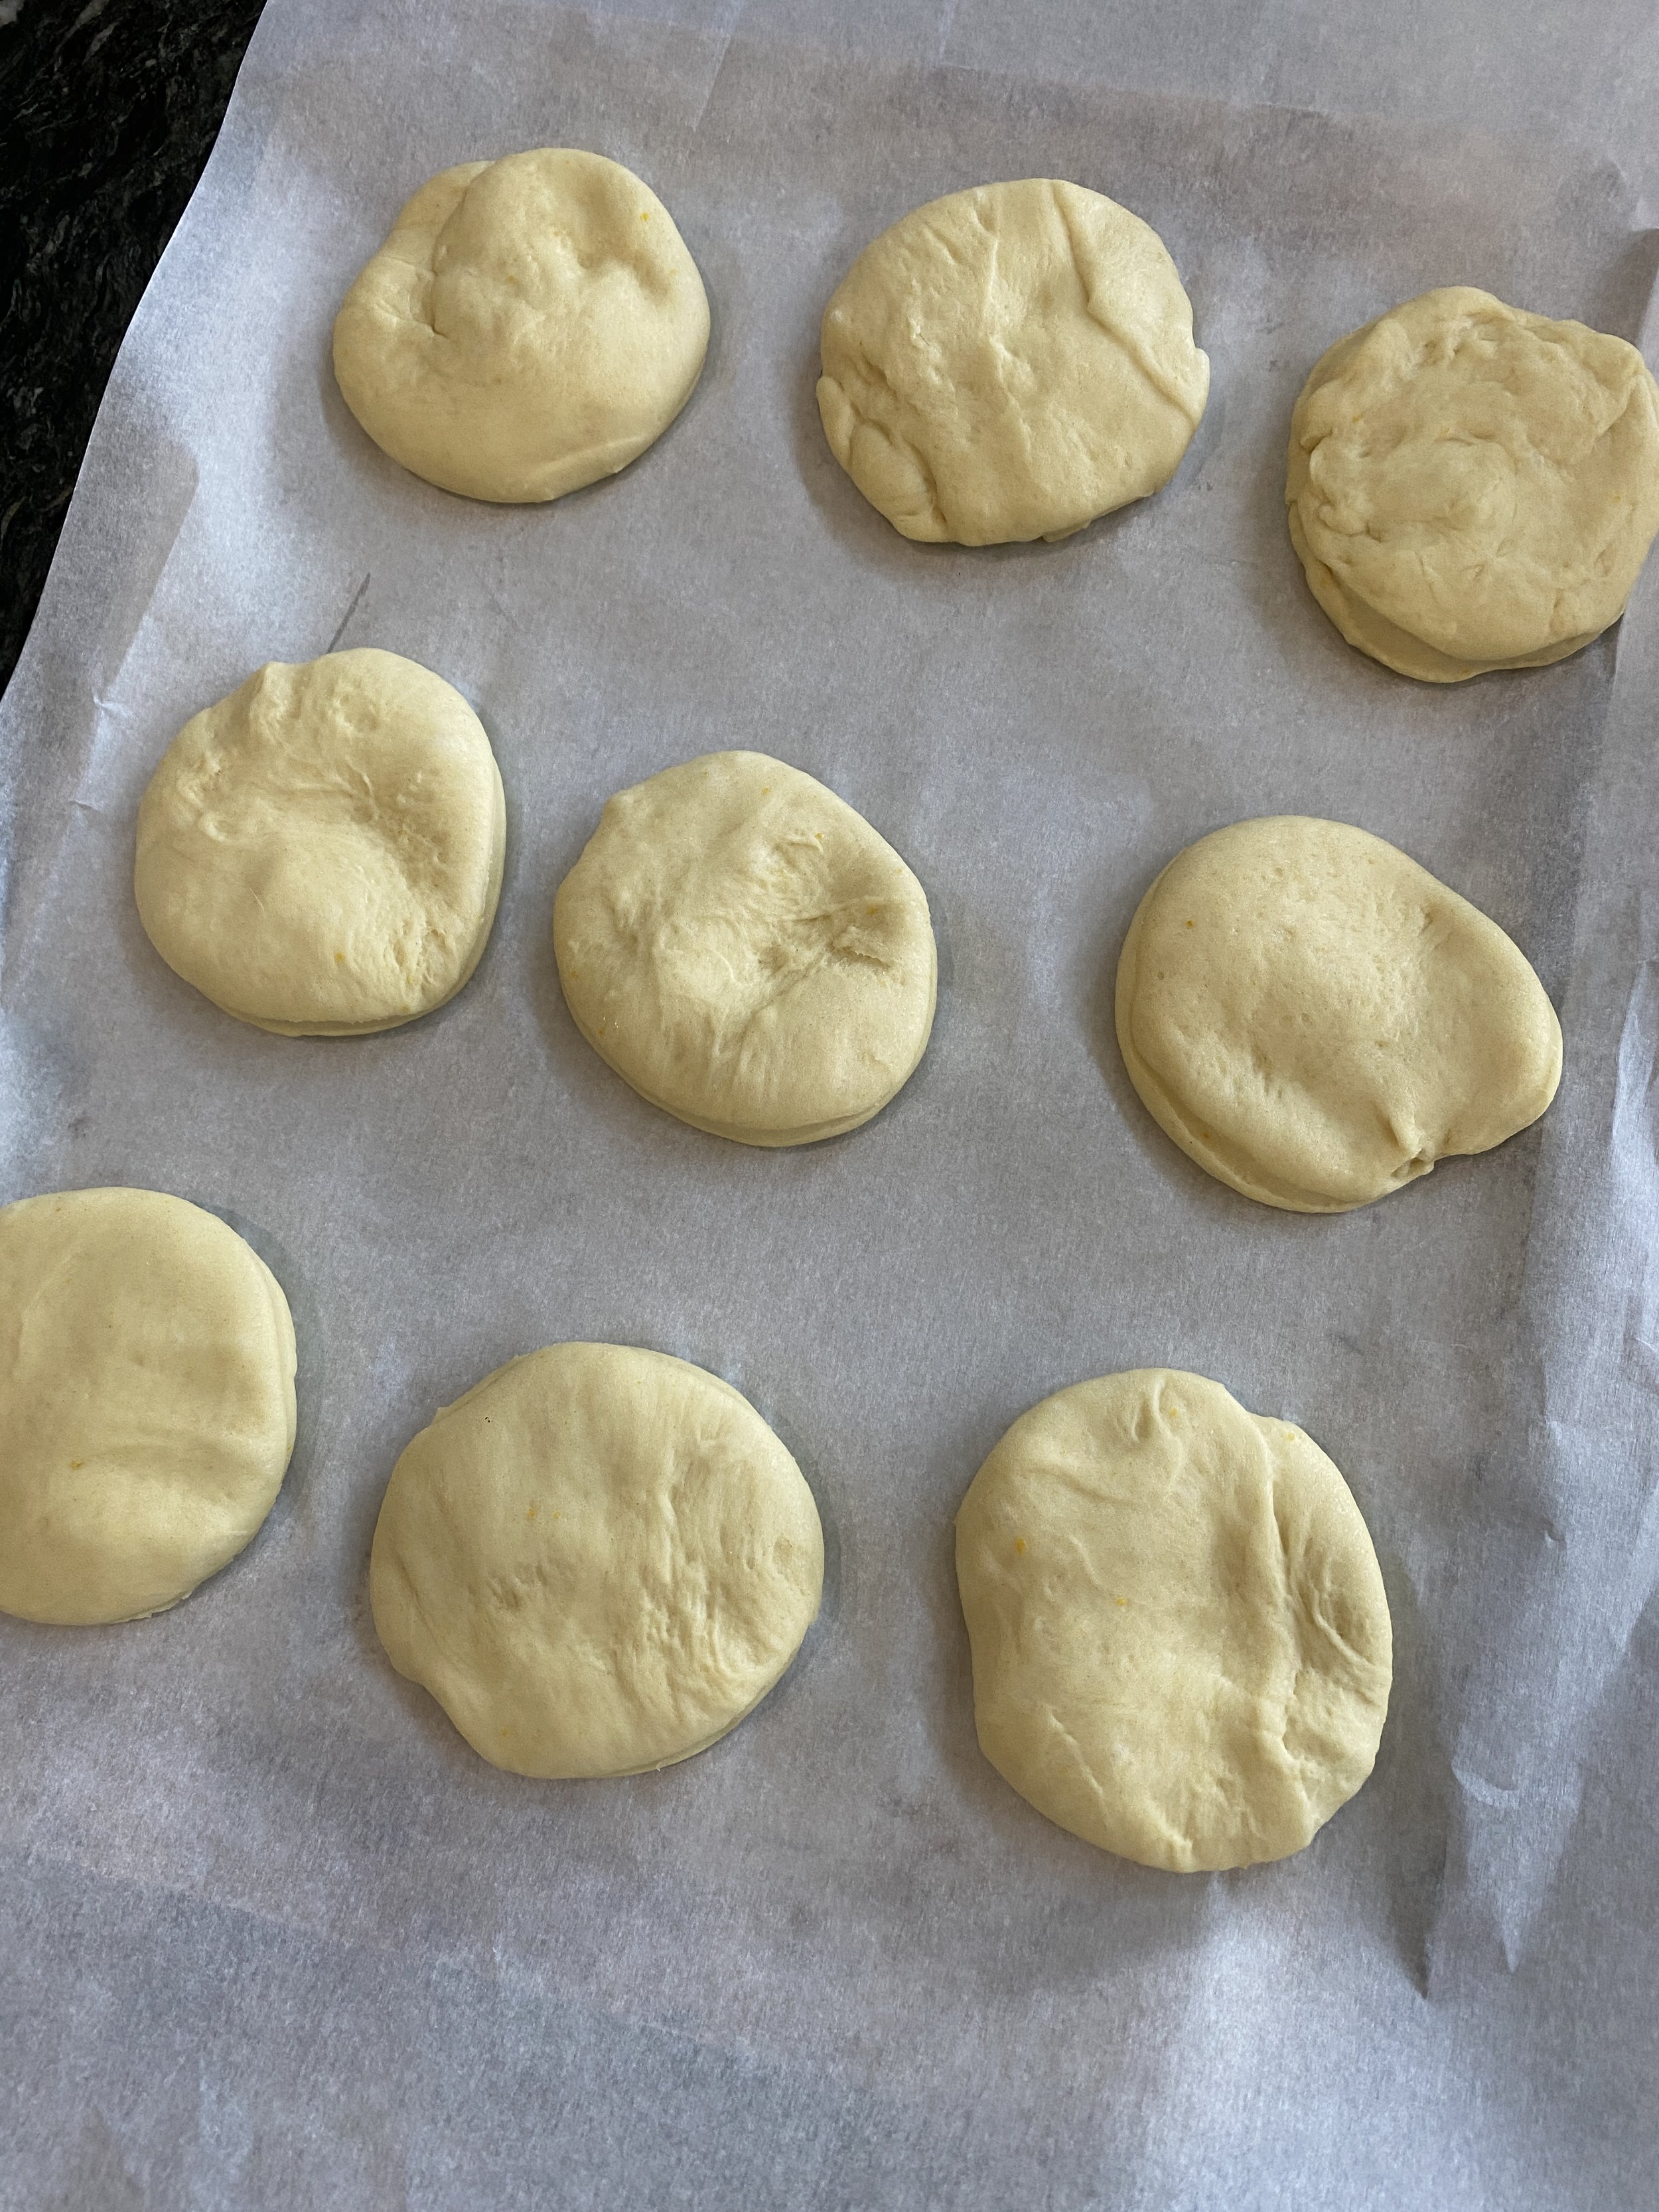
  5. Place donuts on cookies sheets, and let rest for about 25-30 minutes. They will become bigger as they rest.

  6. While they are resting, heat 2 - 3 inches of oil in a deep skillet or medium sized pot to 350 degrees. I’d you do not have a thermometer you can poke a wooden chopstick or skewer to the bottom of the pan. If tiny bubbles form around the tip then the oil is ready.

  7. Once oil is hot, begin adding the donuts to the oil, 2 or 3 at a time. Fry the donuts for about 20 second on each side then flip. Repeat one more time. This helps them cook though and not burn. If you don't have enough oil in the pan, and they are hitting the bottom, they will easily burn. So make sure to use enough oil! If the donuts seem to browning too quickly, reduce your heat.

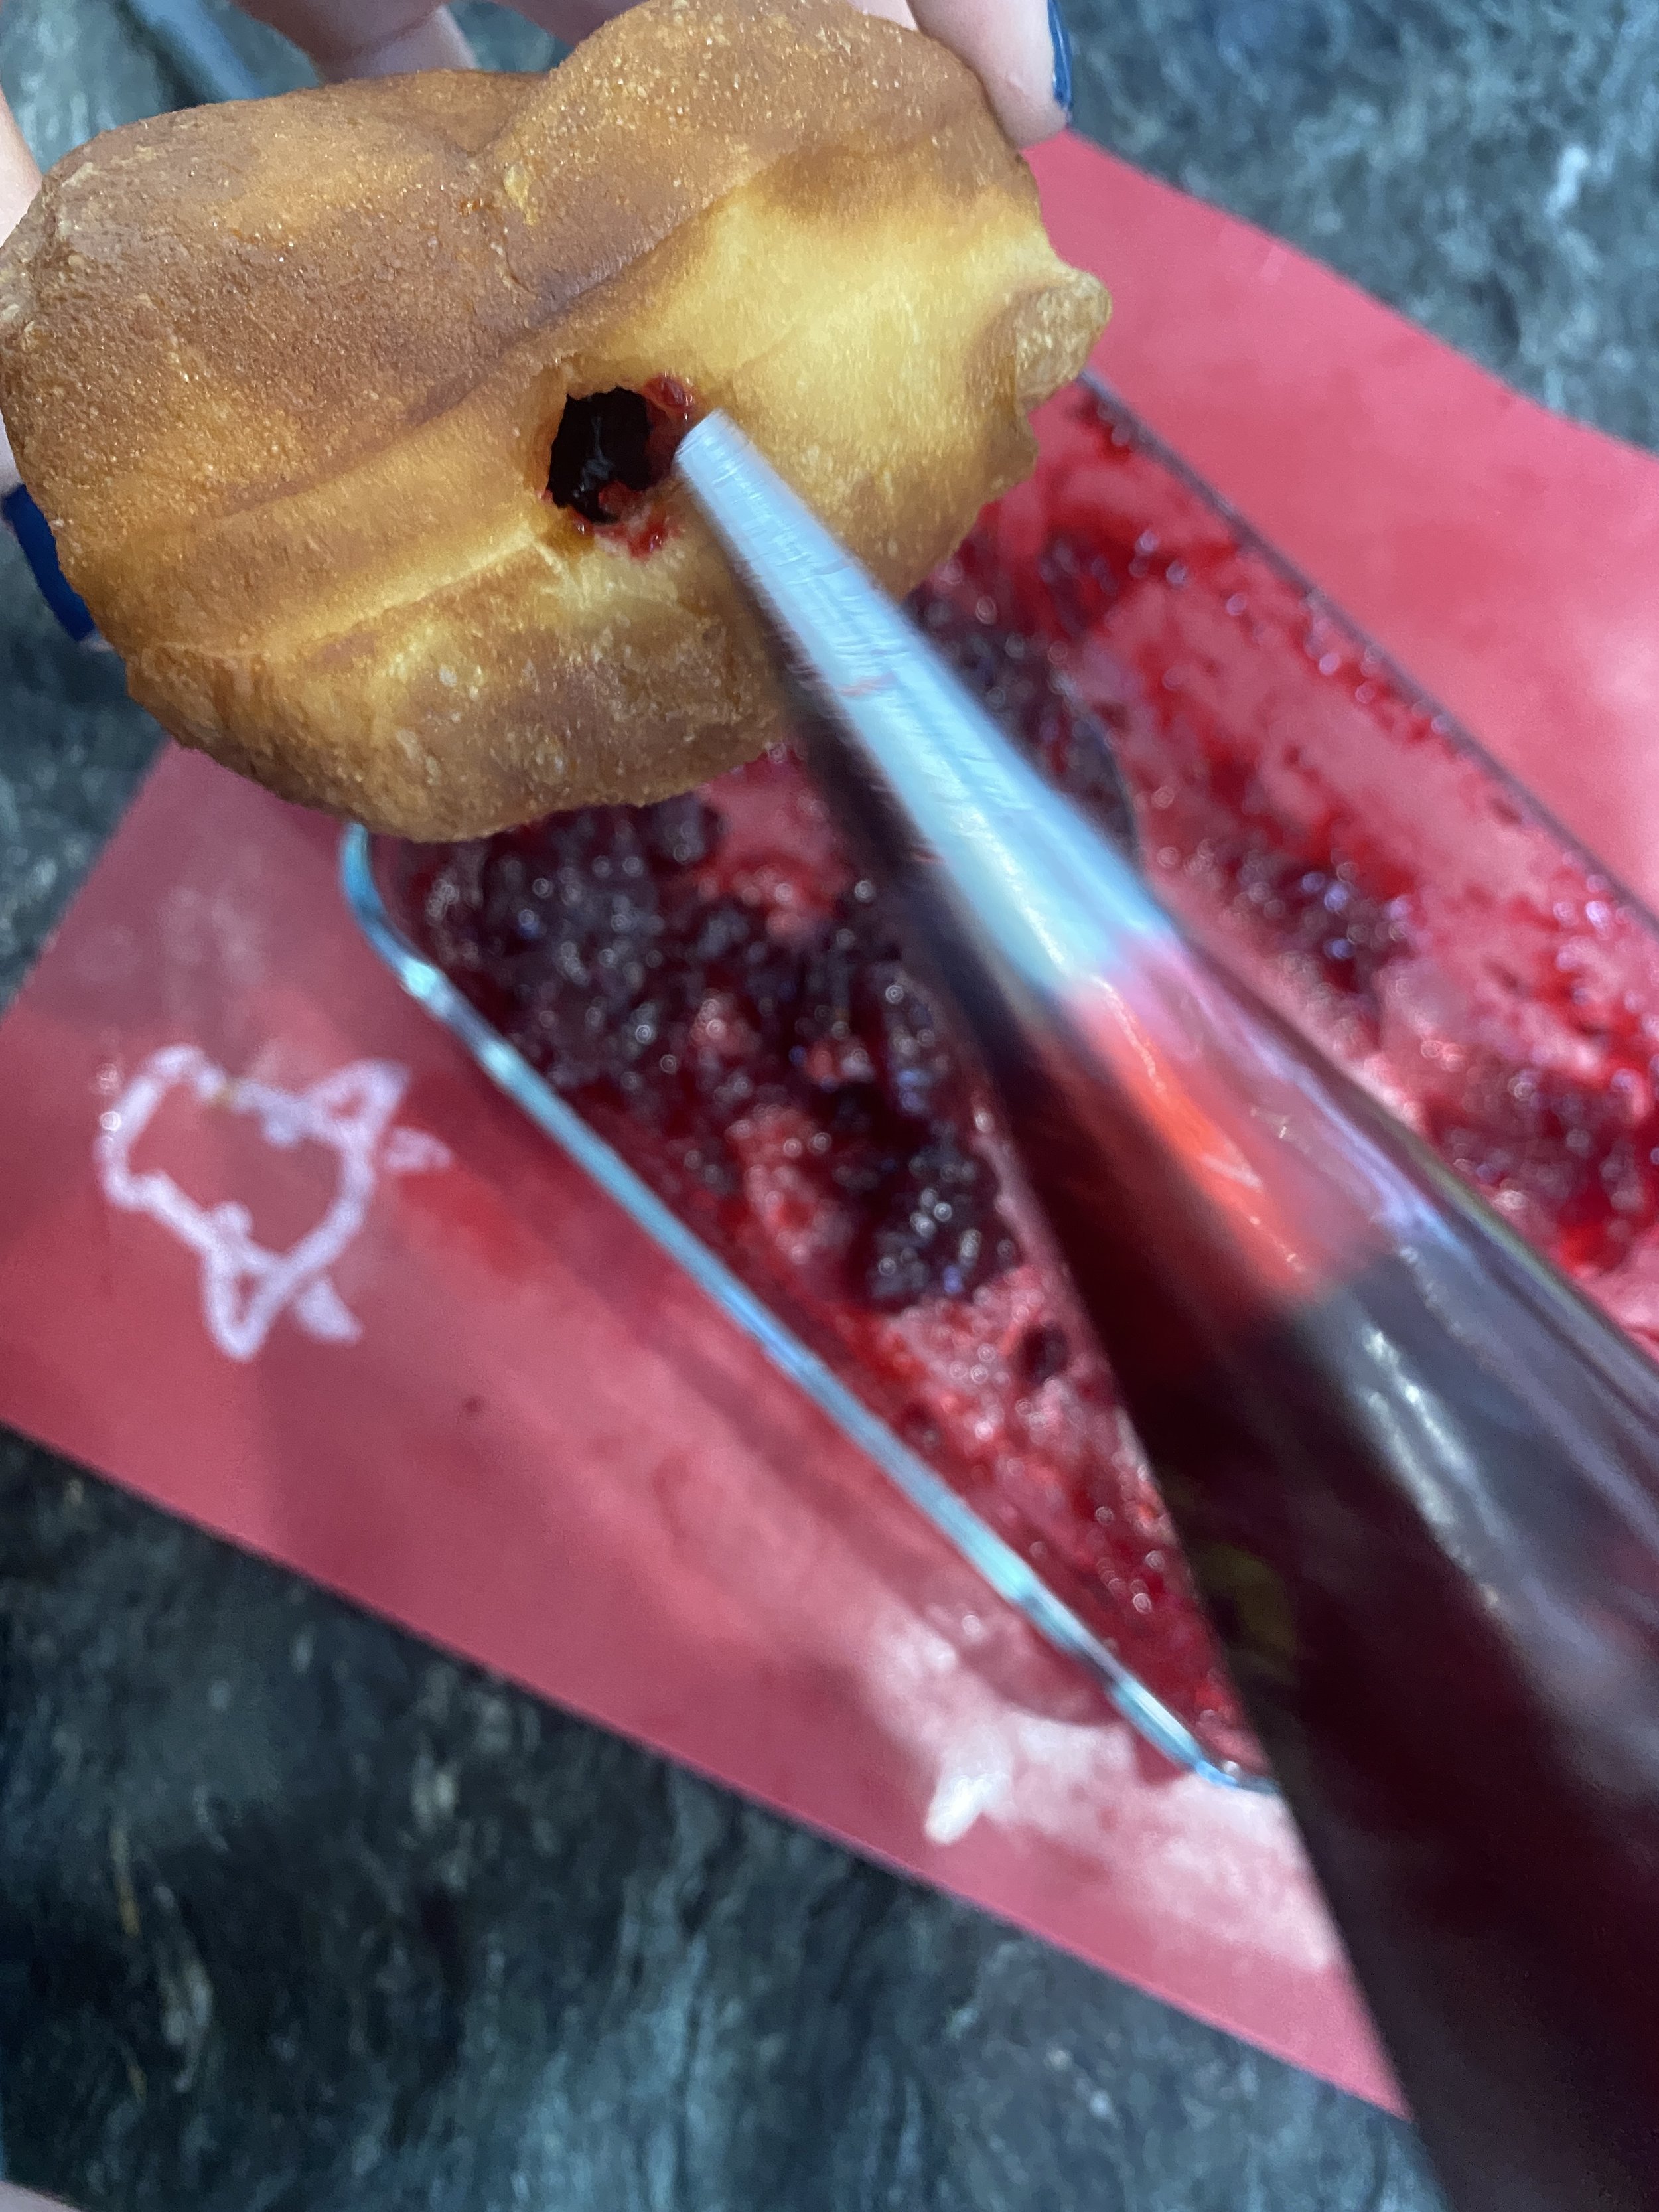
  8. Allow donuts to cool on a wire cooling rack, placed on top of a paper-towel-lined cookie sheet. Once donuts have cooled, use a long piping/filling tip (we used Witons 230 tip) or use a regular fat piping tip ( #12) and chop stick or skewer to poke a hole into the donut on one side. You can kind of turn the chop stick or skewer inside the donut to widen the hole. This is making room for the jelly. You want to make sure you have created enough room for a good amount of filling .

  9. Fit a piping bag fitted with a filler tip or a large piping tip, and fill with cranberry sauce. I will warn if using a filling tip the cranberry skins will tend to clog it, I had to use a skewer to unclog it every couple of donuts, a large piping tip should not clog as much but the filler tip is easy to use since it is long enough to get to the center of the donut without having to create a hole with a chopstick. Fill each donut with the cranberry sauce.

  10. Mix the 3 cups of powdered sugar with zest from half of an orange and remaining vanilla extract. Using a few teaspoons of milk at a time, mix the frosting for the donuts. I like a thick frosting that needs to be applied with a spreader. You are looking for a cake frosting consistency.

  11. Spread frosting on each donut and top with a candied cranberry. Store in the fridge or at room temperature in an air tight container.

If you like this recipe, try these:

Vegan Jelly Donut

Vegan Jelly Donut

Vegan Maple Bacon Donut

Vegan Maple Bacon Donut

Vegan Key Lime Donut

Vegan S'mores Cupcakes

IMG_2199.jpg

I am not gonna lie. I love s’mores. Like they are 1,000% one of my biggest weakness and I will never turn one down.

That being said, It is not always convenient or possible to light up a roaring fire to make some vegan s’mores.

Well, now you don’t have to! Because now you can just bake all of that goodness into a vegan s’more cupcake, no campfire required!! No more hunting for vegan marshmallows either!

I saw a reicpe for a non vegan versions and thought how brilliant….but how do I make them vegan?!?!

IMG_2225.jpg

The original recipe made a homemade marshmallow topping that wasn’t anywhere near vegan!

But we love to make vegan sweet aquafaba whip in our house for all kinds of recipes and I knew it would work perfectly for this recipe as well.

It’s light, sweet, sticky, fluffy and toasts up beautifully!! Oh and most importantly it is delicious. It’s also super easy and cheap to make! No need for an actual marshmallow here!!

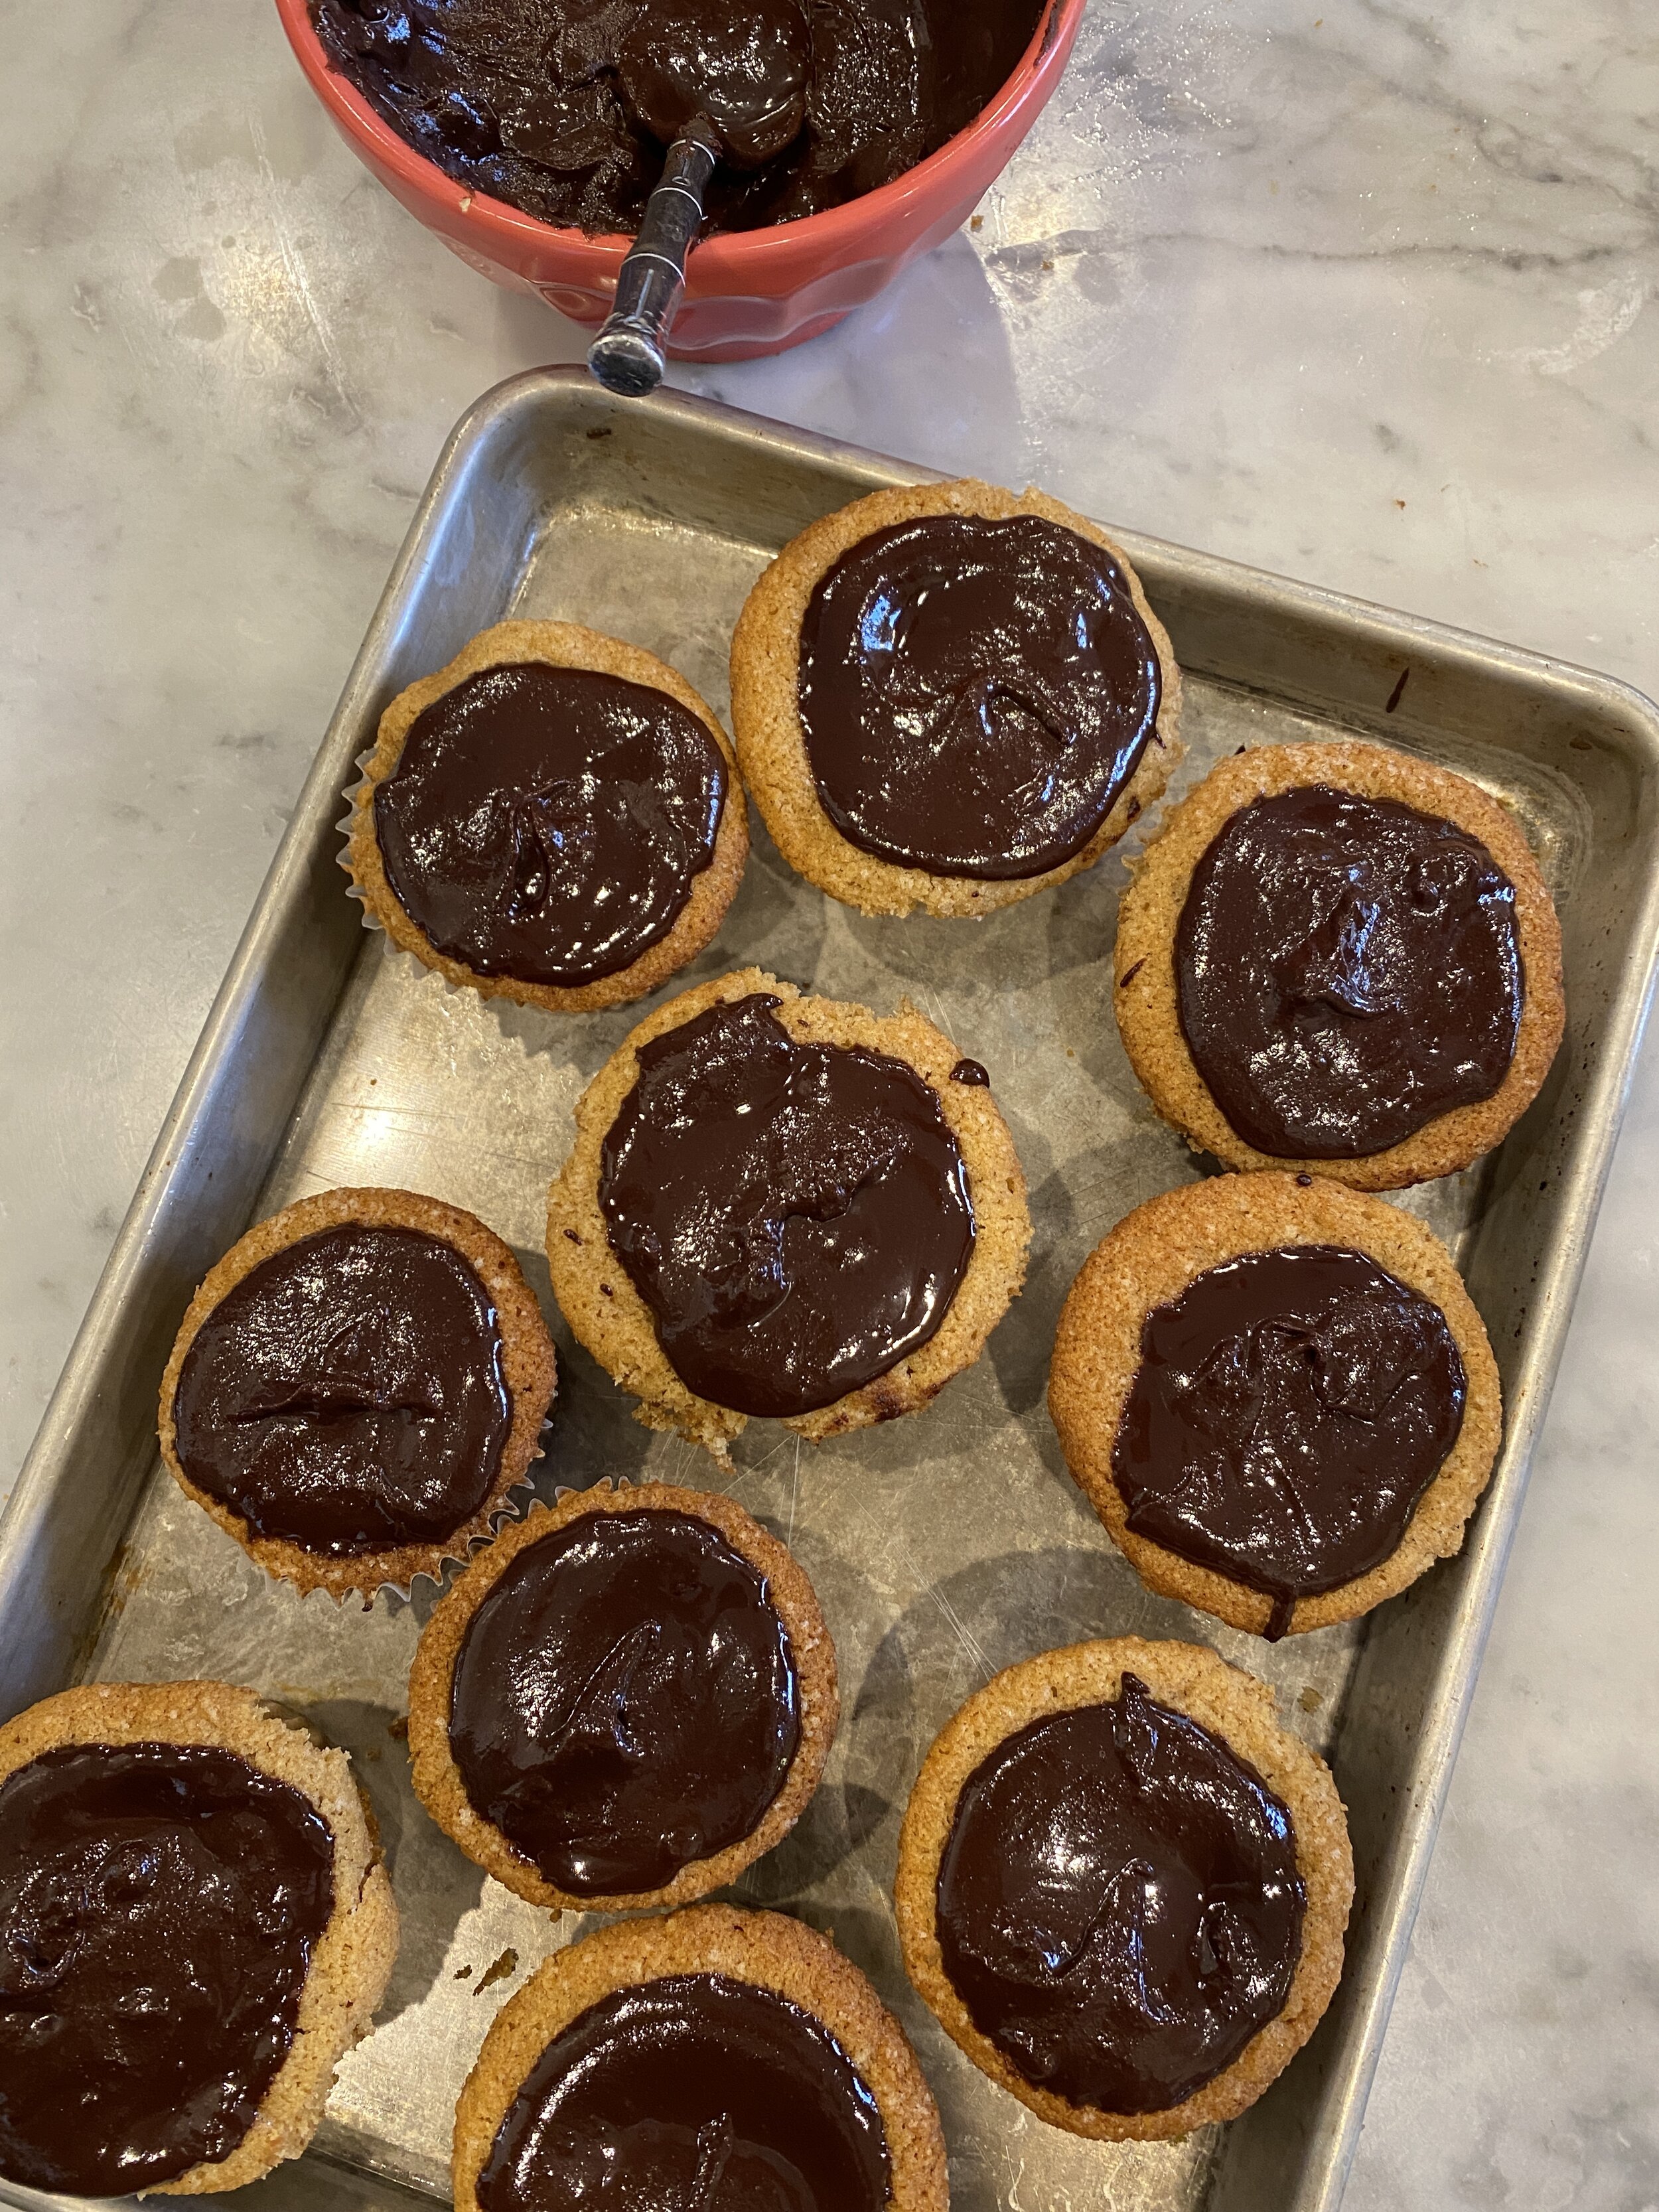
The cupcakes are actually made with crushed up graham crackers and are topped with the perfect amount of easy vegan chocolate ganache!

IMG_2194.jpg

These vegan s’more cupcakes have a few extra steps but overall are really pretty easy, and are so fun and super delicious!

Don't let the aquafaba whip intimidate you if you have never made it before. It is so easy to make! Once you start making it, I promise you will find so many reasons to make it over and over and over again!!!

So when you are craving s’mores but can’t light up a fire, try baking up a batch of these vegan s’more cupcakes instead! I think it will satisfy your craving and then some!

IMG_2187.jpg

INGREDIENTS:

GRAHAM CUPCAKES:

  • 1 sleeve vegan graham crackers

  • 1 cup all purpose flour

  • 1 and 1/2 teaspoon baking powder

  • 1/4 teaspoon baking soda

  • 1/4 teaspoon salt

  • 1 teaspoon ground cinnamon

  • 3/4 cups vegan butter

  • 1 cup sugar

  • 2 starch eggs (2 tablespoons corn or tapioca starch plus 6 tablespoons water)

  • 1 teaspoon vanilla extract

  • 1/2 cup plant milk plus 1 teaspoon apple cider vinegar

  • 1 batch sweet aquafaba whip

VEGAN GANACHE:

  • 1 cup vegan chocolate chips or chopped vegan chocolate

  • 2/3 cup canned full fat coconut milk

  • 2 teaspoons light corn syrup

INSTRUCTIONS:

You will need a 12 cup muffin tin for this recipe

Preheat oven to 350 degrees

  1. Begin by crushing up the sleeve of graham crackers in a food processor or blender until they are completely broken down into a fine crumb.

  2. Prepare your starch eggs by whisking together the starch and water, and set aside.

  3. Prepare the ganache by heating the coconut milk in a medium sized pan over medium heat. Once the milk comes to a boil, add the chocolate and corn syrup. Remove from heat and mix in the chocolate until it is creamy and smooth. Transfer to a glass bowl and pop the ganache in the fridge while you prepare the cupcakes. Check on the chocolate periodically to see that it is thickening. Once it is a thick but a spreadable consistency, remove from the fridge and allow it to sit out at room temperature. It will harden completely if left in the fridge too long, and if that happens just pop it in the microwave for 15 second intervals, stirring well until it is back to a spreadable consistency.

  4. In a large bowl whisk together the graham cracker, flour, salt, cinnamon, baking powder and baking soda.

  5. In a separate bowl using an electric hand mixer, or in the bowl of a stand mixer, cream the butter and sugar until light a fluffy. This should only take a minute or two. Beat in the starch egg mixture. Add the vanilla.

  6. Mix the vinegar into the milk and let it sit for a minute, until it begins to curdle. (we are making a vegan butter milk alternative)

  7. Add the dry mixture and milk to the butter and sugar mixture, adding first a little dry mixture, then a little milk, alternating between the two, and mixing just until everything is well incorporated.

  8. Line a baking tin with cupcake liners and divided the batter equally between each cup.

  9. Bake the cupcakes for 25 to 30 minutes or unit a toothpick inserted into the center of a cupcake comes out clean. Remove from oven and allow to cool completely.

  10. Set oven to broil.

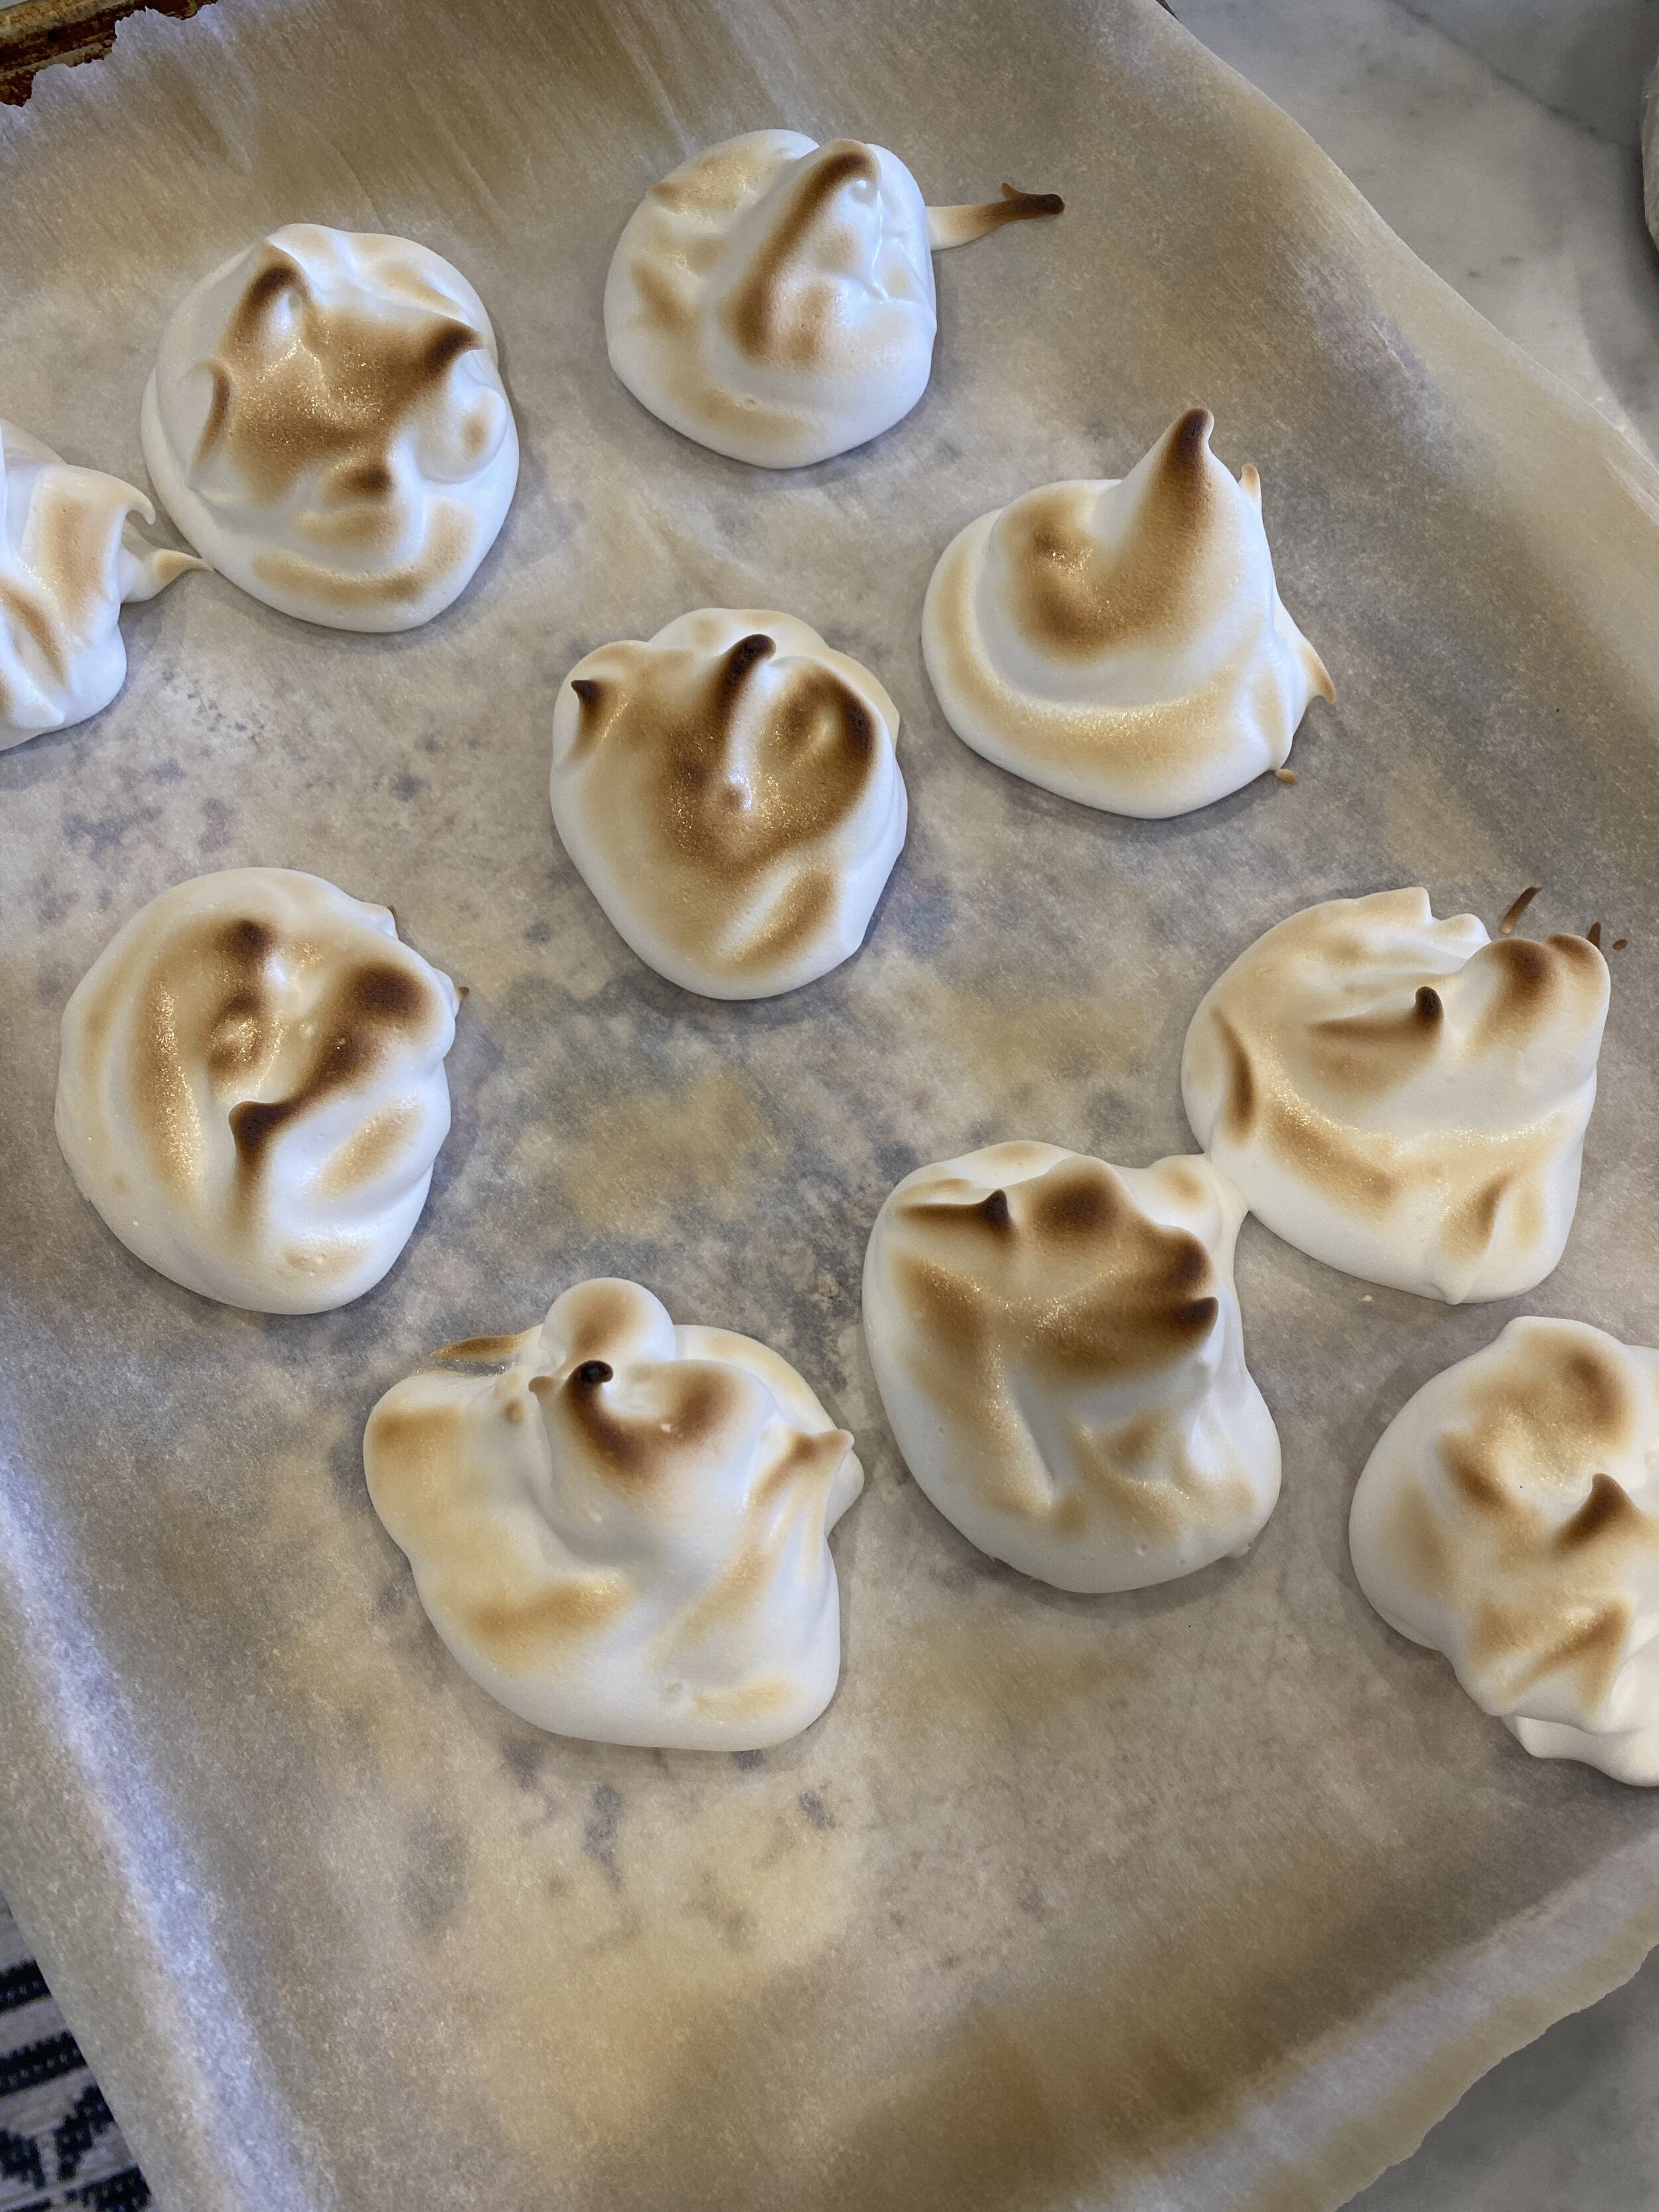
  11. Prepare the sweet aquafaba whip according to instructions while the cupcakes are cooling. You want the whip to resemble meringue and form stiff peaks after it has been whipped.

  12. Fill a large piping bag with any large tip you like or cut a small corner off of a zip lock bag. Line a baking sheet with parchment paper. Pipe out 12 large dollops of whip onto the paper. You will not need all of the whip but can save the leftover in the fridge and use as whip cream for later.

  13. Pop the meringues into the oven but WATCH THEM THE WHOLE TIME!!! You just want to leave them in long enough for the tops to brown BUT they will go from brown to burnt in a split second so do not take you eyes off of them!!

  14. Remove from the oven and let them cool at room temp for a bit.

  15. Prepare the cupcakes by spreading the tops with some of the ganache. Carefully slide a spatula up under the meringues ( you will need to use your other hand to help scoop them up more than likely) the bottoms may still be wet but they will scoop up! I use a small metal cookie spatula to do this. Place the meringues on top of the cupcakes.

  16. Store leftover cupcakes in the fridge for several days.

If you like this recipe, then try these:

vegan flank steak

vegan flank steak

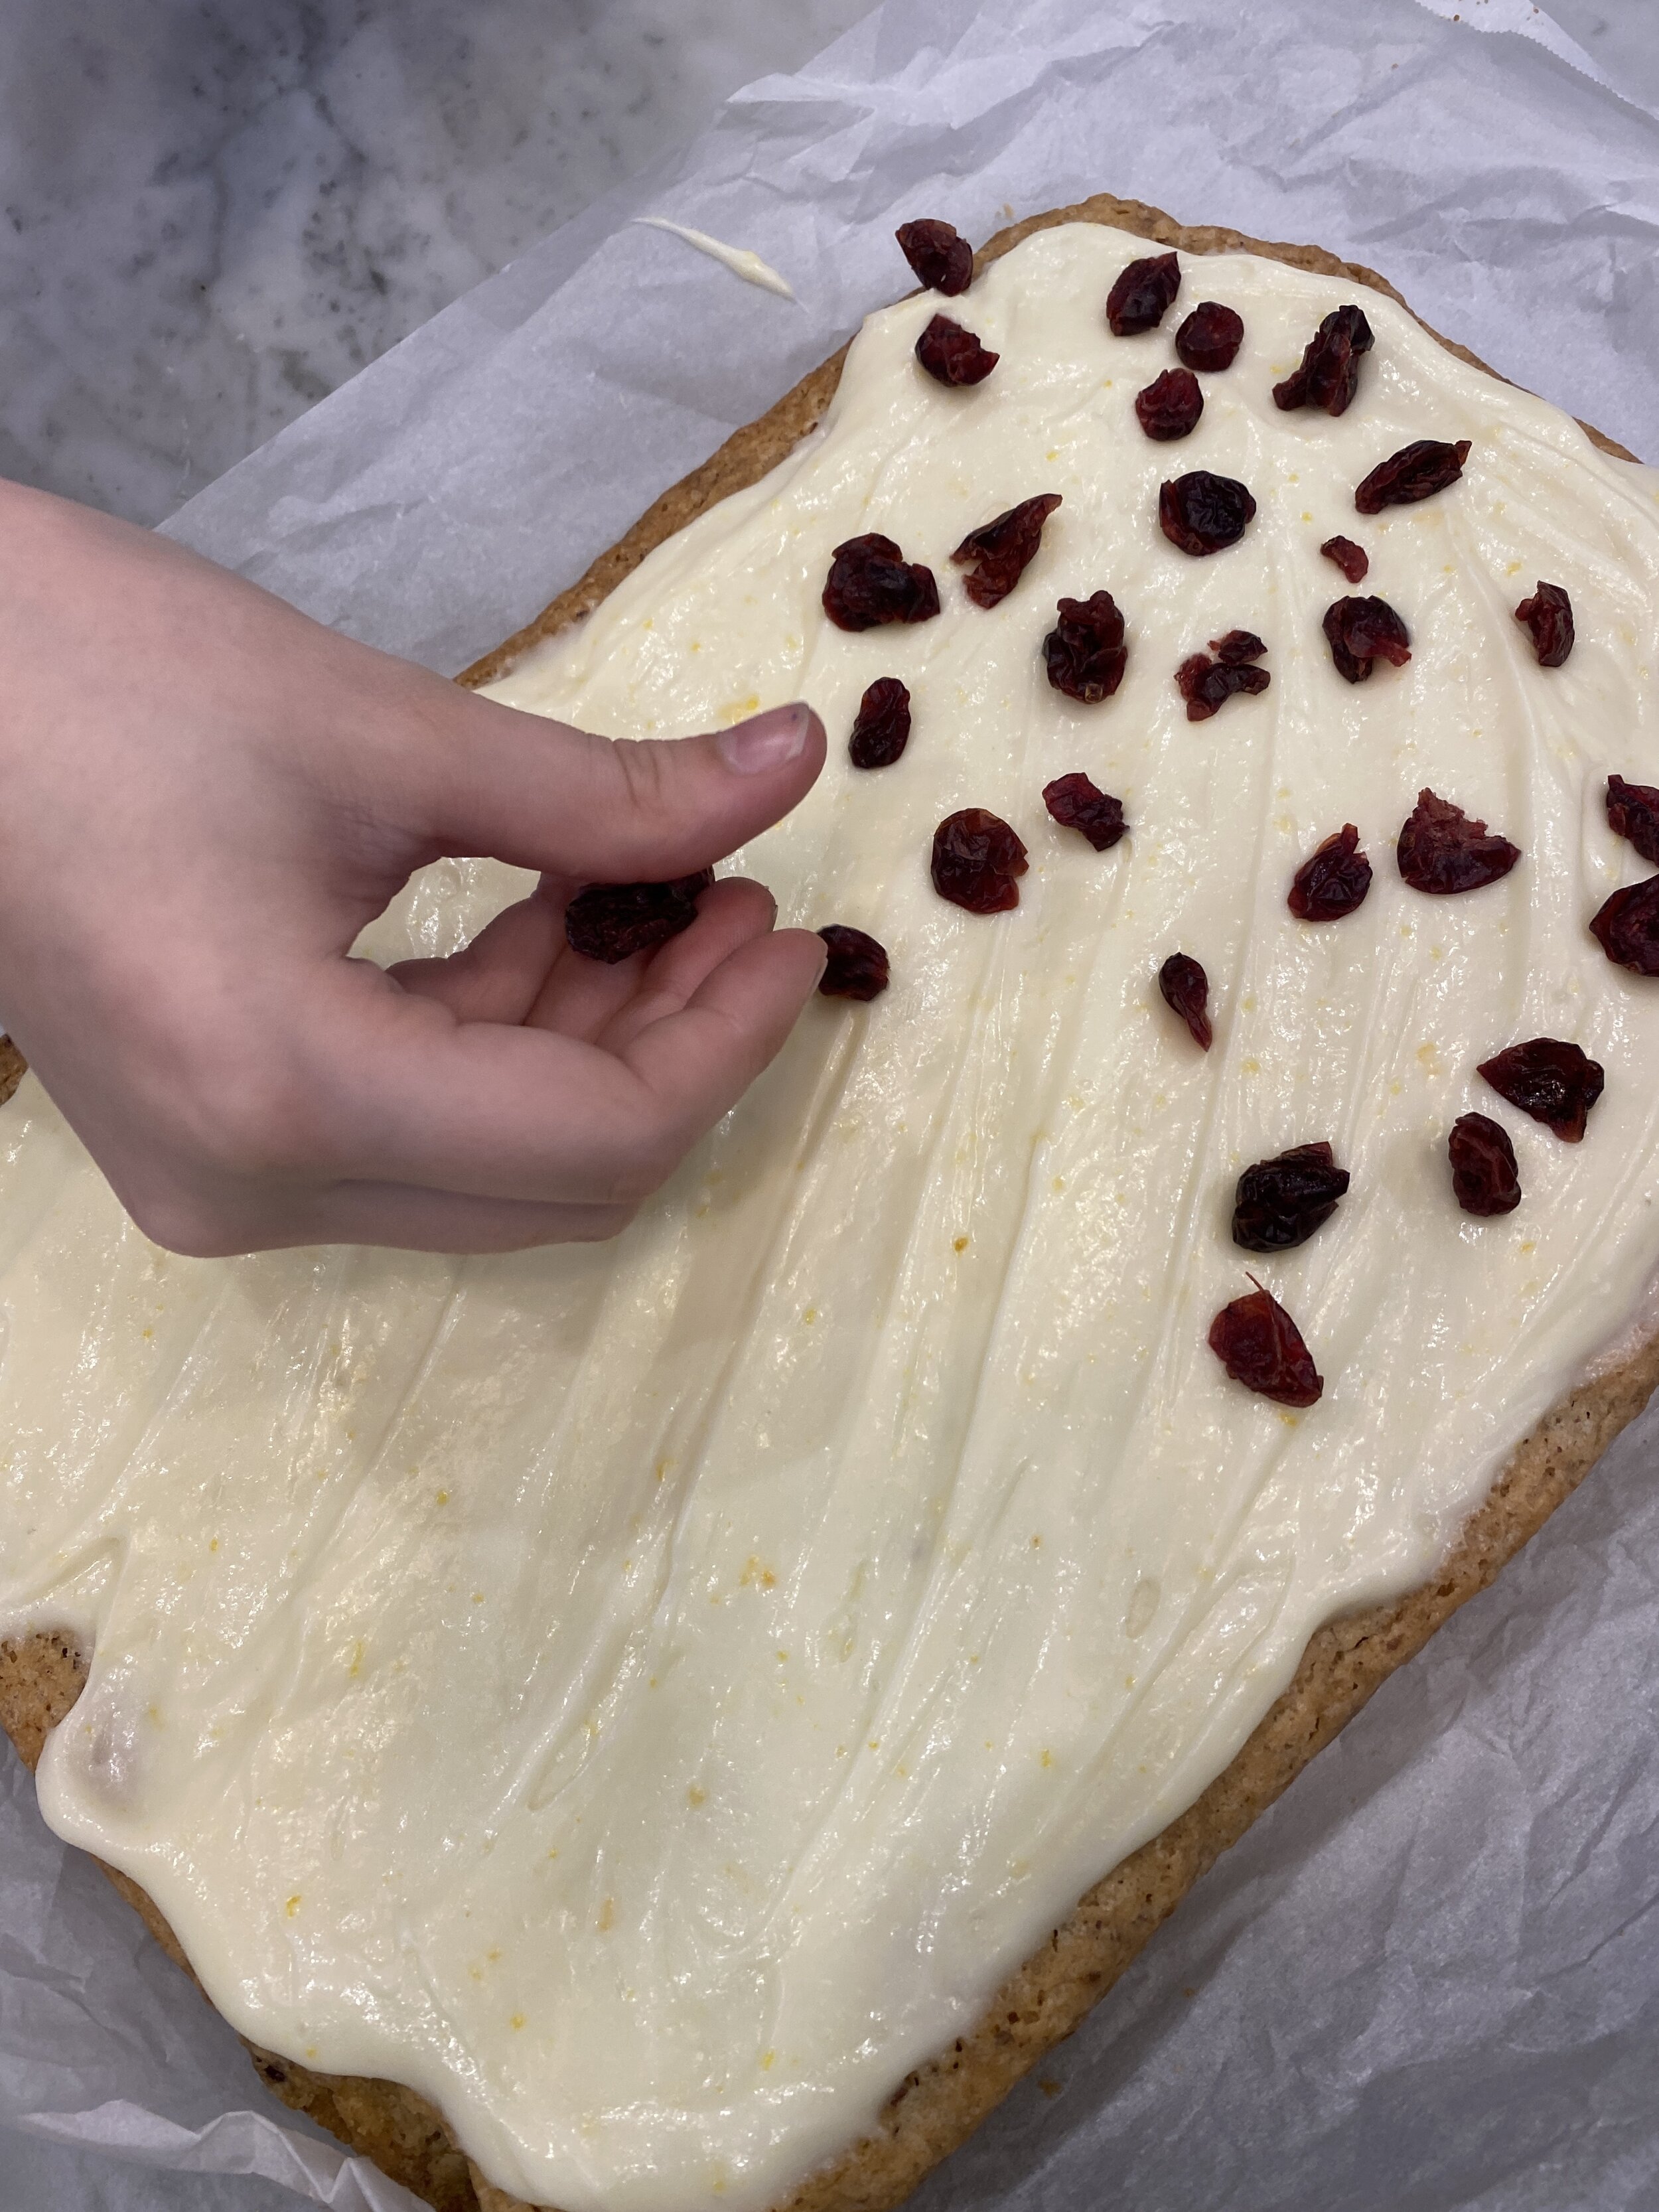
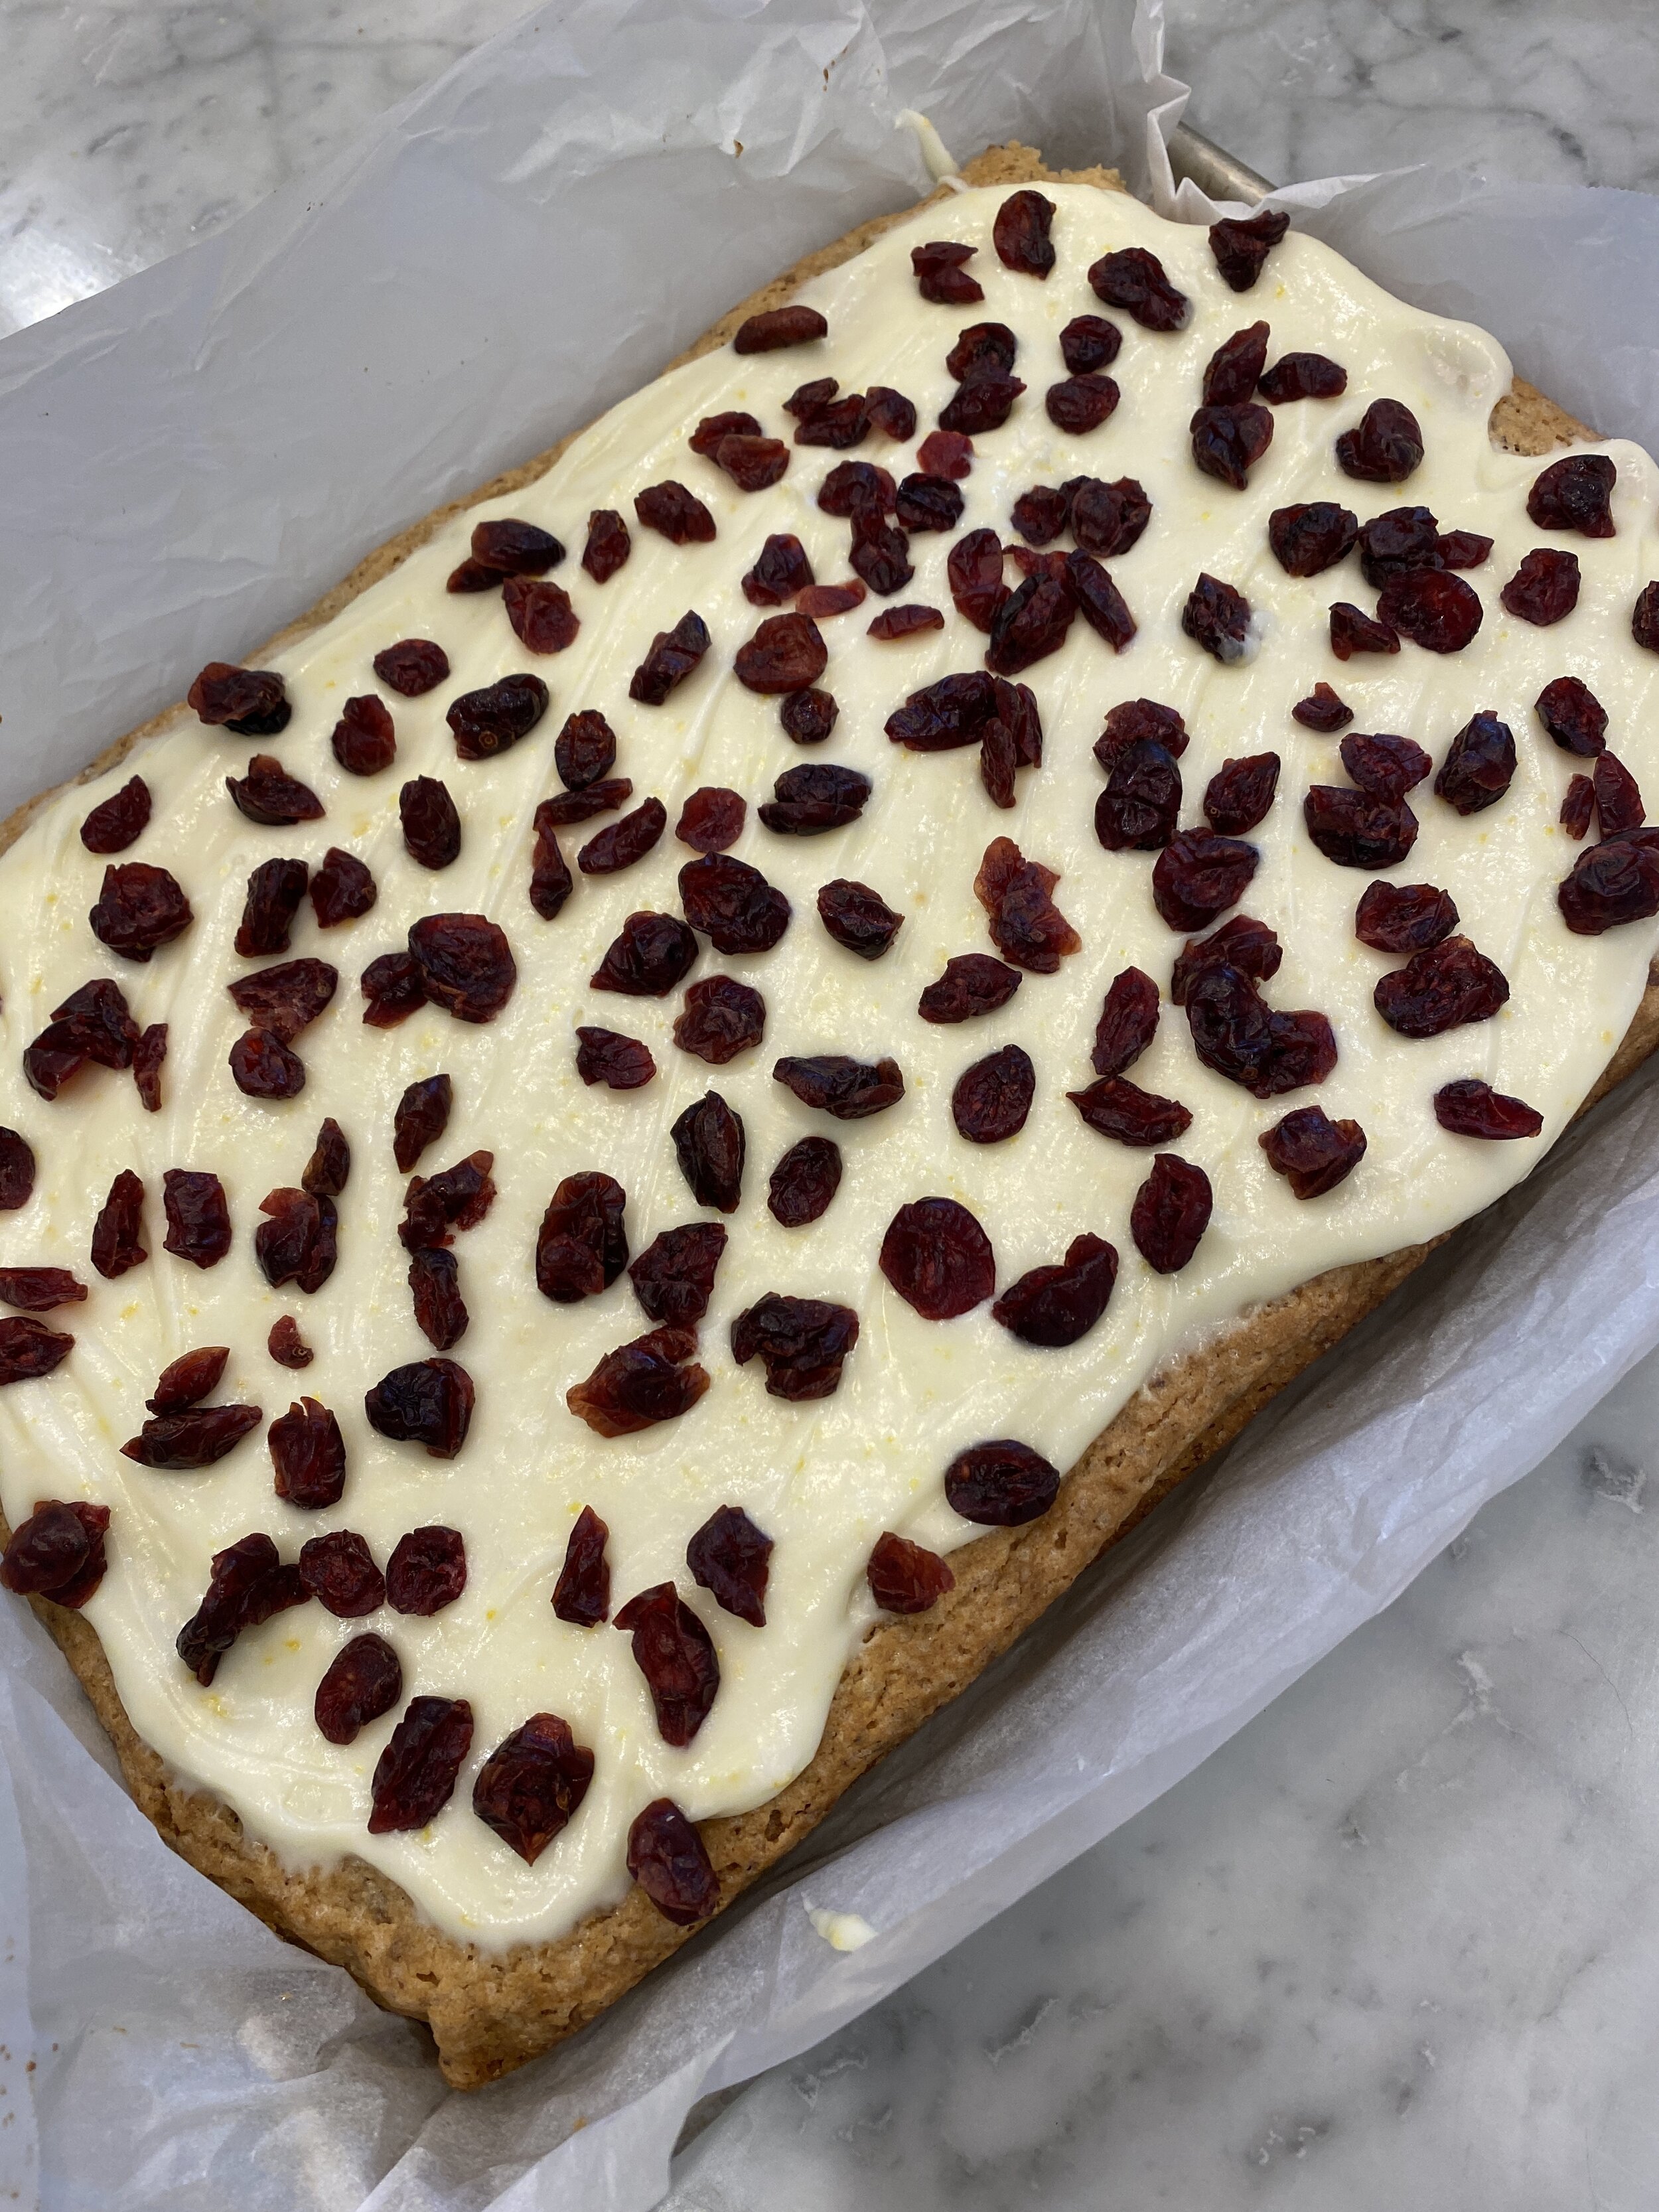
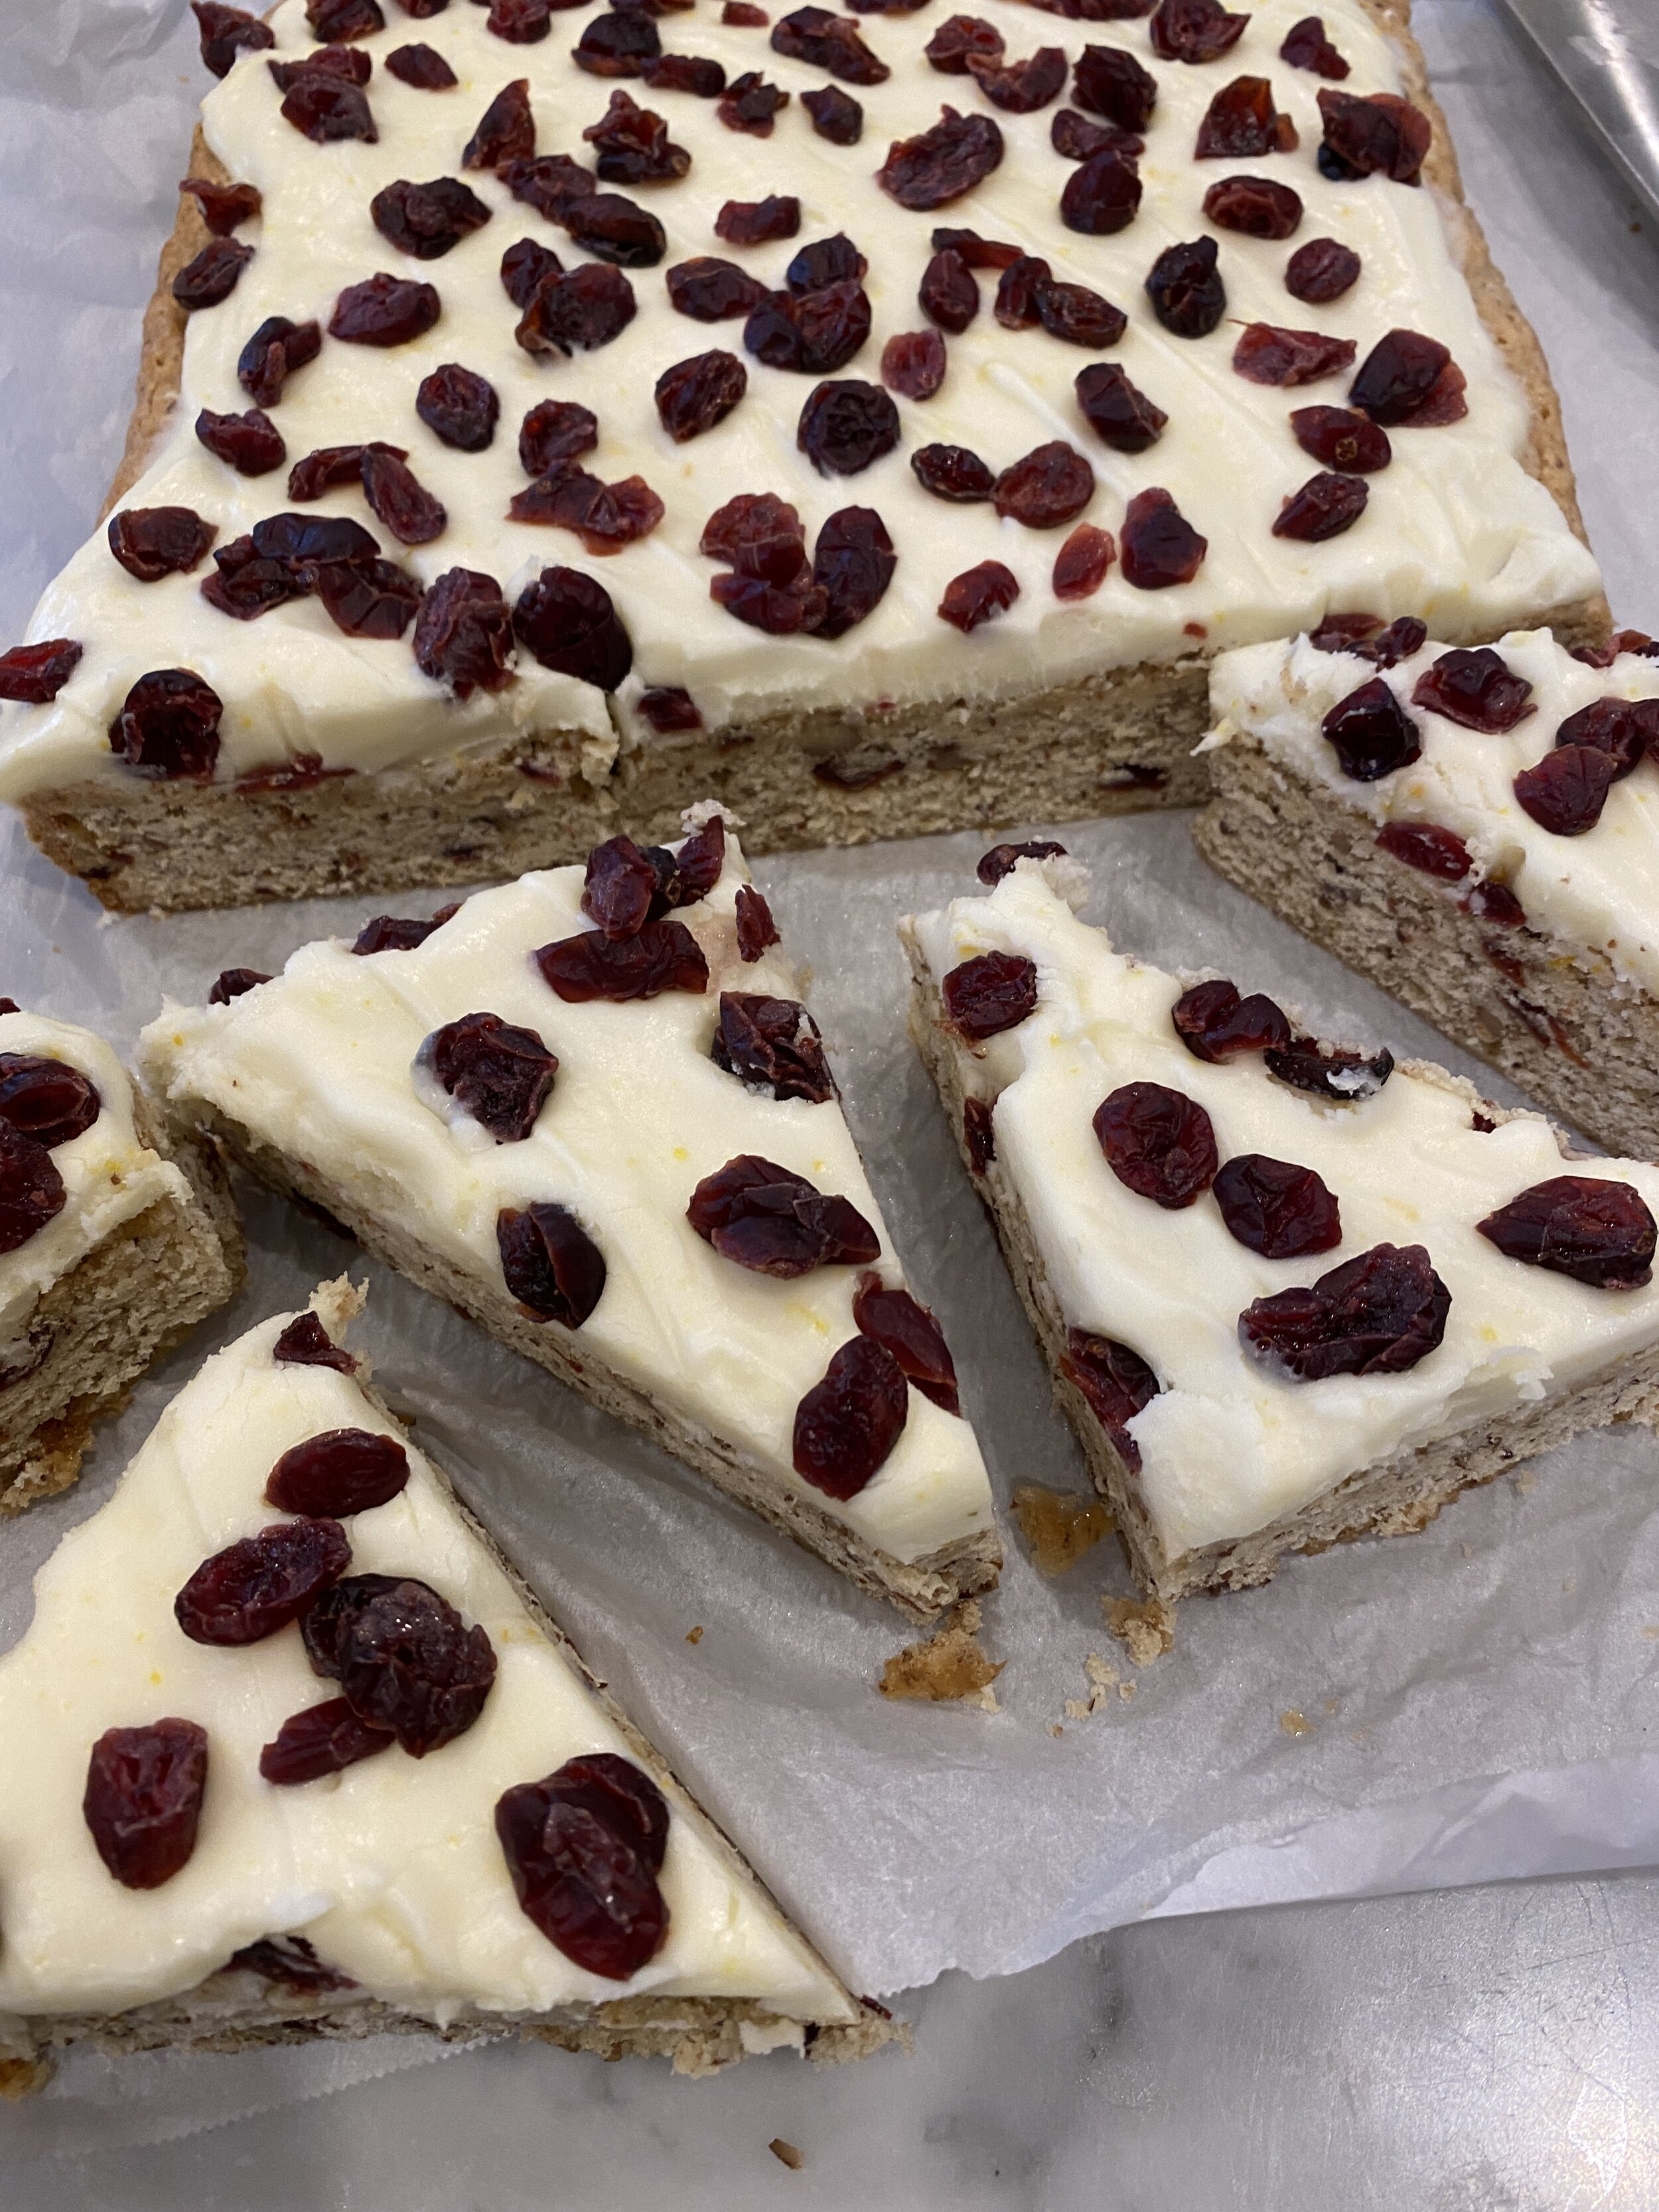
Vegan Cranberry Bliss Bars

vegan cranberry bliss bar

I won’t even pretend I did not rush to Starbucks before we were vegan to grab one of their Holiday Cranberry Bliss Bars.

Back when we were vegetarian I eagerly awaited the holidays to get one of those delicious nutty, cranberry filled blondies topped with cream cheese frosting.

I never once thought to make my own until we were vegan, and it was no longer something I could stop in a grab.

Now I actually had to work for it. But I tell you what, these vegan cranberry bliss bars are worth the work, and actually not too much work at all.

I mean baking anything homemade is some work, but recreating a vegan version of a cranberry bliss bar isn’t rocket science or anything and as far as baked goods go, blondies are about as easy if not easier than a brownie!

vegan cranberry bliss bart 2

Whipping up a batch of vegan cream cheese frosting is easy enough so that actually makes these dangerous from a diet perspective. I mean when a baked good I love is TOO easy, then that means I am going to make the thing more than I should, and I need the pants I currently own to keep fitting…self control….I am working on it y’all, but man these things are good!

This recipe makes a 9x13 pan of vegan cranberry bliss bars so there are PLENTY to share or gift to those you love or just moderately like…I personally would reserve them for those you love and give those you just sorta like something less delicious. But you do what you want.

These bars keep pretty well, and are also kinda pretty, making them a good choice for holiday gifting.

So if you even know what these bars are and have been missing them since going vegan or plant based, your holidays maybe just got a little better. If you are clueless to what these are but love blondies, cranberries and cream cheese….then you will likely adore them as well.

vegan cranberry bliss bar 3

INGREDIENTS:

  • 1 and 1/2 cups vegan butter (room temperature)

  • 1 and 1/2 cups granulated sugar

  • 1/2 cup brown sugar

  • 2 flax eggs (2 tablespoons ground flax and 6 tablespoons water mixed, let sit unit goopy)

  • 2 starch eggs (2 tablespoons corn or tapioca starch and 6 tablespoons water mixed)

  • 3 cups all purpose flour

  • 1 teaspoon baking powder

  • 1 teaspoon salt

  • 1/3 cup oat or almond milk

  • 1 teaspoon vanilla

  • 1/2 cup chopped dried cranberries

  • 1/2 cup chopped pecans

CREAM CHEESE FROSTING:

  • 1/2 cup vegan cream cheese

  • 1/3 cup vegan shortening (I used Spectrum brand)

  • 3 cups powdered sugar (you may need more depending on the cream cheese you use to get the right consistency)

  • zest from 1/2-1 whole orange ( just depends on how much orange you like)

  • 1-2 teaspoons apple cider vinegar (if you don’t want an extra zippy cream cheese you can use plant milk)

  • Dried Cranberries for topping

INSTRUCTIONS:

Preheat oven to 350 degrees Fahrenheit

  1. In the bowl of a stand mixer or in a medium bowl using an electric hand mixer, mix the starch and flax eggs with both sugars.

  2. Add the butter and mix on high for a for a minute.

  3. In another bowl wisk the flour, baking powder, and salt together.

  4. Add the dry flour mixture to the wet mixture and mix just until all of the ingredients are combined

  5. Mix in the milk, and vanilla until well combined,

  6. Fold in the cranberries and nuts.

  7. Line a 9x13 pan with parchment paper allowing it to hang over the sides some, and spray with a little oil. Pour in the batter and bake on the middle oven rack for 45-55 minutes or until tooth pick inserted in the middle comes out clean.

  8. Remove from oven and allow bars to cool completely still in the pan.

  9. To make the frosting beat the cream cheese and shortening together. Slowly add in the sugar, vanilla, and orange zest. Add a teaspoon or so of apple cider vinegar deepening on taste. I like my frosting a little more on the tangy side. Beat all of the ingredients together. You may need to add a little more powdered sugar depending on the cream cheese you used. Some brands are thicker than others.

  10. While the bars are cool but still in the pan, cover with the vegan cream cheese frosting. Sprinkle with 1/4- 1/2 cup chopped dried cranberries. Pop the pan in the fridge and let the frosting cool unit it is good and stiff. This will make cutting the bars much easier.

  11. Remove from the fridge pull the bars from the pan using the edges of the parchment paper.

  12. Cut vertical strips 2-3 inches apart depending on how big you want the bars, then cut the strips on a diagonal to make little triangle shapes.

  13. Store bars in an airtight container at room temperature or in the fridge.

If you like this recipe, then try these:

cranberry bliss bar

cranberry bliss bar

Vegan Burnt Sugar Bourbon Gingerbread Cookies with Orange Buttercream

vegan burnt sugar bourbon gingerbread cookies

vegan burnt sugar bourbon gingerbread cookies

Bourbon, soft vegan gingerbread cookies, orange anything, these are a few of my favorite things.

So what if you take all of those things and roll them into one delicious very grown up vegan cookie.

Well, that is exactly what I just did.

I recently saw a recipe in Bake From Scratch, by Brian Hart Hoffman, for a burnt sugar bourbon gingerbread cookies, and I was instantly intrigued. I had never made a burnt sugar cookie and all of the sudden it was top of my list of to-dos.

I love soft ginger bread and well, bourbon. So this seemed like a winner. And that burnt sugar…I needed this in my life and I mean like the instant I saw it. Hats off to the genius that decided to put this magic inside a cookie. I am not that genius, and am giving credit to the one who did.

IMG_9696.jpg

I am a fan of all things orange and especially when holiday baking. Orange and cranberry, orange all by itself, and orange with gingerbread. Orange and gingerbread spices are a delicious combination that screams “HOLIDAY TIME '“so I decide to make an orange bourbon buttercream and turn these cookies into little vegan sandwich cookies.

And before you question burnt sugar, its not really burnt. More candied/ caramelized. Its quick and easy to do and is what makes these cookies really special.

These cookies are 100% for adults. There is bourbon in the dough, the burnt sugar, and the frosting. If you don’t like bourbon then this is not your cookie. If you love bourbon, then I have high hopes for you loving this vegan soft ginger bread cookie as much and my husband and I did!

These cookies are also beautiful, which makes them a terrific idea for holiday gifting. Since the recipe makes about 3 dozen cookies, more than a few of my neighbors just received these as an early holiday treat. I don’t think any of them were mad about this either!

Although these cookies take a little time to make and put together, they are worth it!!! I mean honestly the holidays only roll around once a year, and these are worth the work to celebrate! They are also so flipping good that I will probably be making serval more batches to share with family later this month.

vegan bourbon gingerbread 2

INGERDIENTS:

  • 1 and 2/3 cups granulated sugar ( I use Florida Crystals, they are vegan)

  • 4 tablespoon bourbon, divided

  • 1 cup vegan butter (I like to use Earth Balance)

  • 2 cups brown sugar

  • 2 starch eggs (2 tablespoons corn or tapioca starch plus 6 tablespoons water)

  • 1/3 cup molasses

  • 4 cups all purpose flour

  • 2 teaspoons baking soda

  • 1 tablespoon each cinnamon, and ground ginger

  • 1 teaspoon each cardamon, allspice

  • 1/2 teaspoon of ground cloves

  • zest form 1/2 of an orange

  • 1/2 teaspoon salt

  • 1/2 teaspoon black pepper (no this is not a mistake, trust me here)

  • 1/2 cup granulated sugar for rolling the dough

ORANGE BOURBON BUTTER CREAM:

  • 1/2 cup vegan butter (I used Earth Balance)

  • 2 tablespoons shortening (I used Spectrum)

  • 3 cups powdered sugar

  • zest from one orange

  • 1 teaspoon bourbon

vegan bourbon gingerbread cookie 3

INSTRUCTIONS:

  1. Line a cookie sheet in parchment paper or with a silicone mat.

  2. In a medium sized pot add 1 and 2/3 cups sugar over medium low heat. Allow the sugar to melt completely, stirring continuously as it does, until ALL of the sugar has melted and is liquified. It will golden brown. Carefully and slowly add 1 tablespoon of bourbon to the melted sugar. This will cause the sugar to seize up but keep stirring and it remelt and mix in.

  3. Carefully pour the melted sugar over the parchment lined cookie sheet. Spread the mixture out to a thinnish layer. Maybe 1/4 to 1/8 inch thick. Allow the mixture to cool completely.

  4. Mix the starch with the 6 tablespoons of water in a small bowl.

  5. In a large bowl using an electric hand mixer or in the bowl of a stand mixer add the butter, orange zest, and brown sugar. Beat on medium speed for a minute or two. Add the molasses and mix until well incorporated. Beat in the starch eggs, and finally the 3 tablespoons of bourbon.

  6. Preheat oven to 350 degrees Fahrenheit.

  7. In a medium bowl whisk together the flour, baking powder, and spices. Slowly mix the flour mixture into the butter and sugar mixture, adding a little flour at a time, beating on a low speed just until all the flour is mixed in.

  8. Break up the hardened burnt sugar into small pieces. It will break pretty easily, and you want the pieces no bigger than a chocolate chip. I fold the parchment in half and use a kitchen mallet to break it up. Reserve 1/4 cup of the sugar piece. You will end up with sort of a sugar dust and that along with the super tiny pieces are what I reserve for dipping the cookie edges in.

  9. Fold the burnt sugar pieces into the cookie batter.

  10. Using a small 1 tablespoon kitchen scoop, scoop the cookie dough and roll into small balls. Pour 1/2 cup granulated sugar onto a plate and roll the dough balls in the sugar to coat.

  11. Place the cookies a few inches apart on a parchment lined cookie sheet. They will need room to spread. Bake for 12 minutes. Allow the cookies to cool a bit on the pan before transferring them to a wire cooling rack.

  12. Prepare the buttercream by beating the butter and shortening together in a large bowl or in the bowl of your stand mixer. Add the orange zest, powdered sugar and bourbon. Beat until all ingredients are incorporated. If the frosting is too thick you can add a few more drops of bourbon. If it seems to thin to pipe, add a bit more powdered sugar.

  13. To assemble the cookies, fill a piping bag with any tip you like with butter cream. Pipe a thin layer of butter cream on one cookie and sandwich another on top. Dip one side of the cookie in the reversed burnt sugar dust/pieces for garnish.

If you like this recipe, then try these:

IMG_9710.jpg

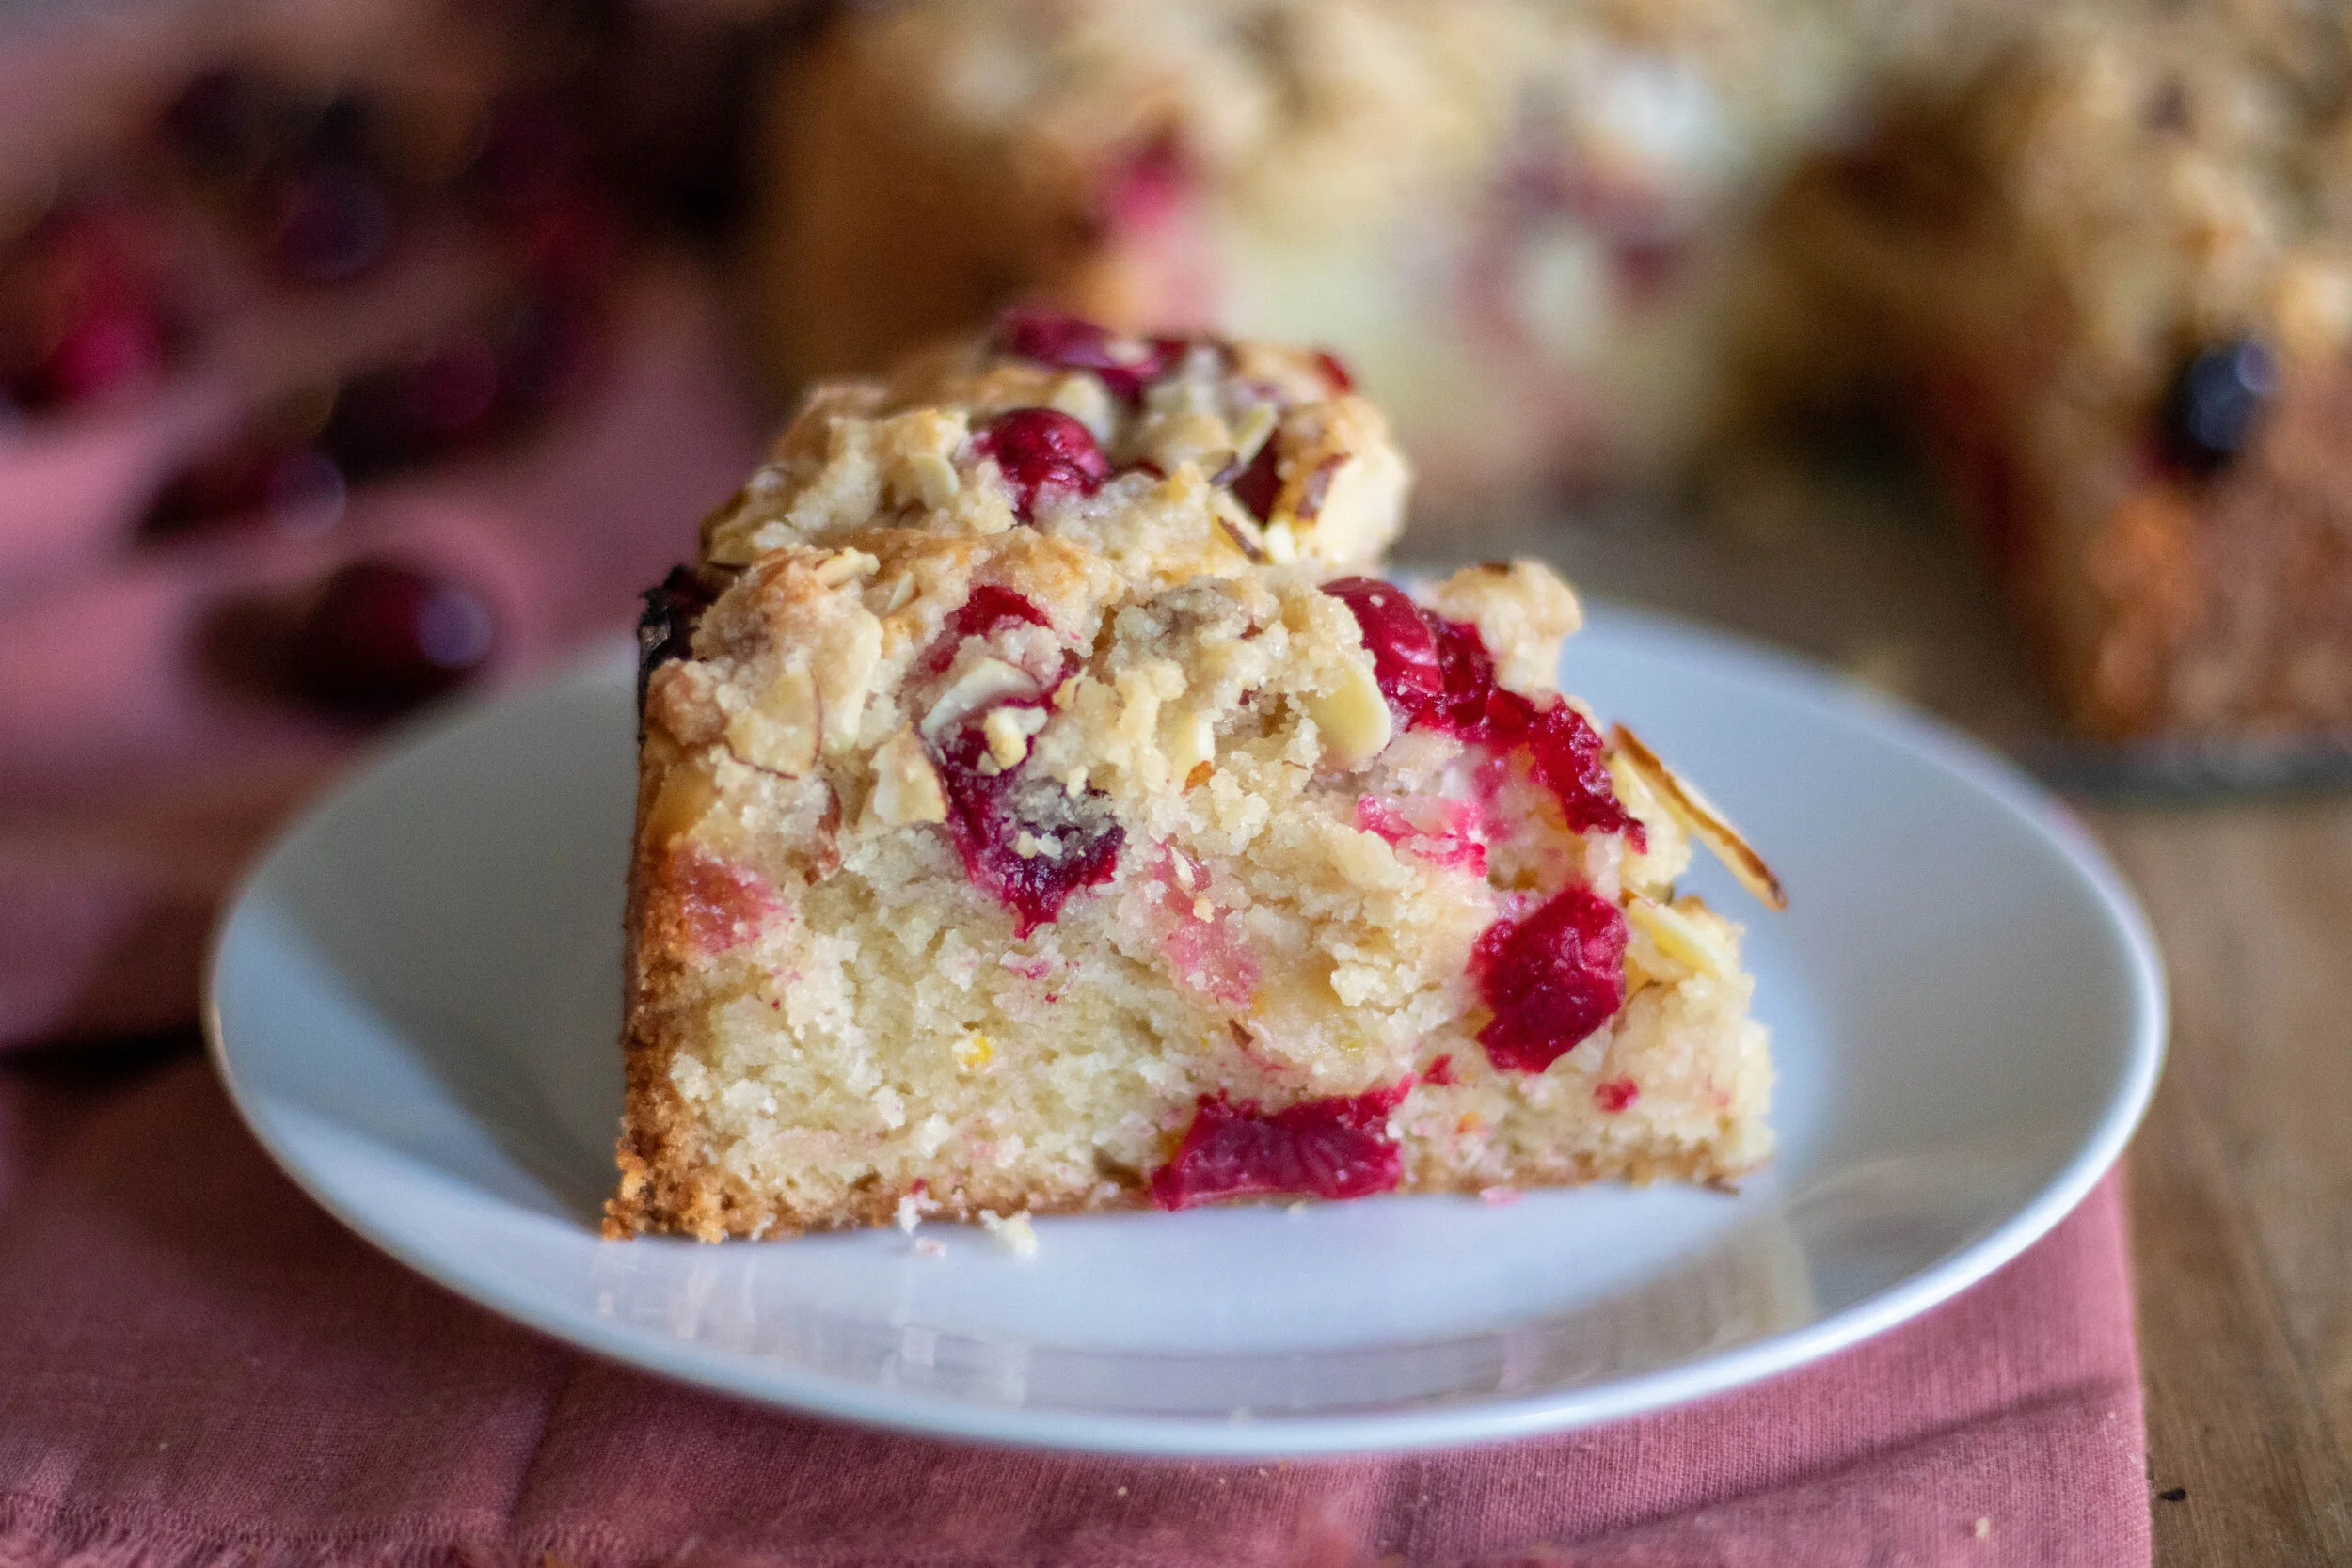
Vegan Cranberry Almond Coffee Cake

IMG_9492.jpg

This time of year I am always going on, and on, and on for my love of cranberries.

I mean it’s an exciting time of year since we can only find fresh cranberries for a few months.

So, in the winter I try and make the best of using one of my most favorite fruits and winter recipe ingredients!

I recently found a recipe in a cookbook for a cranberry citrus coffee cake that I knew I wanted to try and veganize.

I made some flavor changes and deiced I wanted to use almonds in my topping because I love cranberries and almonds together. I also wanted to add some citrus but not too much. Just a hint. Cranberries and oranges are a match made in heaven so we for sure needed to add some orange zest!

IMG_9527.jpg

I also wanted a coffee cake that would work for breakfast, or dessert for the holidays.

The original recipe had a glaze poured over that I was not very interested in. I wanted the cake to last and not get gooey and weird after a day or two. I wanted to savor this vegan coffee cake for as many days as I could with a hot cup of coffee and not see a single piece go to waste!

I was also delighted to find another use for my spring form pan that normally only sees some action when I make a cheese cake, which being perfectly honest is a rare occasion.

IMG_9514.jpg

This vegan cranberry coffee cake actually mixes up pretty quick and easy. Mine had to bake for a full hour, but keep an eye yours and check it around the 45 minute mark since everyones oven is different!

So grab some fresh cranberries while the gettin is good and bake yourself up one or 10 of these delicious vegan cranberry coffee cakes before cranberry season is over and we are all swearing off sweets for the new year!!!

I was also delighted to find another use for my spring form pan that normally only sees some action when I make a cheese cake, which being perfectly honest is a rare occasion.

This vegan cranberry coffee cake actually mixes up pretty quick and easy. Mine had to bake for a full hour, but keep an eye yours and check it around the 45 minute mark since everyones oven is different!

So grab some fresh cranberries while the gettin is good and bake yourself up one or 10 of these delicious vegan cranberry coffee cakes before cranberry season is over and we are all swearing off sweets for the new year!!!

IMG_9499.jpg

iNGREDIENTS:

You will need a 9 inch spring form pan for this recipe

  • 1 1/2 cups all purpose flour

  • 2 teaspoons baking powder

  • 1/2 teaspoon salt

  • 1 cup granulated sugar

  • 1/2 cup vegan butter, melted and cooled

  • 2 starch eggs (2 tablespoons tapioca or corn starch mixed with 6 tablespoons water)

  • 1/2 cup vegan cream cheese, or sour cream ( I used Trader Joe’s cream cheese since its not very thick)

  • 1/4 cup oat milk

  • 1 1/4 cup fresh cranberries

  • zest from one orange (you can use less if you are not a fan of citrus)

  • zest from 1/2 lemon

  • 1 teaspoon vanilla extract

ALMOND STRUSSLE TOPPING:

  • 1/2 cup all purpose flour

  • 1/4 cup granulated sugar

  • zest from the other half of the lemon

  • 1/2 cup sliced almonds

  • 3 tablespoon softened vegan butter

INSTRUCTIONS:

Preheat oven to 350 degrees Fahrenheit

  1. Prepare starch egg by mixing starch and water. Let it sit for a minute.

  2. In a small bowl whisk together the sugar, zest, butter, starch eggs, and vanilla.

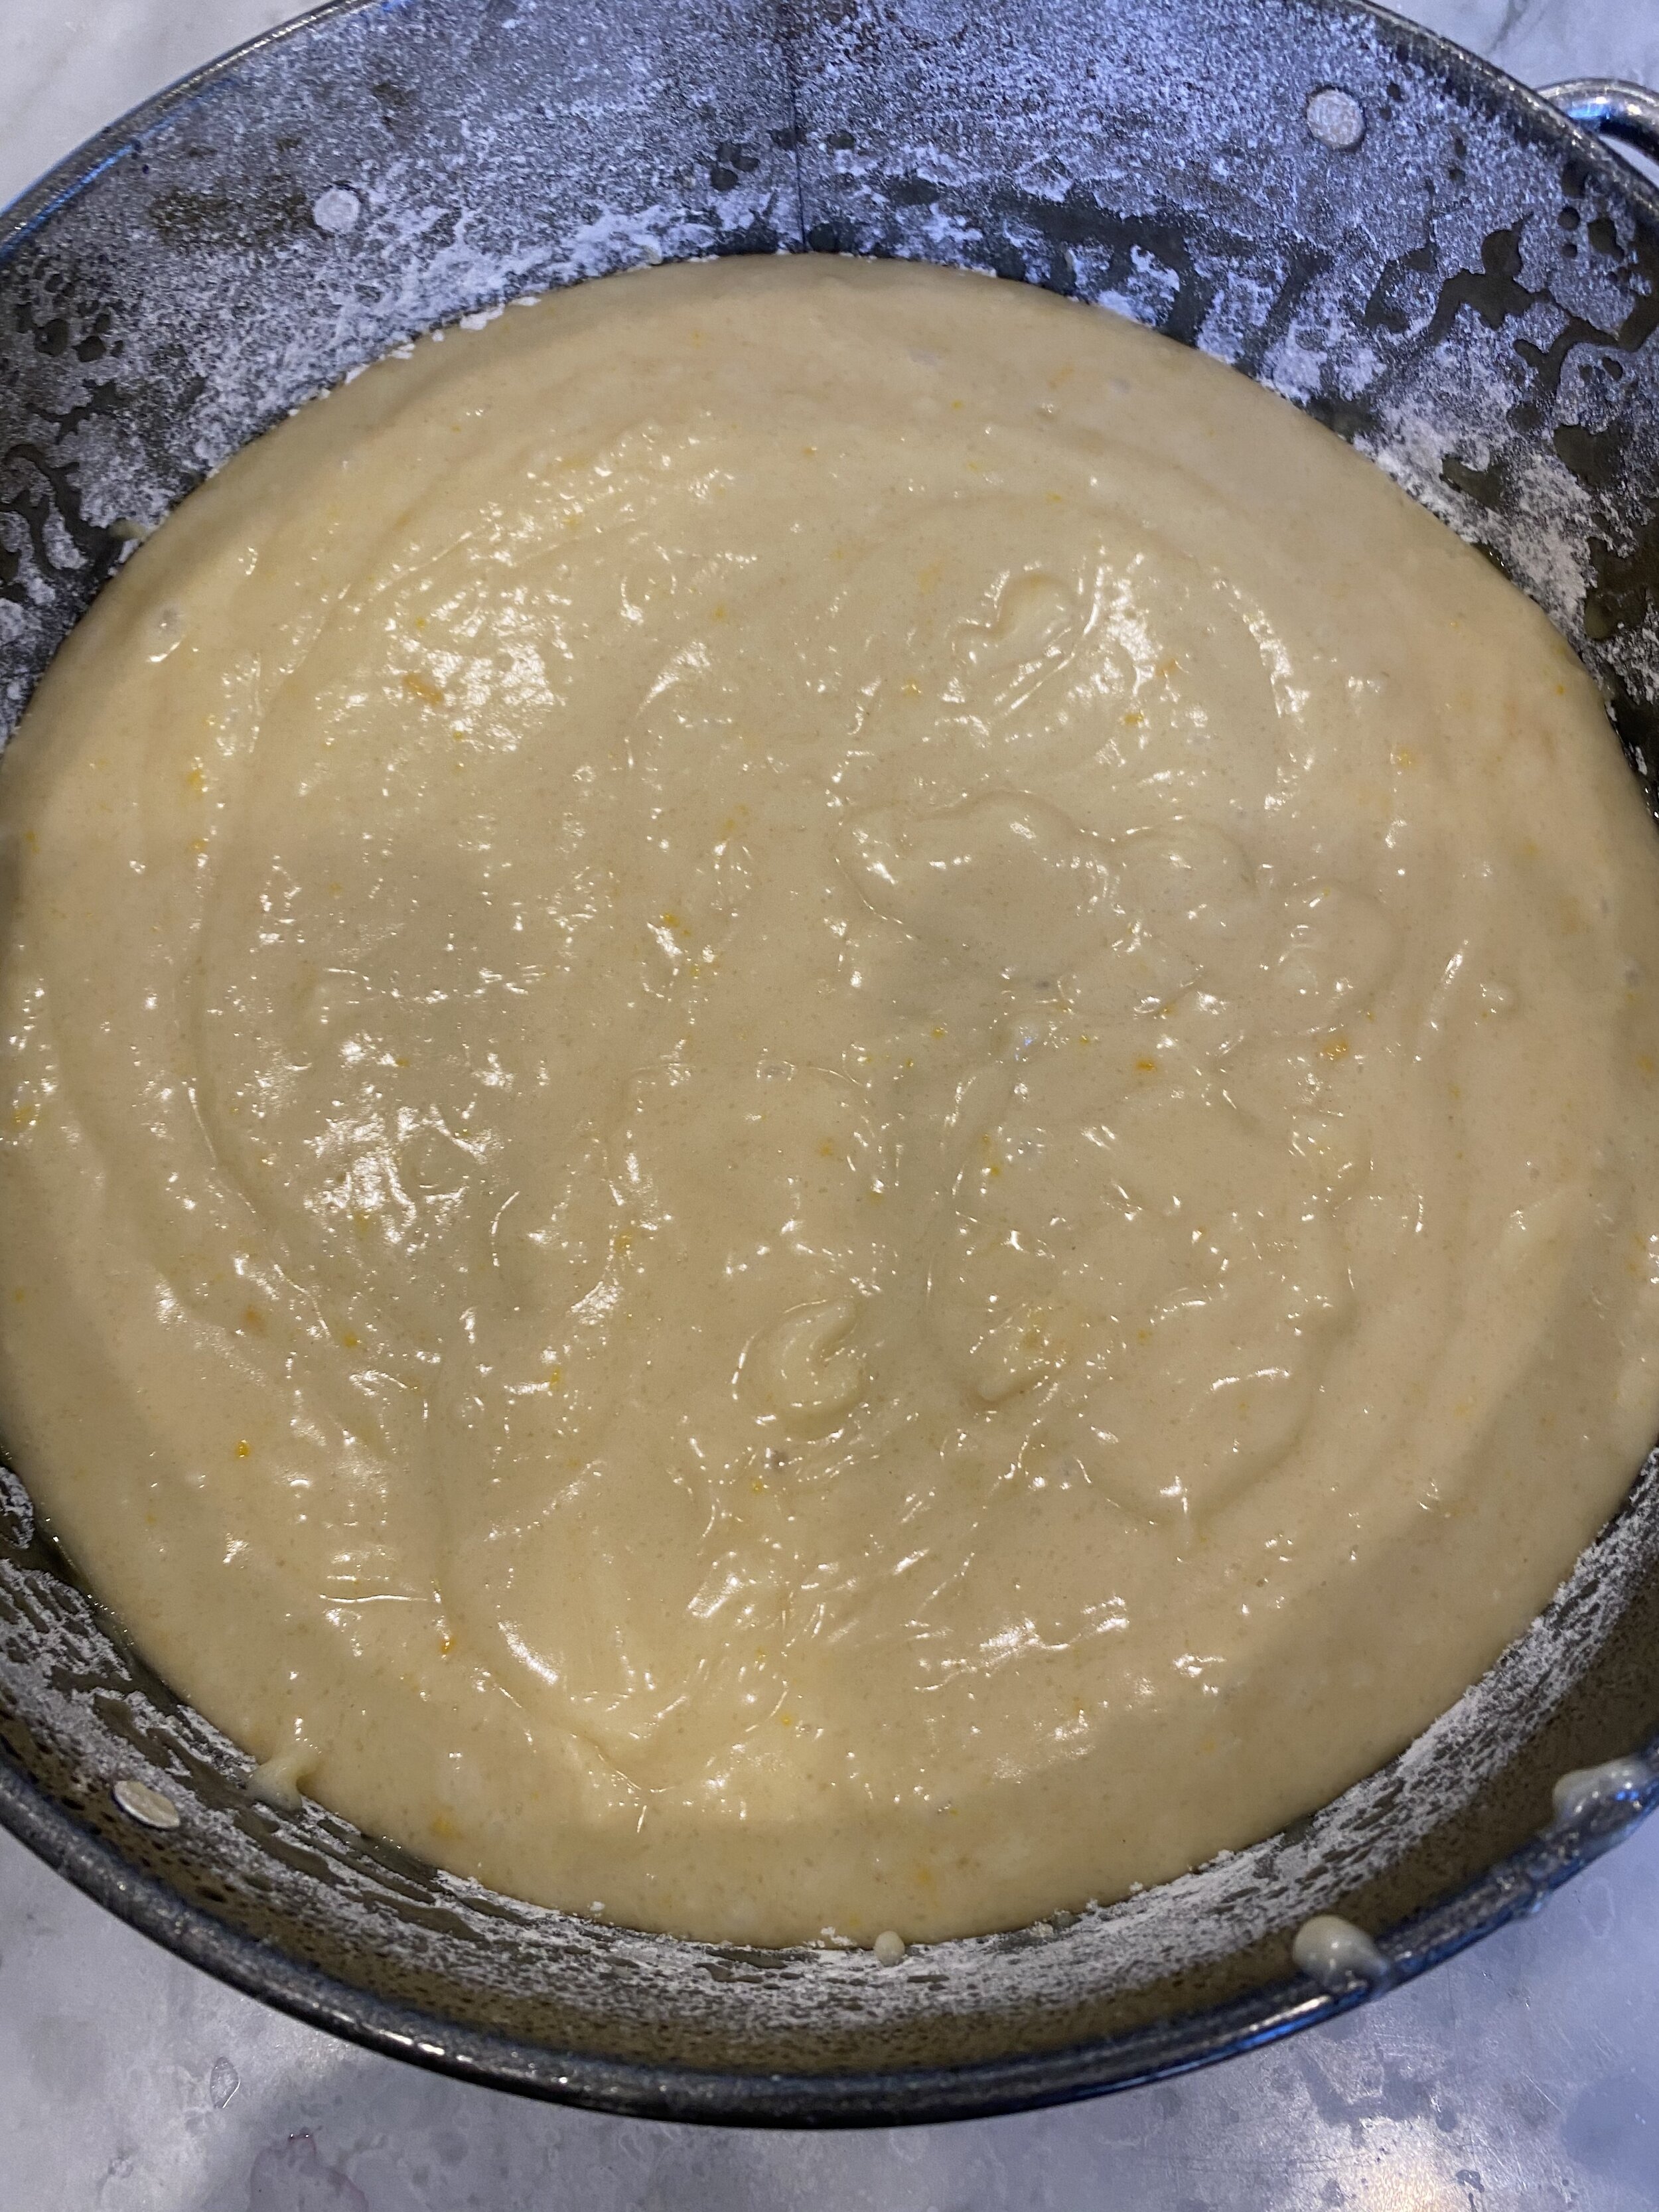
  3. In a medium bowl whisk the flour, baking powder, and salt. Pour sugar and butter mixture into the bowl with the flour and mix together.

  4. Mix in the cream cheese or sour cream, and milk. Mix just until everything is well combined.

  5. Prepare your spring form pan by giving it a light spray with cooking oil ir rub it down with some vegan butter on a paper towel. Shake a few teaspoons of four around the pan until its coated and dump the excess flour.

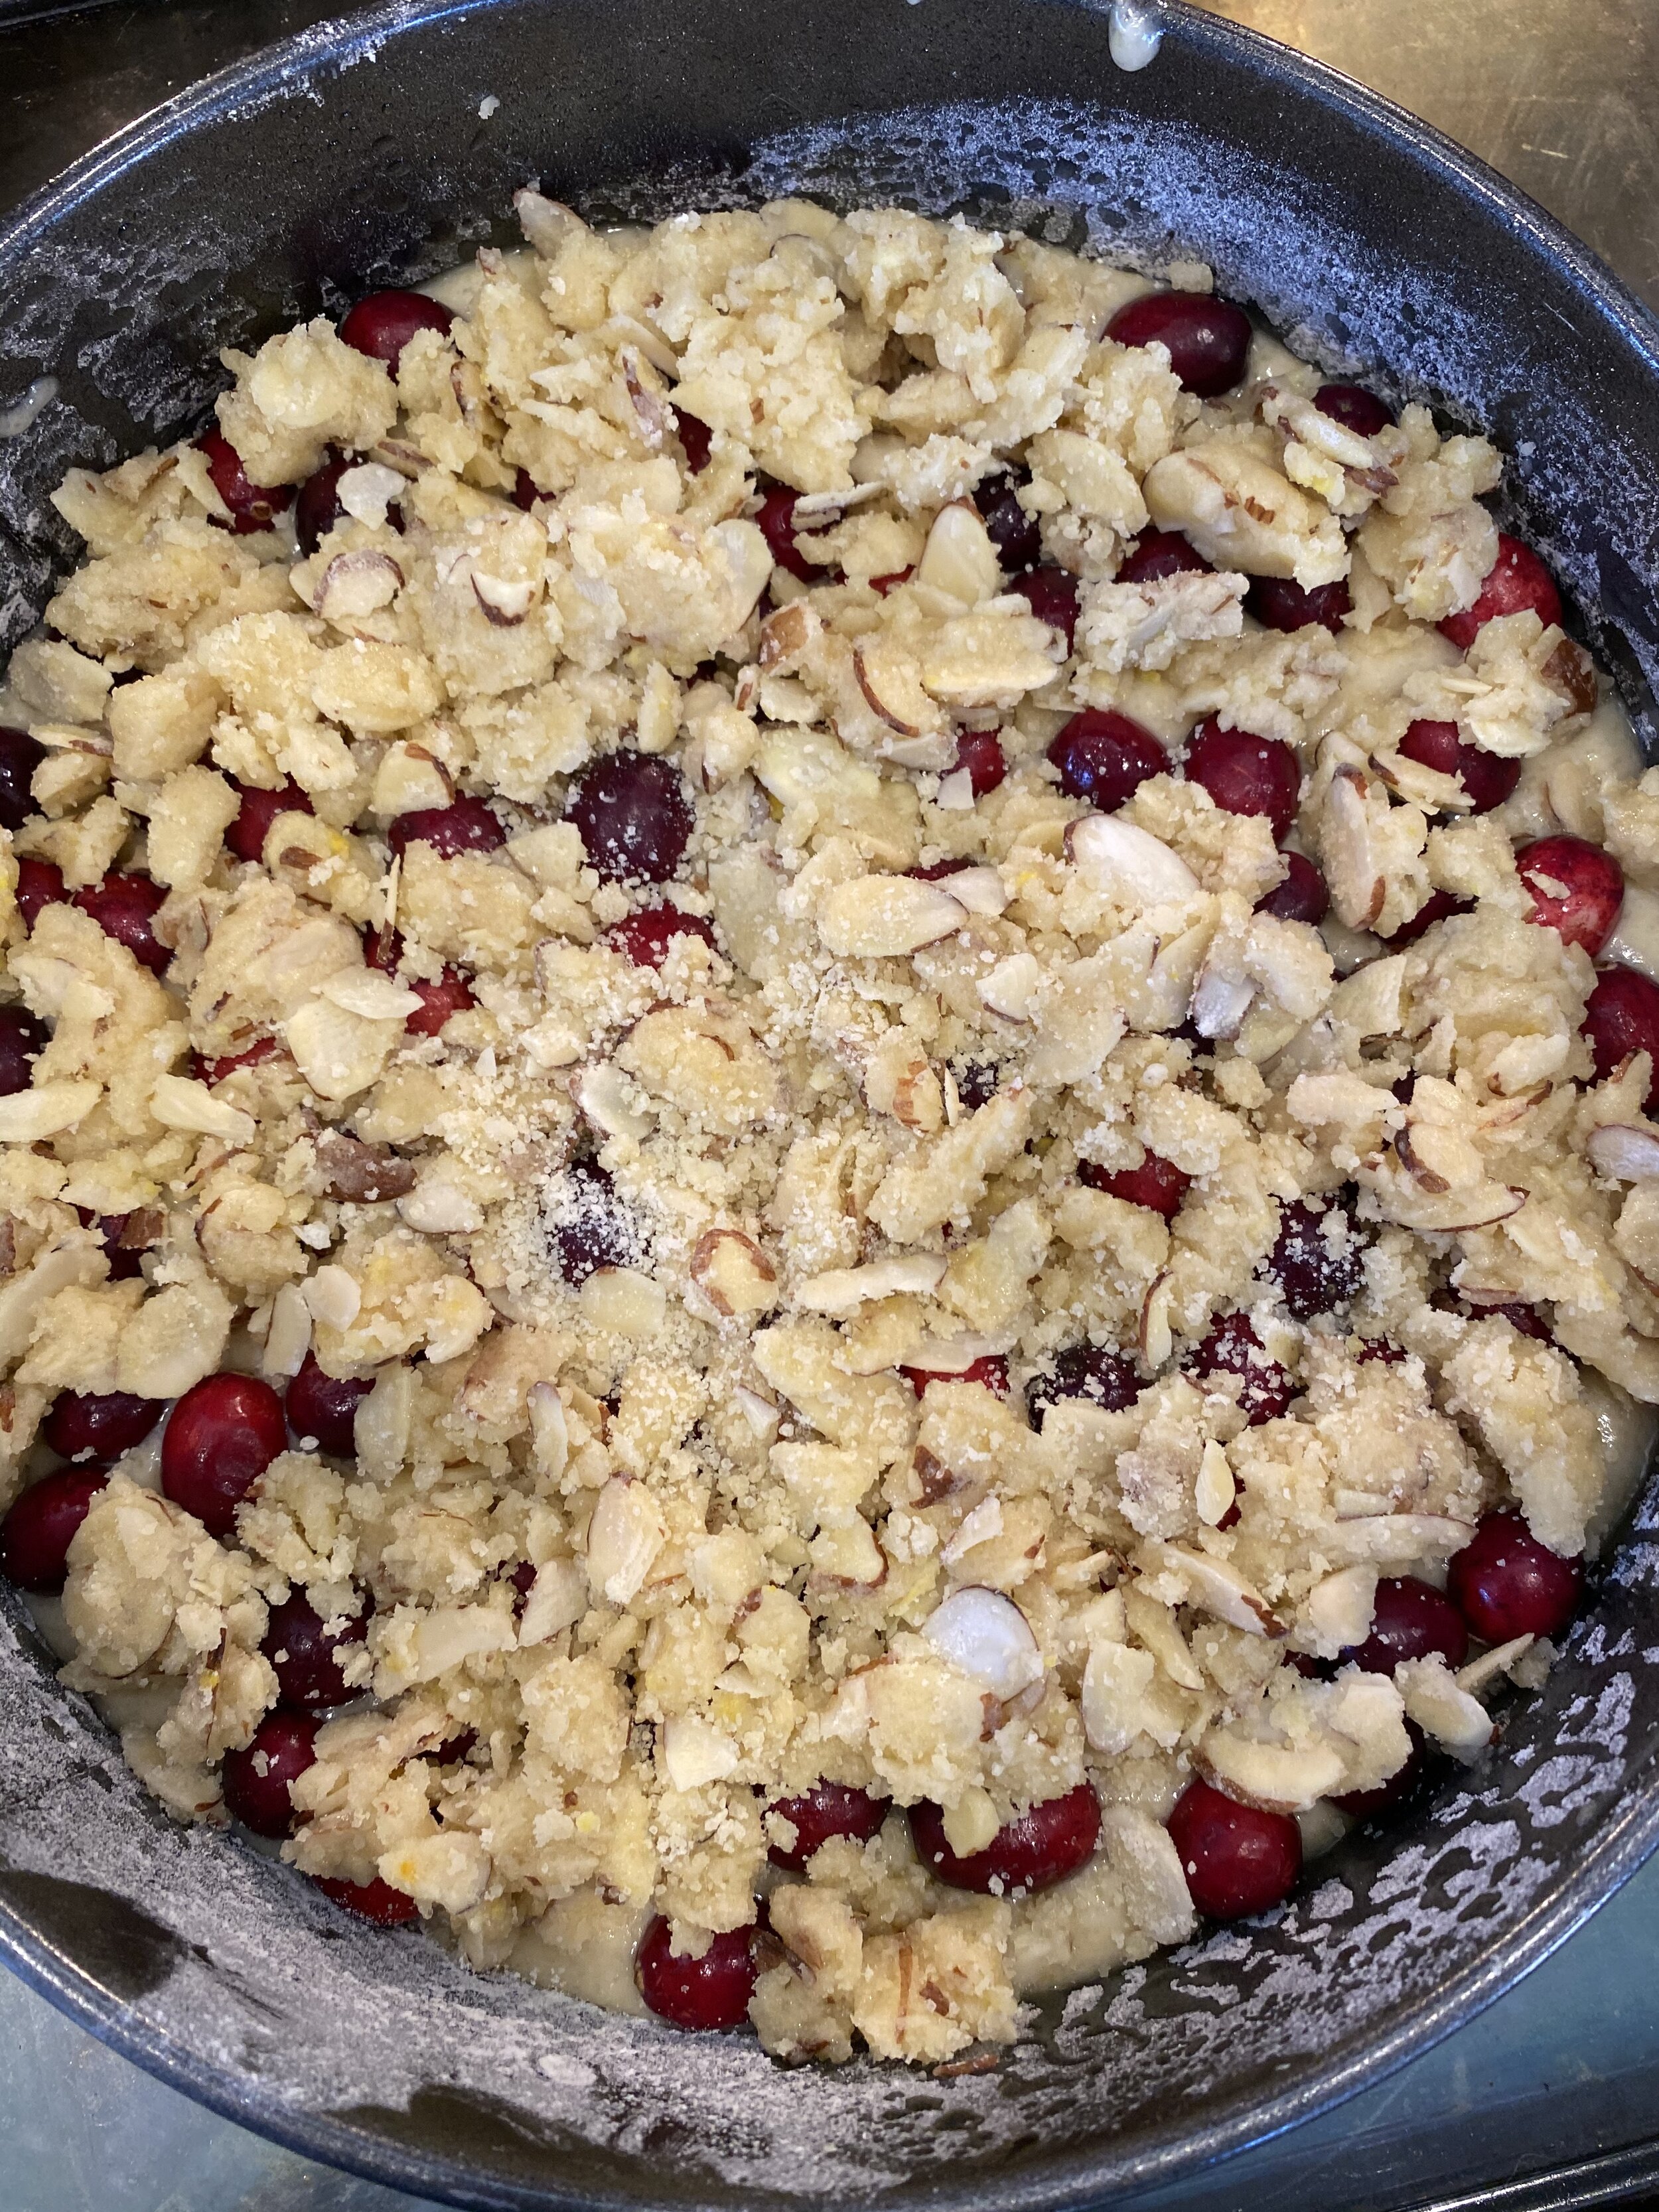
  6. In a medium sized bowl mix the flour and sugar for the streusel topping. Stir in the almonds and add the butter, stirring until the mixture is crumbly. Its easiest to just use your hands to work in the butter and crumble the mixture up.

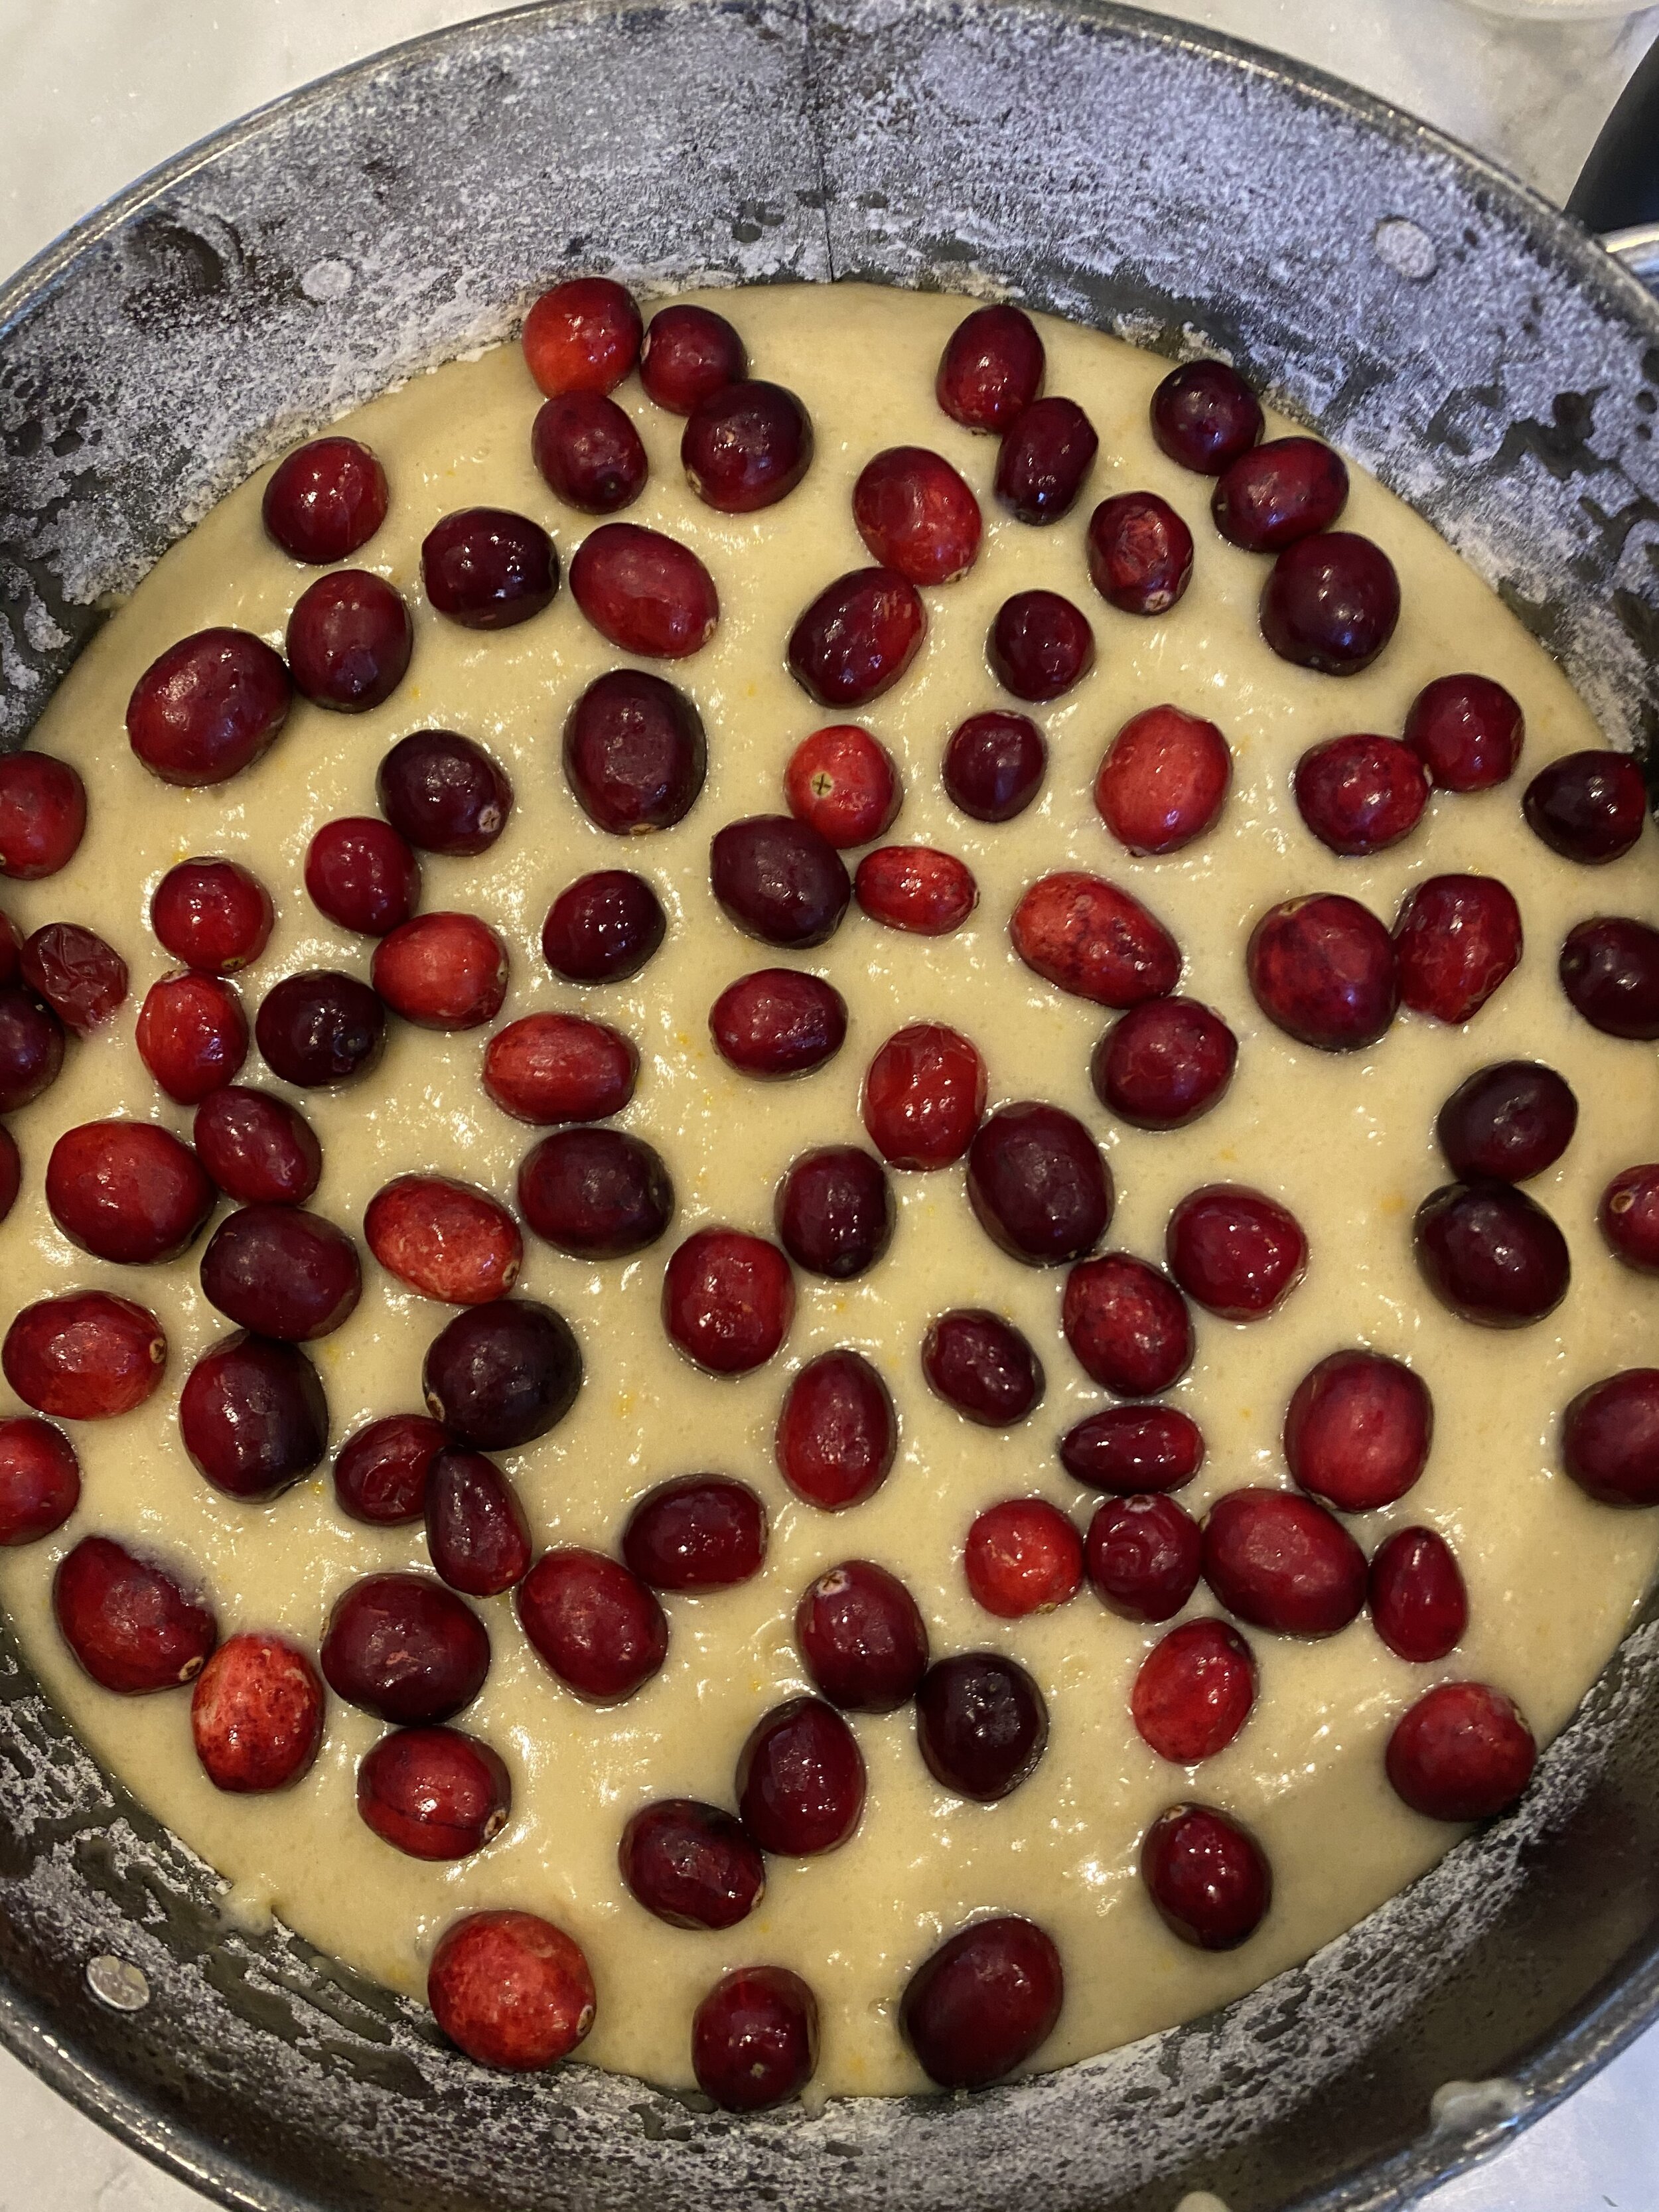
  7. Pour the cake batter into the prepared pan. Sprinkle the cranberries evenly over the top of the batter. Top with streusel mixture.

  8. Place the pan on the center rack of the oven and cook for 50 to 60 minutes, or until a tooth pick or cake tester inserted into the center comes out clean.

  9. Allow the cake to cook a bit before releasing the ring on the spring form pan.

  10. Serve warm or room temperature. Store in an air tight container at room temperature for 3 or 4 days.

If you like this recipe, then try these:

vegan flank steak

vegan flank steak

Vegan Chocolate Cobbler

IMG_8945.jpg

I am from the south and in the south, cobbler is a staple dessert.

Easy dump cobblers and cakes were an absolute staple in my family, especially growing up, and even still now.

Have you ever heard of the a Cupa, cupa, cupa, cobbler…its literally a cup of sugar, cup of flour, cup of milk, fruit and butter. It is, to this day, my step mom’s go-to peach cobbler recipe! And y’all, its delicious…and soooo flipping easy!

This chocolate cobbler isn’t as easy as the cupa, cupa, cupa reicpe, but its still pretty dang easy.

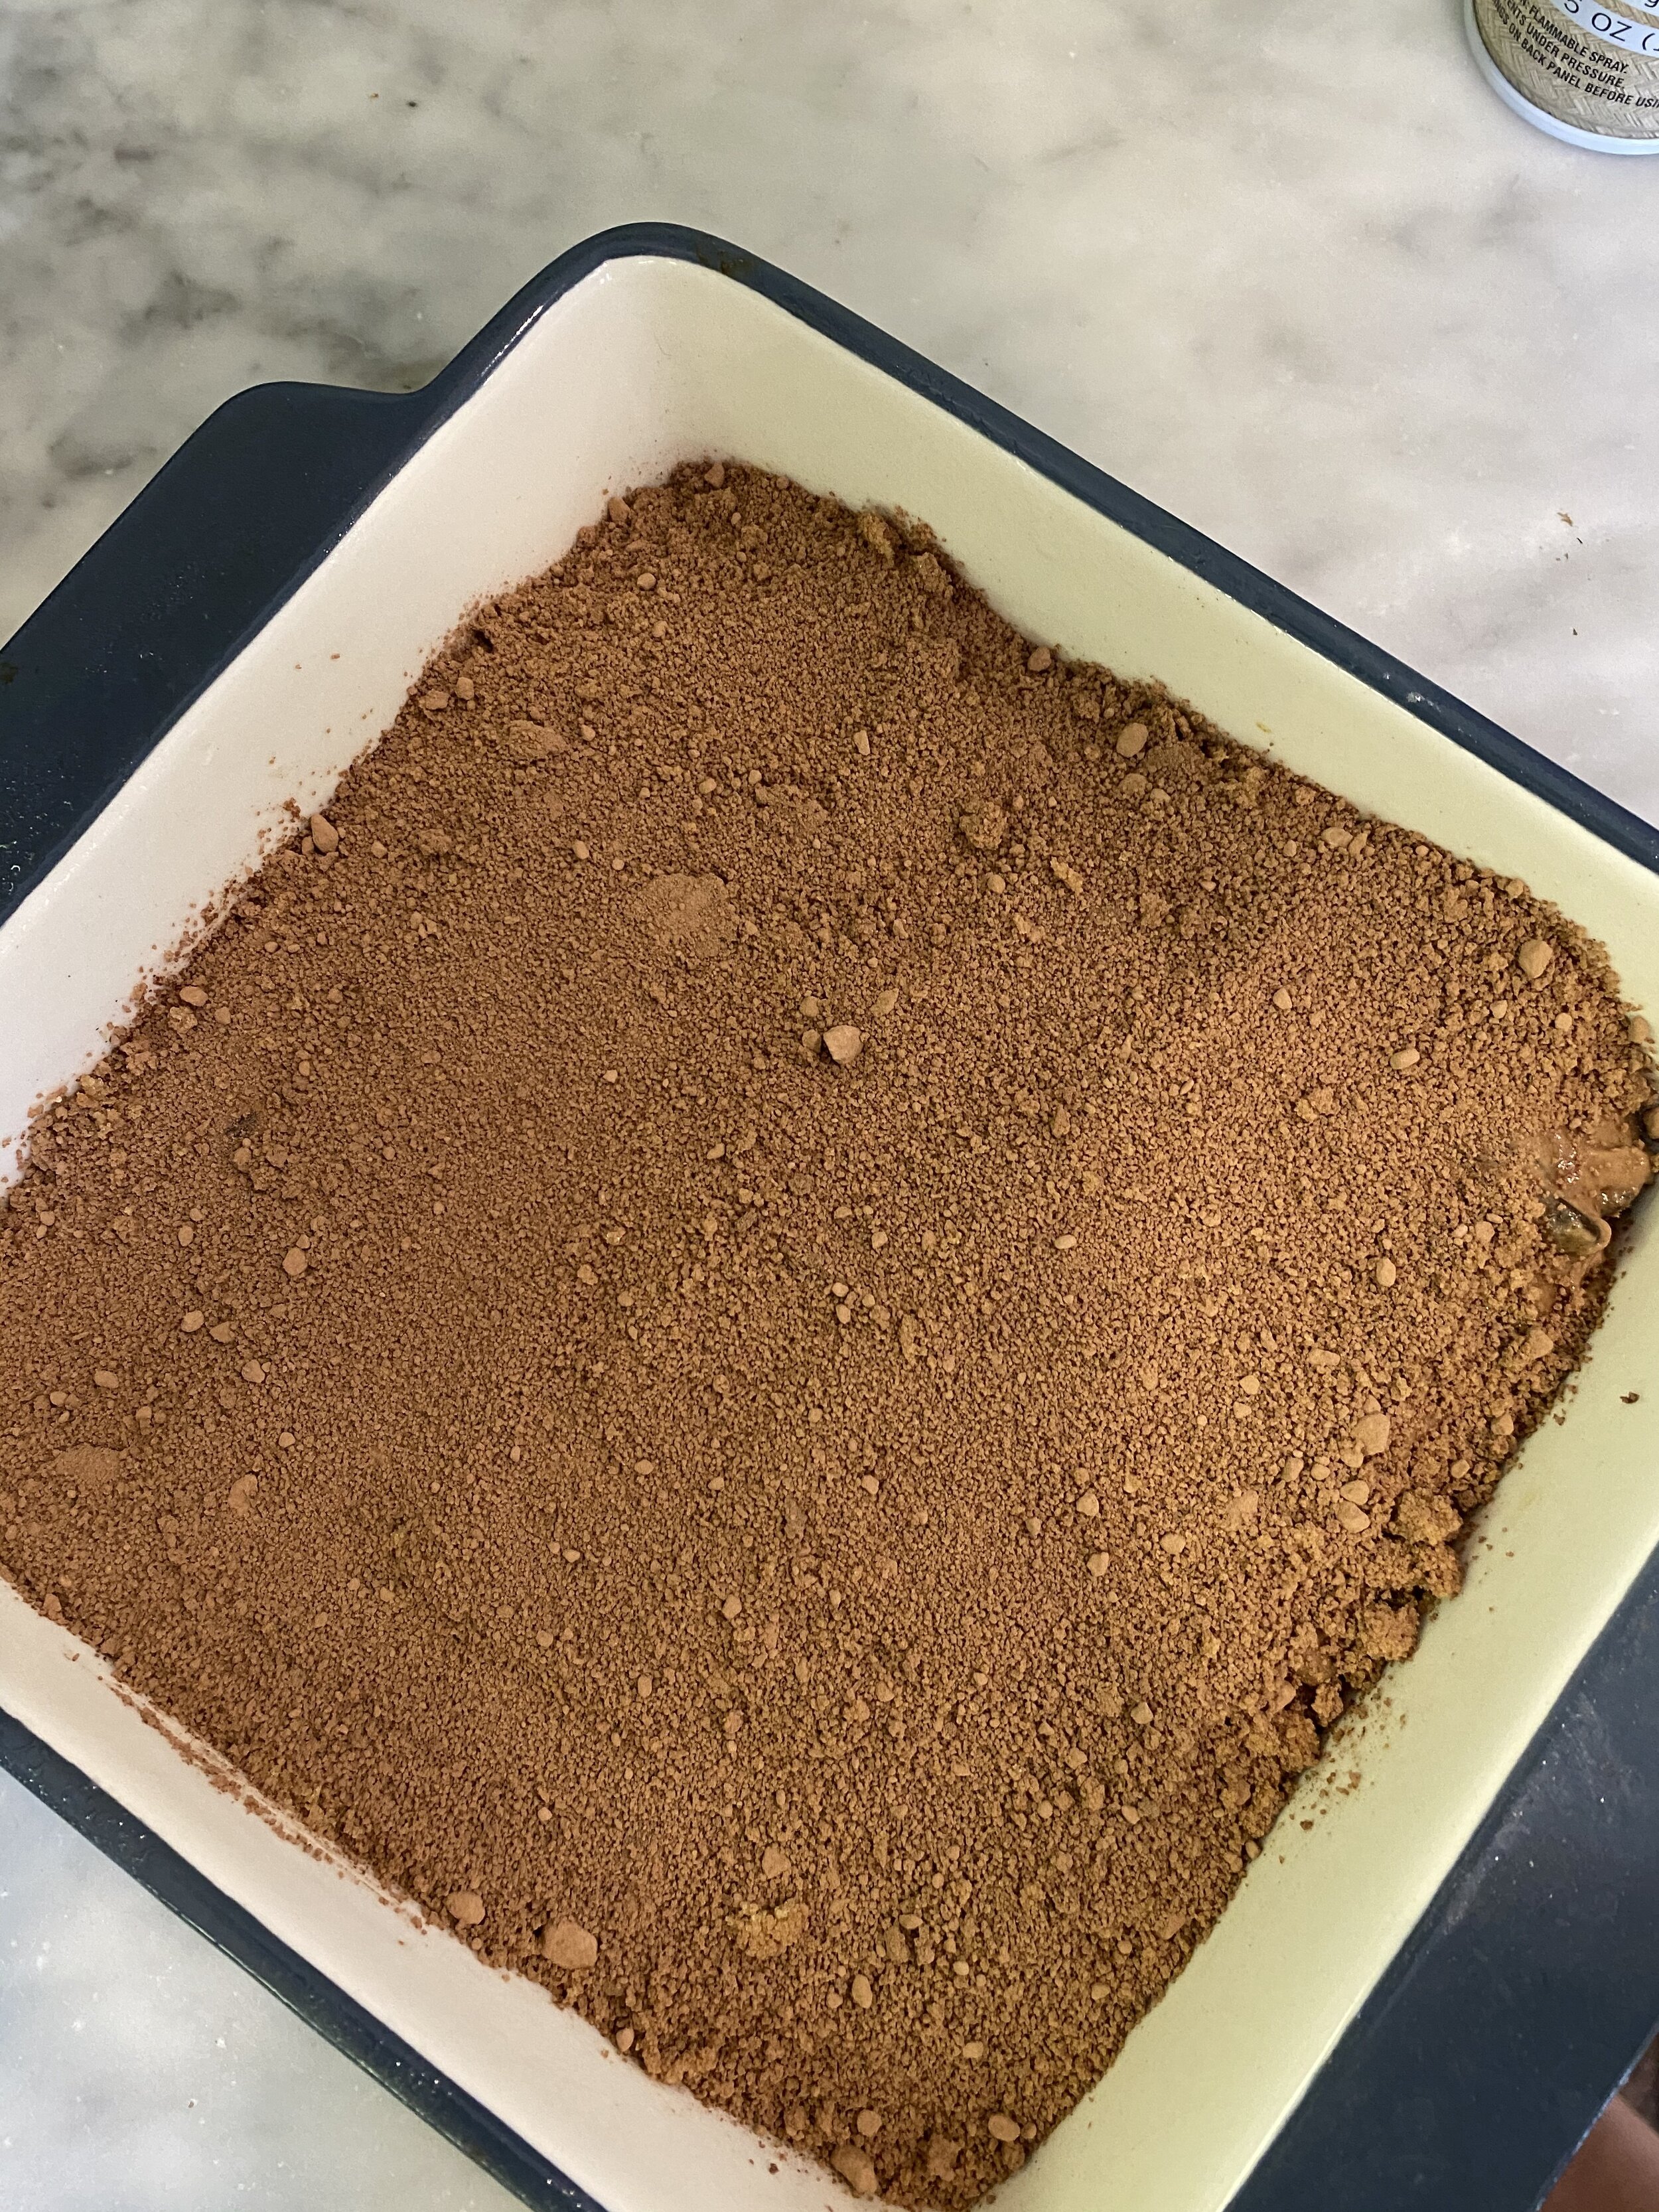
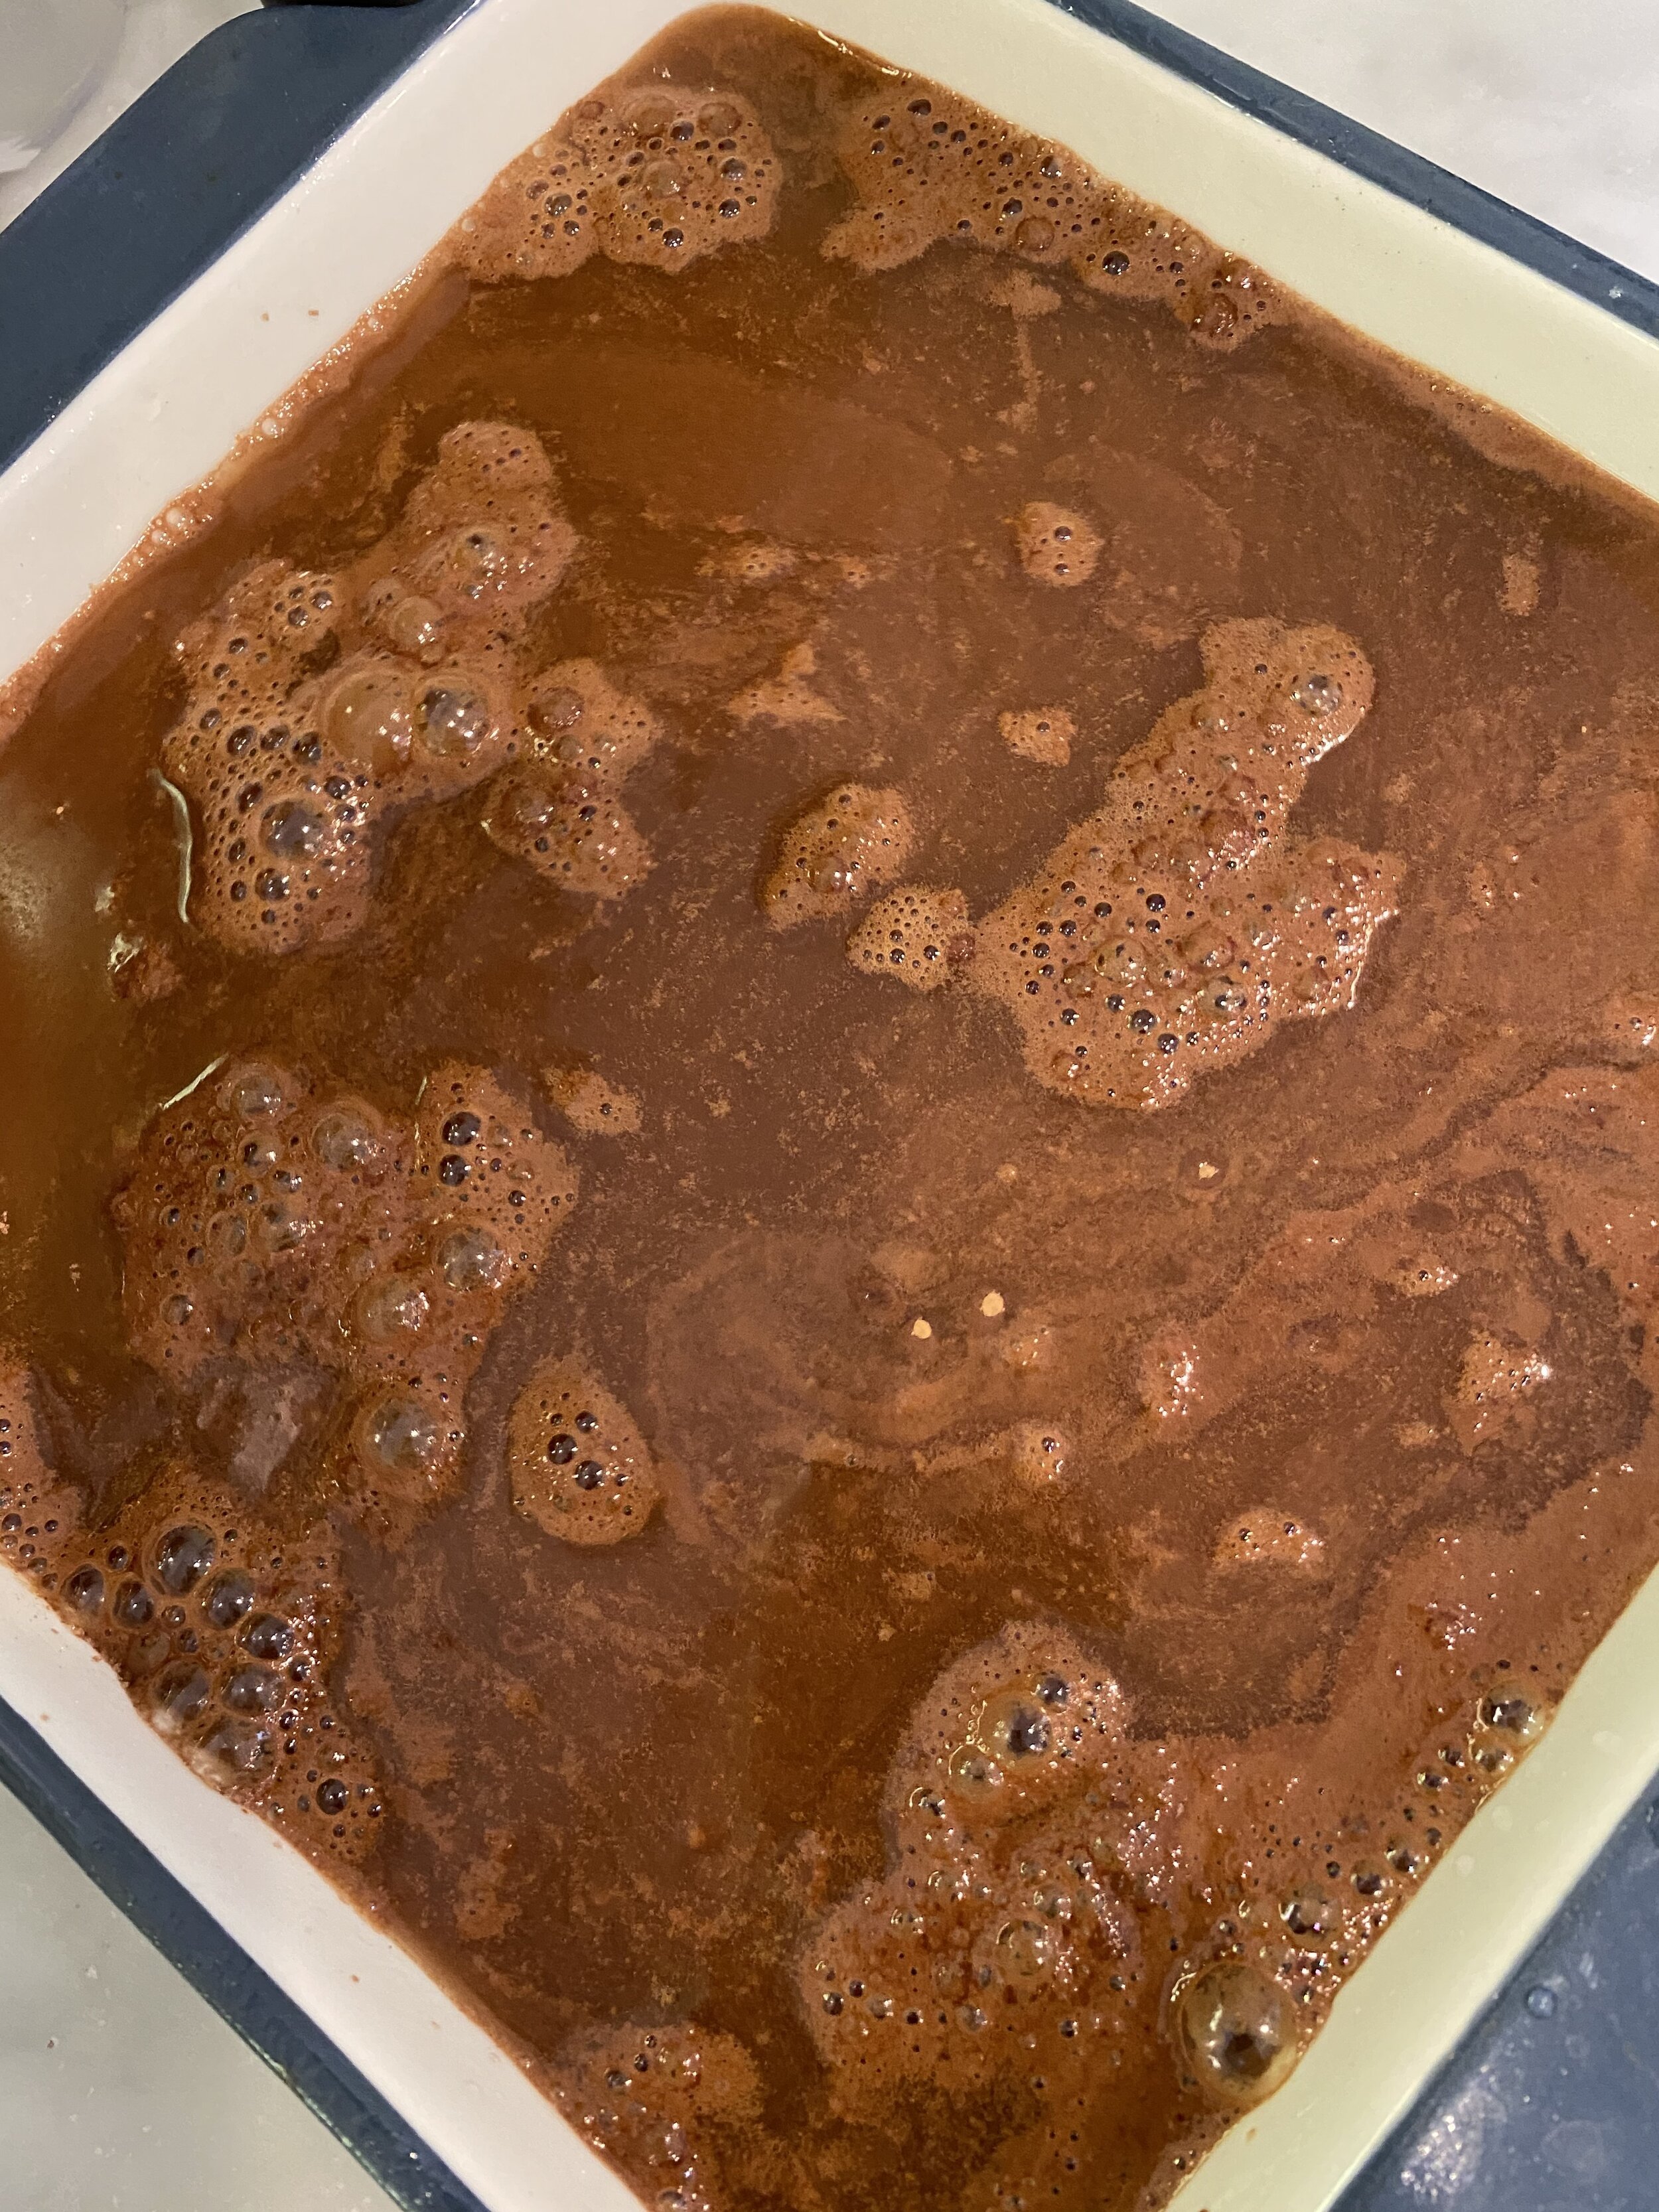
You just mix up an easy batter, sprinkle with some sugar and cocoa and pour hot water on top. Then kitchen science/magic does the rest.

IMG_8912.jpg

The batter bakes up and rises to the top, the sugar, cocoa, and hot water end up on the bottom, and turn into a gooey fudge sauce.

This vegan chocolate cobbler takes minutes to mix up, and about an hour to bake. It is actually best hot, so you can scoop it right out and slap some vegan ice cream on top and you are good to go!

IMG_8973.jpg

It taste like and extra gooey vegan brownie that has been drenched in chocolate sauce. You can can skip the ice cream but I wouldn't dream of it. I think the hot cobbler with the cold ice cream is the only way to eat any cobbler. It would be delicious with a vegan whip cream as well, but vegan vanilla ice cream is my go- to.

So if you are looking for a quick and easy dessert to satisfy even the strongest chocolate craving, this might be what you are looking for. It’s so easy I am certain my 9 year old, that only currently makes bowls of cereal or ramen, could make it. So I will go ahead and declare this a fool proof recipes, so easy even a kid can make it!!!

IMG_8939.jpg

INGREDIENTS:

  • 1 cup all purpose flour

  • 2 teaspoons baking powder

  • 1/2 teaspoon of salt

  • 3 tablespoons vegan melted butter

  • 1 teaspoon cinnamon (optional)

  • 3/4 cups sugar

  • 3 tablespoons cocoa powder

  • 1 cup vegan chocolate chips

  • 1/2 cup plant based milk (we like to bake with oat milk)

  • 1 teaspoon vanilla extract

TOPPING:

  • 1/4 cup cocoa powder

  • 3/4 cups brown sugar

  • 1 3/4 cups hot water

INSTRUCTIONS:

Preheat oven to 350 degrees

  1. In a medium bowl, whisk the flour, baking powder, salt, sugar, cinnamon, and cocoa. Add the melted butter and plant milk and mix until well combined. The batter should be close to the consistency of a brownie batter. If it still seems a little dry, you can add a few extra splashes of milk. Fold in the chocolate chips.

  2. Prepare an 8x8 baking pan by giving it a good spray with some oil, or you can wipe the inside of the pan down with some oil and paper towel.

  3. Pour the batter into the pan.

  4. In another bowl whisk the cocoa powder and brown sugar for the topping. Sprinkle it on top of the batter in the pan. So NOT stir it in, just sprinkle it in an even layer on top.

  5. Pour the hot water over the top of the topping. Again, do NOT stir. Just leave it be…seriously it’s that easy, y’all.

  6. Place the pan on the center rack of the preheated oven, and bake for about 45 minutes, to an hour. You want the batter cooked though, but there will be gooey, fudgy, syrupy, chocolate on the bottom, so as long as the top later seems cooked through and a tooth pick inserted comes out clean, its done.

  7. Scoop into bowls, and top with vegan ice cream ,or whipped cream to serve.

If you like this recipe, then try these:
IMG_8915.jpg

Vegan Sweet Potato Hand Pies

IMG_8765.jpg

If there is a pie I love equally to pumpkin pie, it is sweet potato pie. And if I’m being honest, I might even like sweet potato pie more than pumpkin.

In truth, when I was a kid I probably couldn’t even tell the difference between the two. The flavors and and spices are similar. The texture however is just a bit different.

Pumpkin pie tends to be denser, creamier, and smoother. Whereas sweet potato is lighter and seems to have a little more texture, and oomph to it. for lack of a better, more scientific description.

I grew up in the south, so sweet potato pie has always been a staple on any holiday table.

IMG_8772.jpg

Sweet potatoes are fairly inexpensive, and easy to find year round, unlike a pie pumpkins that tend to only be available the the fall in winter, when they are in season.

I also really love these vegan hand pies because they bake up so fast, are super easy to make vegan, and work well for serving at parties or as a holiday dessert. They also make nice treat to take into the office to share, or gifts around the holidays.

They work great for bake sales as well because its way easier to walk around holding hand pie than it is trying to walk around with a slice of pie on a plate. That’s just a fact.

So once again our amazing daughter, who is one of the best pie bakers I know, (this is fact, not biased opinion, that kids can out bake most adults I know) came in strong with a delicious crust while I whipped up the filling.

The dough for this vegan hand pie is delicious and also pretty easy to make. If you are not in the mood to make homemade pie dough however, you can always buy a vegan store bought roll out pie crust. Many brands are not vegan but there are brands that are. Often Lard is added to the curst so just be sure to check the ingredients or this vegan pie crust list from PETA.

IMG_8790.jpg

These vegan sweet potato hand pies are sweet, buttery, gooey, and full of my favorite fall spices. We actually used a chai spice blend for the potatoes and the glaze, but you can use any mix of fall spices, like cinnamon, cloves, ginger, and nutmeg. Whatever you like, or have on hand, add that!

So, if you have never had sweet potato pie but you are a fan of pumpkin, let me encourage you to try it!! Really, it is so delicious. Or if you have and love it as much as I do and need a vegan version of an old favorite, we are happy to oblige!

IMG_8780.jpg

INGREDIENTS:

THE FILLING:

  • 3 cups of peeled, diced sweet potatoes

  • 3 tablespoons brown sugar

  • 1 teaspoon vanilla extract

  • pinch of salt

  • 1 tablespoon maple syrup

  • 1 1/2 teaspoon chai spice blend (see how to make further down the page) or the spices listed below.

  • 1 teaspoons ground cinnamon

  • 1/4 teaspoon ground nutmeg

  • 1/4 teaspoon ground ginger

  • 2 tablespoons corn or tapioca starch

IMG_8794.jpg

THE DOUGH: (or use Pre-made vegan pie dough)

  • 2 1/2 cups all purpose flour

  • 2 tablespoons sugar

  • 1 teaspoon salt

  • 3/4 cups cold vegan butter

  • 1/4 vegan shortening

  • 2 tablespoons ice water if needed

  • 2 tablespoons plant milk plus 1 tablespoon maple syrup to brush dough with before baking

THE GLAZE:

  • 1 1/2 cups powdered sugar

  • 1 1/4 teaspoon chai spice mix (see below) or use a blend of any fall spices you like

  • enough maple syrup to bring it all togehter

CHAI SPICE BLEND:

This spice can be made and stored in an air tight container and used for all kinds of fall themed desserts!

  • 3 tablespoons ground cinnamon

  • 1 tablespoon ground ginger

  • 1 tablespoon ground clove

  • 1/2 tablespoon ground cardamom

  • 1/2 tablespoon ground black pepper

INSTRUCTIONS:

  1. Begin preparing the dough by adding the flour, sugar, salt , cold butter, and shortening to a food processor or a large bowl. If using a food processor, pulse until a crumbly dough forms. Add the ice water a little at a time if needed to bring it from a crumbly dough to a ball of dough. If using a bowl, mix ingredients with a spoon, again only add the water as needed until dough forms.

  2. Flatten the dough into a rectangle shape and tightly wrap with plastic wrap. Pop the dough in the fridge for AT LEAST 2 hours. You can pre make the dough a day or 2 ahead of time as well.

  3. While the dough is resting begin preparing the filling by brining a large pot of water to a boil. Once boiling, carefully add the cubed sweet potatoes. Cook unit the potatoes are soft and able to be pierced with a fork. Drain the water and return the potatoes to the pot.

  4. Add the brown sugar, starch, maple syrup, and spices to the pot. Using a hand potato masher or electric hand mixer, mash the potatoes until smooth. Let the mixture completely cool.

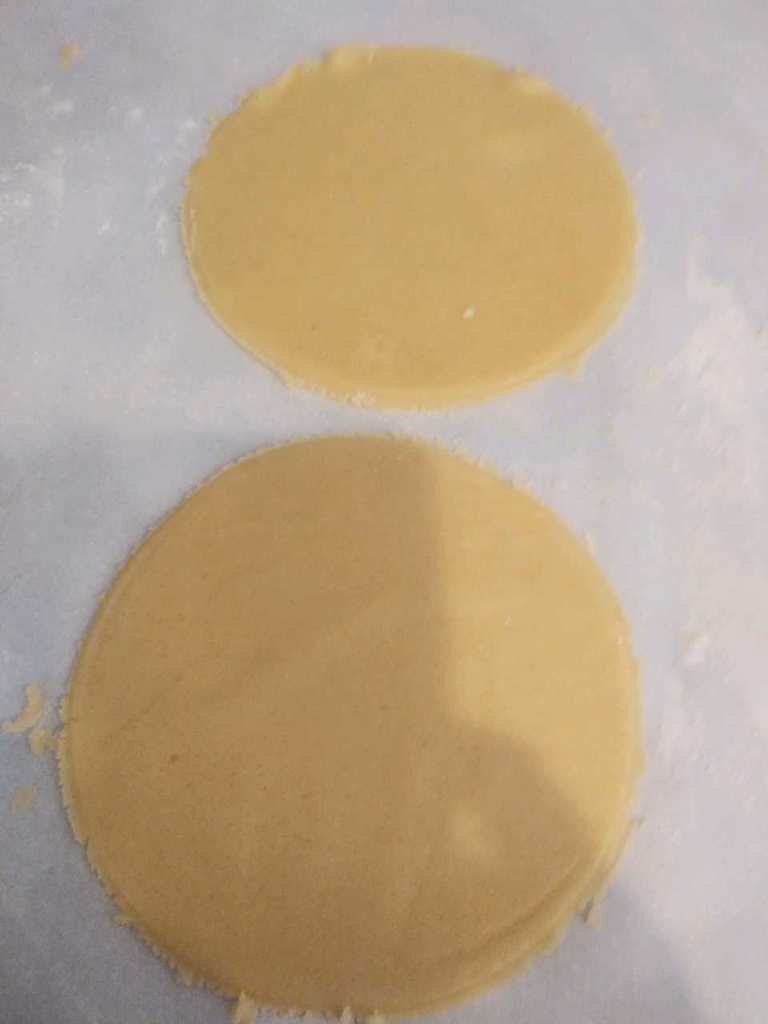
  5. Once the dough has rested, remove from the fridge and allow to sit out on the counter for about 5 minutes. On a large, clean, lightly floured surface, begin rolling the dough out into a large rectangle until it is somewhere between 1/8- 1/4 of an inch thick. You don’t want the dough too thin so it rips when you are forming the pies, but not too thick either. (refer to picture above)

  6. Using a small cereal bowl or something similarly sized, cut circles from the dough.

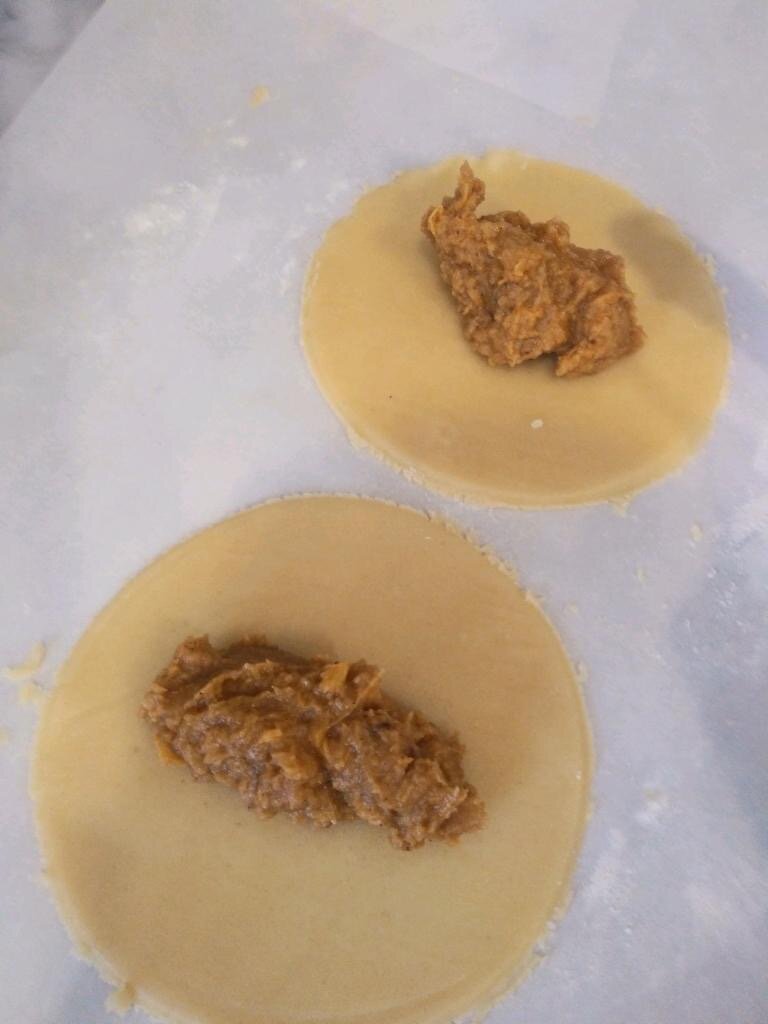
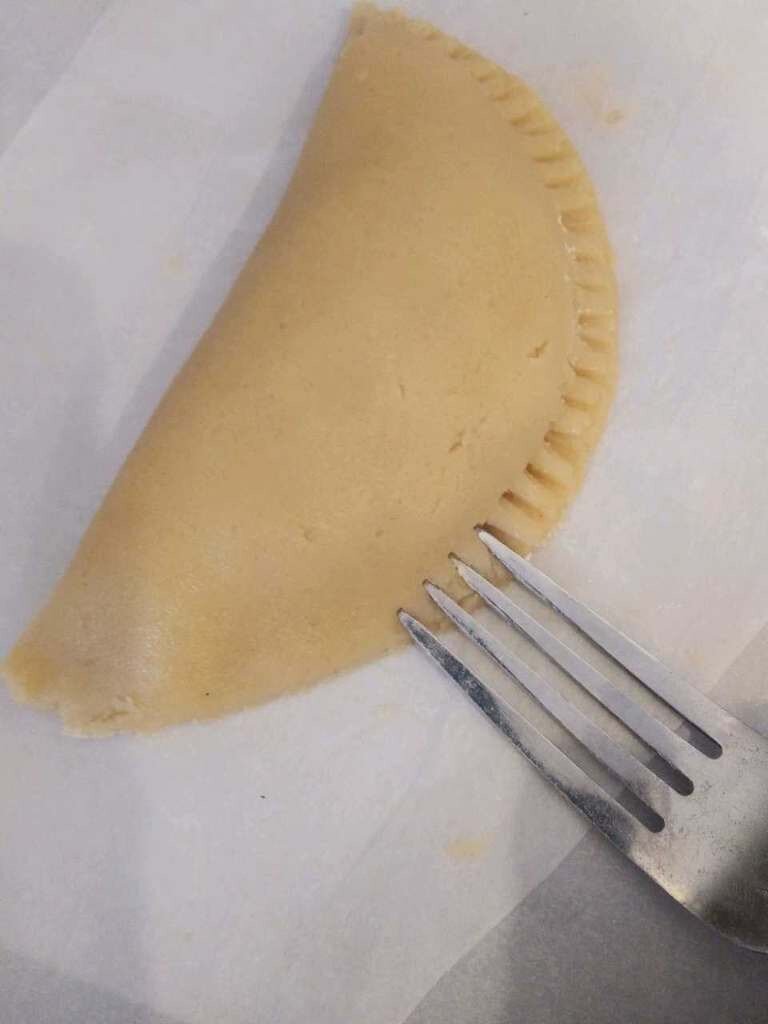
  7. Scoop a few tablespoons for filling into the center of each circle. Gently fold the dough over and use a fork to press into and seal the dough around the edges, making sure the two sides of dough are actually pressed together.

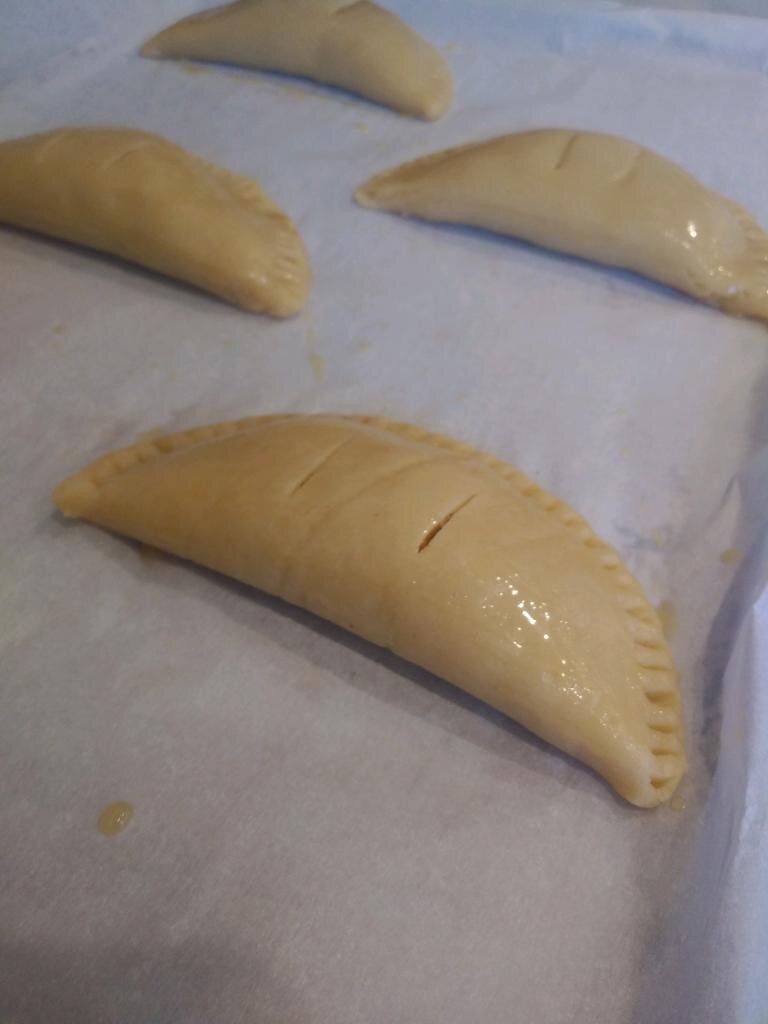
  8. Preheat oven to 350 degrees. Cut two slits in the tops of the pies. Mix up about 2 tablespoons plant milk ( oat milk browns really well) and a tablespoon of maple syrup and brush the tops of the pies with the mixture. Place the hand pies on a parchment lined baking sheet.

  9. Place the baking sheet in the oven and bake the pies on the center rack for about 25 to 30 minutes. Or until the pies are browning and seem cooked through.

  10. Allow the vegan sweet potato hand pies to cool at room temperature for about 10 minutes.

  11. Mix up the glaze ingredients in a small bowl and add just enough maple syrup until you have your desired consistency. Spoon glaze over pies and let set before serving. You can sprinkle some extra cinnamon or chai spice on top of the glaze if you like.

  12. Store hand pies in an airtight container in the fridge or at room temp.

Yields 9-10 pies, or you can make smaller pies using a smaller bowl and it would yield more

If you like this recipe, then try these:

IMG_8767.jpg

Vegan Chai Spice Cookies

IMG_8601.jpg

We are big chai fans in this house. Well, at least half of us are.

Recently we stumbled upon a recipe book with all kinds of chai spice recipes in it, and it got our wheels turning.

One of my daughters favorite cookies to bake is a Vegan Mexican wedding cookie. You may call it a Russian tea cookie, a snow ball, or some other name because there are so many.

We often make these cookies gluten free and have added instructions to make them gf if that is your preference! Just use any good all purpose gf flour blend and they will turn out great!

So she decided that it would be extra delicious to mix the Mexican wedding cookie with a little spice so to speak. The perfect blend of warm chai spices with a nutty powdered sugar covered cookie that almost melts in your mouth!

Y’all, I could not stop eating these vegan chai spice cookies!! They are addictive, perfectly spiced, and taste like fall!!

IMG_8598.jpg

These vegan chai spiced cookies are pretty easy to make but a little time consuming if you decide to shape them into a crescent. This is why we normally just shape them into balls.

These cookies are great for just about any occasion, or fall holiday. I mean, we made them on a random Monday because we were in the mood for cookies, which seems like a good enough occasion for me!!

So if you are a fan of a buttery, traditional snow ball/Mexican wedding/Russian tea cookie, and love all things chai, I know without a doubt you will love these easy vegan chai spiced cookie.

IMG_8588.jpg

INGREDIENTS:

Chai Spice Blend: (keep stored in a cool dry place in an air tight container)

  • 3 tablespoons ground cinnamon

  • 1 tablespoon ground ginger

  • 1 tablespoon ground clove

  • 1/2 tablespoon ground cardamom

  • 1/2 tablespoon ground black pepper

Cookies:

  • 2 1/2 cups all purpose flour or gluten free flour blend (we use this one, it is hands down the best we have tried)

  • 1 cup vegan butter, softened

  • 1 cup powdered sugar, plus extra for rolling

  • 1 teaspoon vanilla extract

  • 1/2 teaspoon almond extract (optional)

  • 2 teaspoons chai spice blend

  • 1/4 teaspoons salt

  • 1 cup almond meal ( ground up almonds)

  • 1/2 teaspoon chai spice blend, plus 1-1 1/2 cup powdered sugar for coating

IMG_8606.jpg

INSTRUCTIONS:

Preheat oven to 350 degrees

  1. In large bowl mix softened butter and sugar until creamy. Add in the vanilla and almond extracts and mix.

  2. Add in the dry ingredients and mix until well incorporated. The dough be dry but wet enough to hold the shape of a ball. You can find almond meal in the baking section of most stores now. It is NOT almond flour. It is more coarse. We normally just pop some almonds in a blender to make the meal.

  3. Line 2 baking sheets wth parchment paper. Using a small cookie scoop or a talbesppon, scoop dough and roll into balls. The cookies do not really spread, so you do not have to space them out too much. You can also scoop the dough and shape it into a crescent shape. Whatever is your preference, but shaping them into balls is a lot quicker!

  4. Bake for about 12-15 minutes, just until the cookies are starting to brown around the edges.

  5. Allow cookies to cool completely before rolling them in chai spice and powdered sugar. If the cookies are even still warm it will cause the powdered sugar to cake up and melt on the cookies. So make sure they are totally cool.

  6. Store cookies in an airtight container.

If you like this recipe, then try these:
IMG_8591.jpg

Vegan Orange Creamsicle Pie

IMG_8028.jpg

Flinstone’s push up pops. That was my all time favorite frozen treat growing up.

I love all things orange creamsicle, actually. Orange is one of my favorite fruit flavors and I will choose it every time.

So, the other day after my daughter had made some lemon curd for some little vegan lemon meringue pies, I asked her if she thought she could make a curd with oranges so we could attempt an orange creamsicle pie.

In my mind it was going to be orange creamsicle dreamy deliciousness. She decided it needed a graham cracker crust and I had not arguments with that idea.

IMG_8042.jpg

So just as quickly as the pie was dreamed up, she had whipped it up and I was shoving it in my face.

The best part about this vegan creamsicle pie is the it is technically a no bake vegan pie. You do have to bake the crust but the pie filing is quickly cooked in a pan, then it just has to cool and set!

We piled our pie high with the best sweet aquafaba whip ever! You can use store bought vegan whipped topping but I am telling you this one is so cheap to make and soooo tasty! All you need is some sugar, a can of white beans, and a pinch of cream of tater to stabilize it. Thats it!! Its so fluffy and sweet and perfect!

IMG_1495.jpg

So if you love orange creasicle things too, and you love easy vegan pies, then by all means, make this one ASAP. I don’t think you will be disappointed. And once again, lets give Peyton all the high fives for her amazing baking abilities and always humoring my many pie and cakes ideas.

I am pretty sure our powers combined are responsible for that extra 5 lbs that seems impossible to lose, and thats ok. I’ll take it for the sake of pie.

IMG_8050.jpg

INGREDIENTS:

The Crust:

  • 2 sleeves of graham crackers (make sure the brand is vegan)

  • 6 tablespoon vegan butter, melted

The Filling:

  • 2 cup coconut cream, divided ( heavy coconut cream in the can, shaken well)

  • 4 tablespoons coconut oil

  • 2/3 cup fresh squeezed orange juice

  • 1 cup white sugar

  • 1/2 cup corn starch

  • pinch of salt

  • zest from 1 orange

INSTRUCTIONS:

Preheat oven to 350 degrees

  1. Place 2 sleeves of graham crackers in a food processor and pulse until you have achieved a crumb consistency. If you do not have a food processor you can place the crackers in a large zip lock bag. Make sure all the air is out of the bag and using a rolling pin, roll over the bag crushing up the crackers to a crumb.

  2. If using the food processor, add the melted butter and pulse to mix. If using a bag, pour the crumbs and butter into bowl and mix to incorporate. Spray a 9 inch pie plate or pan with a light coating of oil and press the crumb mix into the pan and up the sides. Place in the middle oven rack and bake for about 20 minutes. Remove and allow to cool.

  3. In a medium sauce pan, whisk together 1 cup coconut cream and remaining curd ingredients over medium/low heat until the mixture thickens (about 5-10 minutes.) Just make sure it has thickened before removing from the heat. It will thicken more as it cools but it needs to simmer and thicken in the pot before removing it from the heat.

  4. Remove from heat and stir in the remaining 1 cup coconut cream. Pour the curd into a bowl and pop it into the fridge for about an hour.

  5. Pour the cooled orange curd filling over the pie crust and place back in the fridge allowing the filling to set up (it should be ready to slice in about half an hour.)

  6. While the pie is in the fridge, prepare a batch of sweet aquafaba whip according to directions. Once the pie is set you can top it with the whip and serve. I always wait to top the pie with the whip right before serving. Aquafaba whip will begin to weep once it gets warm or sits in the fridge for a day or two so keep that in mind for serving.

  7. If you are feeling fancy, you can add some orange slices, or zest to the top of the pie for garnish.

If you like this recipe, then try these:
IMG_8041.jpg

Vegan Mason Jar Lemon Meringue Pies

IMG_7857.jpg

I am sucker or anything lemon.

I am a sucker for anything lemon meringue.

I am sucker for all desserts served in single serving portions, like a mason jar.

I learned a long time ago that I could make some of my favorite desserts in mason jars to make them easier to serve and easier to travel with.

This includes and is not limited to pies! Especially vegan lemon meringue pie.

All you need is a solid lemon curd recipe (and we have that for sure) some vegan pie dough, and super simple vegan meringue (again, we got you covered.)

I know everyone doesn’t feel like making pie dough from scratch, so I have suggested for this recipe you buy pre-made. There are several vegan pre-made vegan pie doughs available. It is easiest to pie the box of 2 rolled pie crust, but if you can not find that, you can buy a vegan frozen pie in the pan, let it thaw and roll it out. (I have done this in a pinch.) You can also get adventurous and make your own from scratch. I have not included a recipe for dough here, but there a lot of good ones out there that are pretty simple to make, if you have the time and willingness.

For this curd we use corn starch to achieve the thickness we want. You can use tapioca but I urge against it just because it will yield a stretchy curd that I am not a huge fan of in this application. In some recipes I prefer the stretchiness of the curd for keeping it put (pop tarts, donuts) but for this recipe we want a silky, creamy, thick curd that is more palatable since its the main attraction!

As for the meringue, we use our delicious sweet aquafaba whip, all toasted up. It is just as good if you don’t toast it, but I love a toasty brown meringue on my pie. It is just up to you and your preference.

IMG_1495.jpg

If you have never made aquafaba meringue before, don’t be intimidated! Its actually really easy and really, really, really, tasty! It works very well in place of whip cream in recipes, or toasts up beautifully to mimic meringue, or even a marshmallow fluff!

So if you are looking for a solid lemon meringue pie recipe that is a little different and definitely fun, then try making these vegan mason jar lemon meringue pies! They are adorable and delicious and just what summer called for!

IMG_7829.jpg

*You will need six, 6 oz mason jars for this recipe

INGREDIENTS:

THE CURD:

  • 2 cups coconut cream, divided ( heavy coconut cream in the can, shaken well)

  • 4 tablespoons coconut oil

  • 2/3 cup lemon juice

  • 1 cup white sugar

  • 1/2 cup corn starch

  • pinch of salt

  • Optional: 2-4 teaspoons lemon zest for extra lemon flavor

  • 1/4 teaspoon turmeric for color

REMAINING INDREDIENTS:

IMG_7835.jpg

INSTRUCTIONS:

  1. In a medium sauce pan, whisk together 1 cup coconut cream and remaining curd ingredients over medium/low heat until the mixture thickens (about 5 minutes.) The curd will continue to thicken as it cools.

  2. Remove from heat and stir in the remaining 1 cup coconut cream.

  3. Allow curd to cool.

  4. Preheat oven ot 350 regress

  5. Roll out pie crust on a floured surface, and cut circles in dough that are roughly the size of your jar lid. We used a small glass to do thiS. They will shrink up when you bake them a little bit, so its ok if the cutter is a tiny bit bigger than the lid, but try to get it about the same size. You will need 3 circles per jar. Place the dough circles onto a parchment paper lined baking sheet, add another layer of parchment on top. Place another baking sheet on top of parchment, so it is sitting on top of the pie dough circles. This is going to help the crust to not puff up, but stay flat and crisp which for this recipe is what we want. Pop the trays in your preheated oven on the middle rack for about 20-25 minutes (or they are brown and crisp.) When the crusts are done, remove from oven and allow to cool.

  6. While the crust is baking, prepare the sweet aquafaba whip according to instructions.

  7. Begin building your vegan lemon meringue pies by first placing one circle of pie crust in the bottom of the jar. Fill half full with curd, then place another circle of pie crust, curd, then one more crust. Top with a big scoop of sweet aquafaba whip meringue.

  8. You can server the meringue as is or use a kitchen torch or brown the tops. (originally I suggested toasting them in the oven as baking in mason jars seems to be a common practice. However most brands are not tempered glass, and advise against baking in them. That said, I don’t want to suggest you do something that is going to cause glass to shatter in your oven, regardless if it is commonly done or not)

  9. We like to serve these right aways as aqufaba meringue will begin to weep over time, plus the freshly toasted meringue is most delicious when still warm. These do however hold up pretty well in the fridge for a day or so. If you are taking these to an event or get together, I suggest torching the tops right before you serve them.

If you like this recipe, then try these:
IMG_7843.jpg

Vegan Fiddle Faddle (Caramel Corn with Peanuts)

vegan fiddle faddle

vegan fiddle faddle

I am guessing that not everyone knows what Fiddle Faddle is. So incase you don’t know, I’ll tell ya!

It’s the most delicious caramel popcorn and peanuts all mixed together and it taste like my childhood.

My dad always, ALWAYS, had a box of Fiddle Faddle in our pantry and I loved it as a kid. It was sweet, and salty and crunchy, and sticky, and peanutty perfection!

After not thinking about fiddle faddle in probably 25 years, I suddenly began craving it the other day. This is especially odd because I am not a big popcorn eater. Movie theater popcorn has made me sick to my stomach my whole life. I have either myself been in braces, or 2 of my 4 kids have been in braces at some point over the last 7 years, so we don’t eat a lot of popcorn in this house. ( popcorn is a big NO when wearing braces)

vegan fiddle faddle

vegan fiddle faddle

But, as of last month nobody is wearing braces (hallelujah!!! but we still have 2 kids to go) and I decided my kids needed to learn the joy of box of Fiddle Faddle. But, like most tasty treats from my childhood, Fiddle Faddle is not vegan. And like most tasty treats from my childhood, it was my responsibility to try and veganize them so my kids could know the same happy joy.

I would love to claim I made this, but it was actually my super talented 14 year old daughter who played with a caramel recipe until it was just right. She takes charge where all things vegan baking and sweets are concerned. She is beyond gifted and a natural in the department! I was pretty much just in charge of popping the corn and not starting a fire. That is a story for another day.

This caramel is perfect. Not gritty (like the first attempt) but crunchy and chewy, and just right. The peanuts make this caramel corn extra special and they are my favorite part. Again, I don’t love popcorn on its own that much, but add peanuts and salty, sweet buttery caramel, and I’m all in.

So if you are a long time Fiddle Faddle fan who has also been craving a box, or you just happen to love caramel corn and needed a vegan recipe, this Vegan Fiddle Faddle recipe should be just the fix you are looking for.

vegan fiddle faddle

vegan fiddle faddle

INGREDIENTS:

  • 2 1/4 cups white sugar

  • 6 tablespoons water

  • 6 tablespoons vegan butter (we used Earth Balance)

  • 1 teaspoon vanilla extract

  • pinch of salt

  • 1 to 1 1/4 cups shelled peanuts

  • 10 cups popped popcorn ( 1/2 cup pre popped kernels)

INSTRUCTIONS:

vegan caramel corn

vegan caramel corn

  1. Begin by popping the popcorn. I heat a large dutch oven over medium heat with the teaspoons of a neutral flavored oil. Add two or three pop corn kernels to the pot and wait for them to pop. Once they have popped add the 1/2 cup of kernels to the pot and reduce the heat to medium/low. Place a lid over the pot and wait until you hear no more popping. I often shake the pot around while it’s popping to avoid burning the pop corn. Remove the pot from the heat but leave the lid on so any stray kernels that may still pop stay put. (you could also just pop a few bags of microwave popcorn if you are not into loose kernels or use whatever popcorn popping machine you may have….we are pretty old school poppers in this house)

  2. In a medium sized pot, over medium heat add sugar and water. Once the sugar has dissolved, add the peanuts to the pot.

  3. Increase the heat to medium/ high and let cook until the mixture turns an amber/brown color, stirring occasionally. Be careful not to let the mixture get too dark, as this will mean you burned the sugar. Depending on the kind of pot you are using, this could take 5-7 minutes.

  4. Remove the pot from the heat and add the butter, vanilla, and pinch of salt and stir well. It might look separated and like its not going to come together, but once the butter heats up, it will mix together.

  5. Carefully pour the mixture over the pot of popcorn. Using a large spoon, stir the best you can, trying to evenly coat all the popcorn.

  6. Lay a large sheet of parchment paper out on your counter top and pour the popcorn out to cool.

  7. Store cooled caramel corn in an airtight container at room temperature.

If you like this recipe, then try these:
vegan fiddle faddle

vegan fiddle faddle

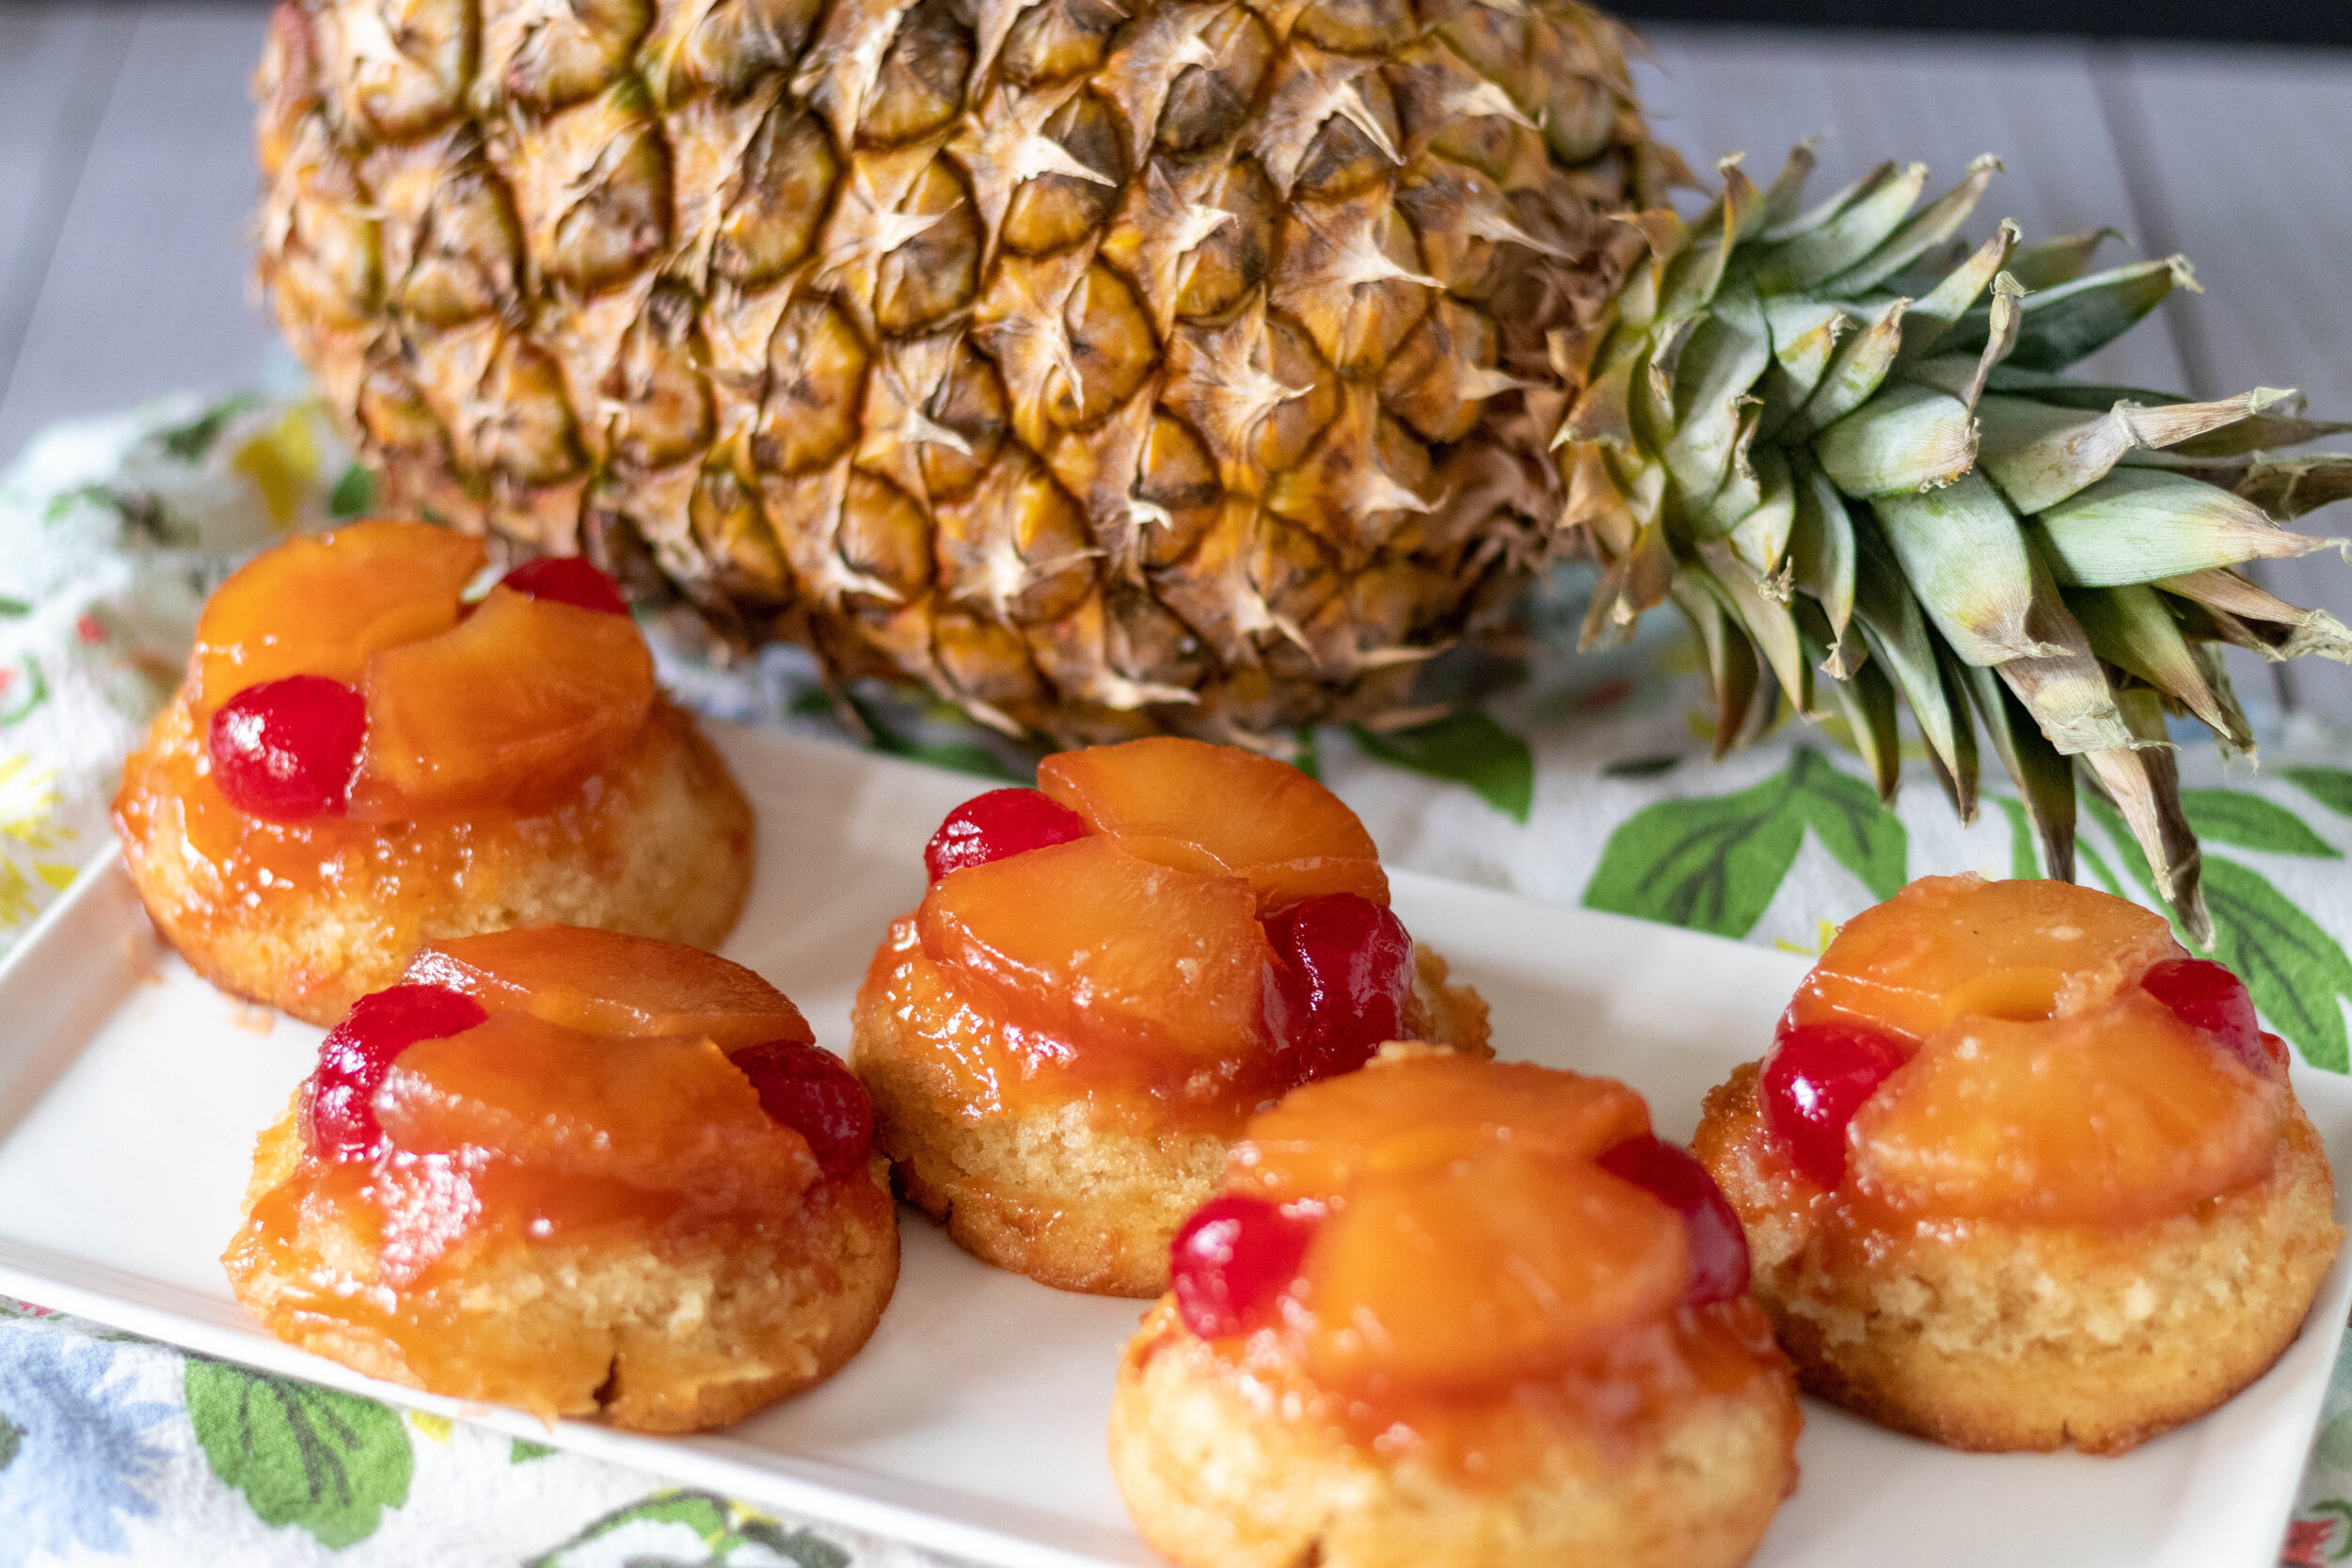
Vegan Mini Pineapple Upside Down Cakes

Vegan Pineapple upside down cake

If you follow this blog at all, you may have noticed my affection for making things in muffin tins.

Desserts, breakfast, dinner, you name it, if it fits in a muffin tin, I have put it in a muffin tin.

I have recipes for muffin cup quiche, lasagna, sausage tater tot cups, green been casserole, tacos, Banh Mi. serious sooo many things.

So it was only a matter of time before we made one of our all time favorite desserts in a muffin cup. Vegan pineapple upside down cake!

I think we were originally inspired by Disney for this one. We live near Disney World and are pass holders. So whenever we are there we hardly ever skip grabbing a Dole Whip. If you do not know about Dole Whip then please google now!!! Seriously!!! One Dole Whip option is getting the pineapple soft serve (vegan) on top of a little baby pineapple upside down cake (not vegan.) So not wanting to be left out of that fun, we came home and our super talented 14 year old daughter, Peyton, baked up our own version. Now all we need to do is blend up a batch of some Dole Whip and we are good to go.

vegan pineapple upside down cake

These vegan pineapple upside down cakes are good with or without pineapple soft serve. They are super good with a scoop of vegan vanilla ice cream or just as is. They mix up quickly and easily and are just super cute. Again, this is the reason for my affections towards muffin tin foods. The cute factor.

If you are not into cute foods, you can bake this into one big vegan pineapple upside down cake. The cook time will change since it’s a bigger, and you will just have to check on it and expect it to take a little longer. I would bake it in a round 8 inch cake pan if that was the route I was going.

How ever you choose to bake it, and top it, this vegan pineapple upside down cake is delicious and taste like tropical summer! Which is basically my favorite flavor of anything.

vegan pineapple upside down cake

INGREDIENTS:

You will need one 12 cup muffin tin for the is recipe

The Cake:

  • 1 1/2 cups all purpose flour

  • 1 1/2 teaspoons baking powder

  • 1/4 teaspoon salt

  • 1/2 cup vegan butter at room temperature

  • 1/2 cup white sugar

  • 1/4 cup brown sugar

  • 2 starch eggs (2 tablespoon tapioca or corn starch, plus 6 tablespoons water whisked together)

  • 1/4 cup vegan sour cream or plain yogurt

  • 1/4 cup oat milk (you can use almond or coconut but we find oat best for baking)

  • 1/4 cup pineapple juice (Juice from the can you get the pineapple rings from)

  • 1 teaspoon vanilla extract

Topping:

  • 1/4 cup melted vegan butter

  • 1/2 cup brown sugar

  • 20 oz can pineapple rings (rings used for topping, juice used in cake)

  • 12 maraschino cherries without stems

INSTRUCTIONS:

Preheat oven to 350

  1. Spray muffin tin with oil or lightly brush oil in each cup.

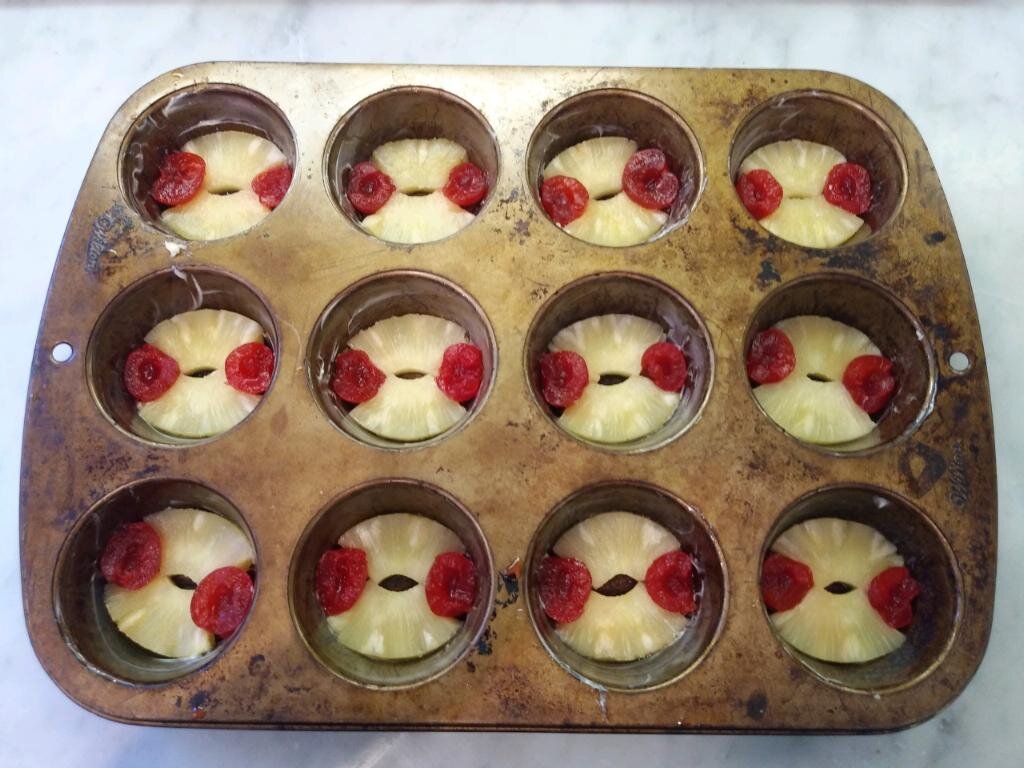
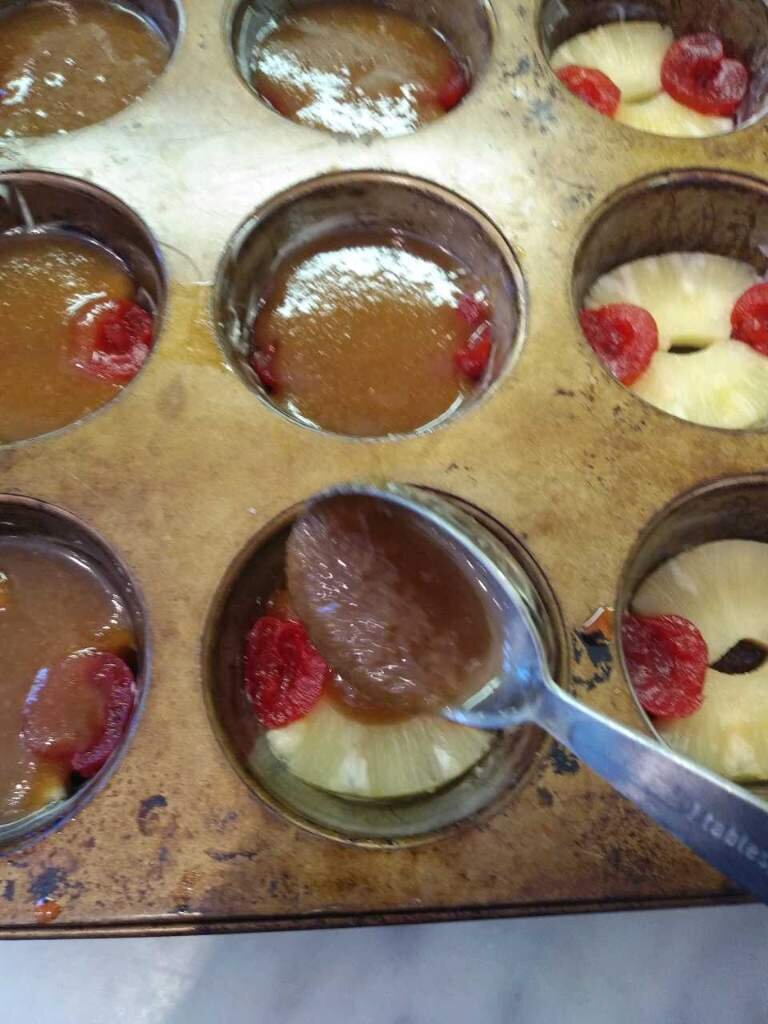
  2. Prepare the topping by mixing the melted vegan butter and brown sugar in a small bowl. Cut 6 pineapple rings into quarters. Cut 12 cherries in half. Arrange 2 pieces of pineapple and 2 pieces of cherries in the bottom of each muffin cup. Evenly divide and scoop the sugar butter mixture into each muffin cup over the pineapple and cherries.

  3. In large bowl or the bowl of your stand mixer add the butter, white, and brown sugars. Beat on medium speed in the stand mixer or with a hand mixer if mixing in a bowl. Add the starch eggs and mix until well combined.

  4. Next add the vanilla and sour cream or yogurt.

  5. In a separate medium bowl, mix together the remaining dry ingredients.

  6. Add 1/3 of the flour into the butter sugar mixture and and mix, next add the milk, then 1/3 of the flour, then the pineapple juice then the remaining flour, beating between each addition.

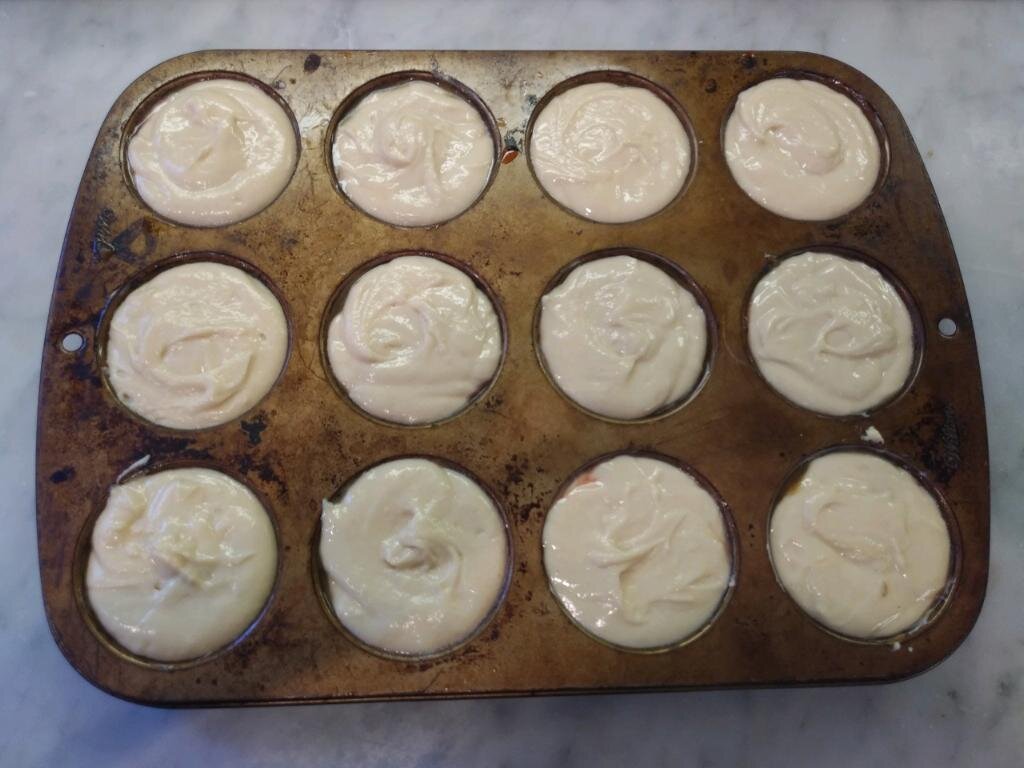
  7. Divide the batter evenly between the muffin cups. Place the muffin tin of a cookie sheet and place on the middle rack of your oven. Bake for 35-45 minutes, until a toothpick inserted into the cake comes out clean.

  8. Let the cakes cool for about 20 minutes and gently turn the tin over onto a baking sheet. Store the cakes in the fridge in an air tight container. S

vegan pineapple upside down cake

If you like this recipe, then try these:
Vegan Peanut Butter Buckeyes

vegan peanut butter buckeyes

Chocolate and peanut butter go together, well, like chocolate and peanut butter.

It’s a classic combo that is one of my all time favorites.

So making vegan buckeyes was a no brainer, right!?! I mean they are everything good. They are chocolate, they are peanut butter, and they are sweet, sweet, tasty goodness.

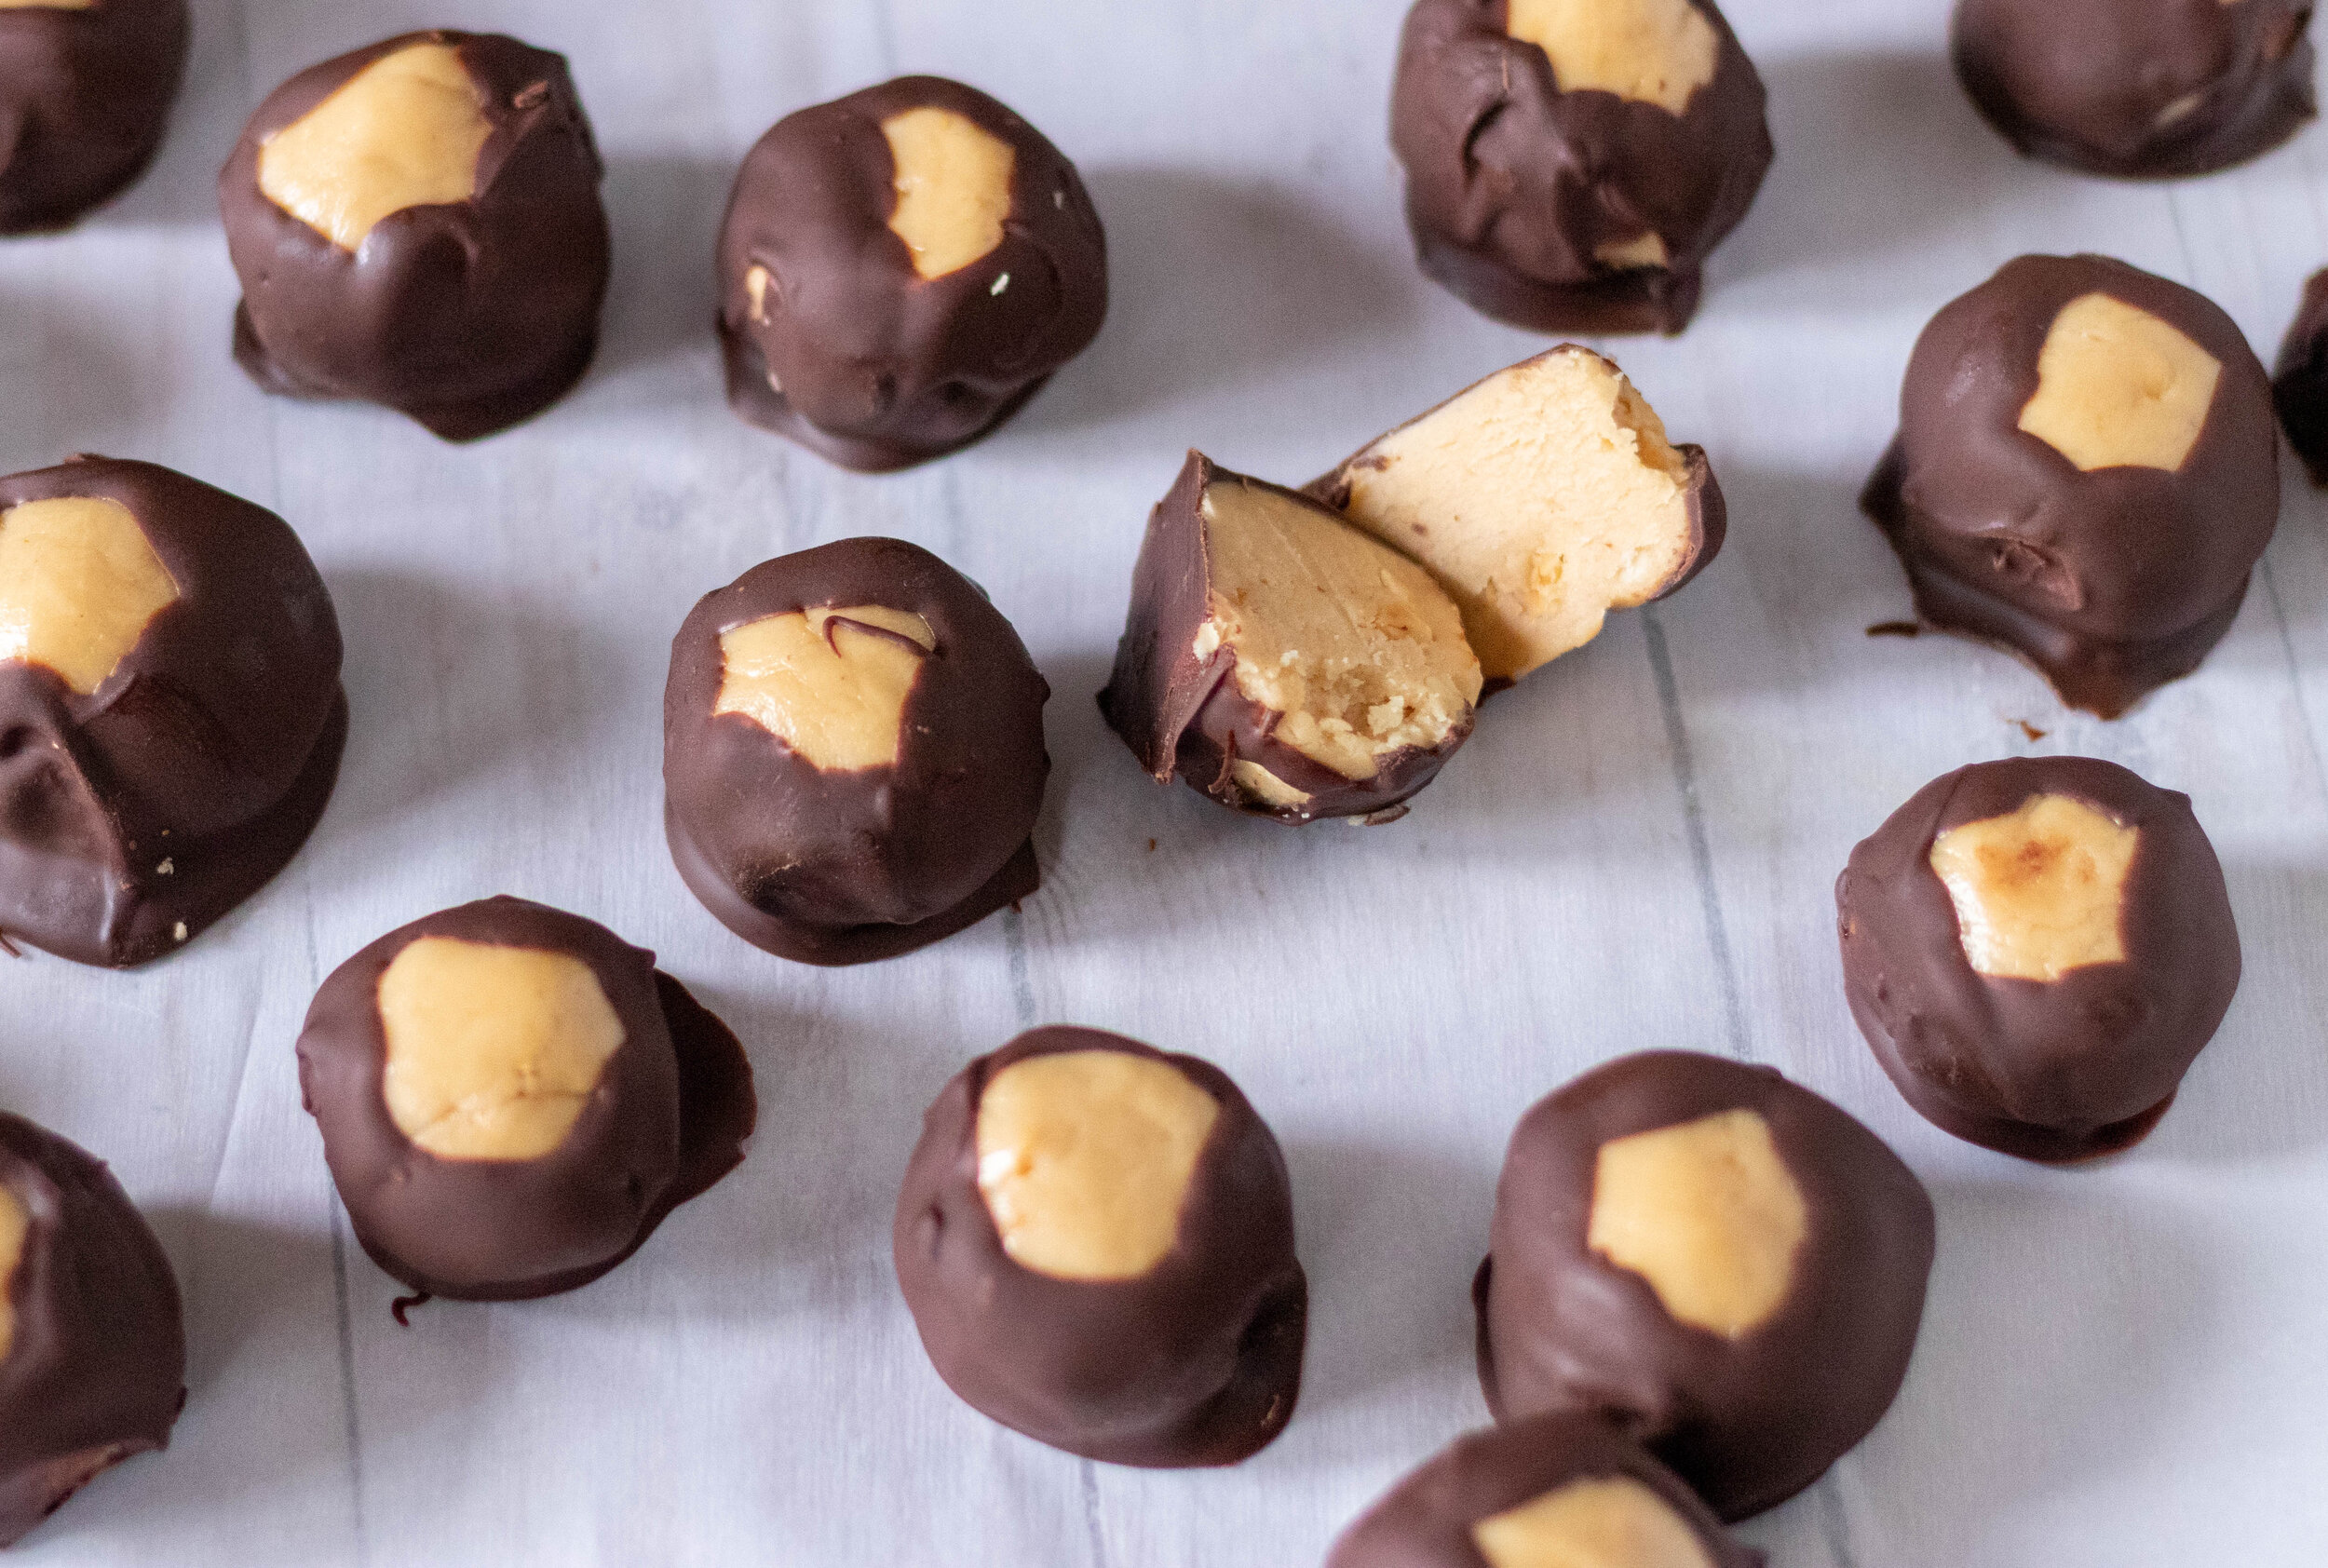
What is a buckeye you might ask. Well, it is simply a chocolate covered peanut butter ball that is made to resemble a nut from a Buckeye tree, which happens to be the state tree of Ohio. Growing up in Georgia, this was not a commonly seen treat. But every year when we went on vacation up in the North GA mountains, we would visit a fudge shop that sold them, and that is where I first fell in love with a buckeye.

Why do I love these vegan buckeyes? Well they are easier to make than a peanut butter cup for starters. No little muffin pan or tiny cupcake liners required. Just mix the ingredients, roll into a ball and dip in chocolate. Ready in minutes!! Who doesn’t love dessert that only takes MINUTES! Seriously, they are actually dangerous and if you are currently on a diet please don’t send me hate mail. I still love you and didn’t mean to make you mad. I just wanted to share the love of vegan buckeyes.

I really only buy crunchy peanut butter because it reigns supreme. You can use whatever nut butter you have. Peanut, almond, you could even use SunButter. Allergy friendly vegan buckeyes can exist, y’all! Everyone rejoice now (excluding again those on a diet, again my apologies!)

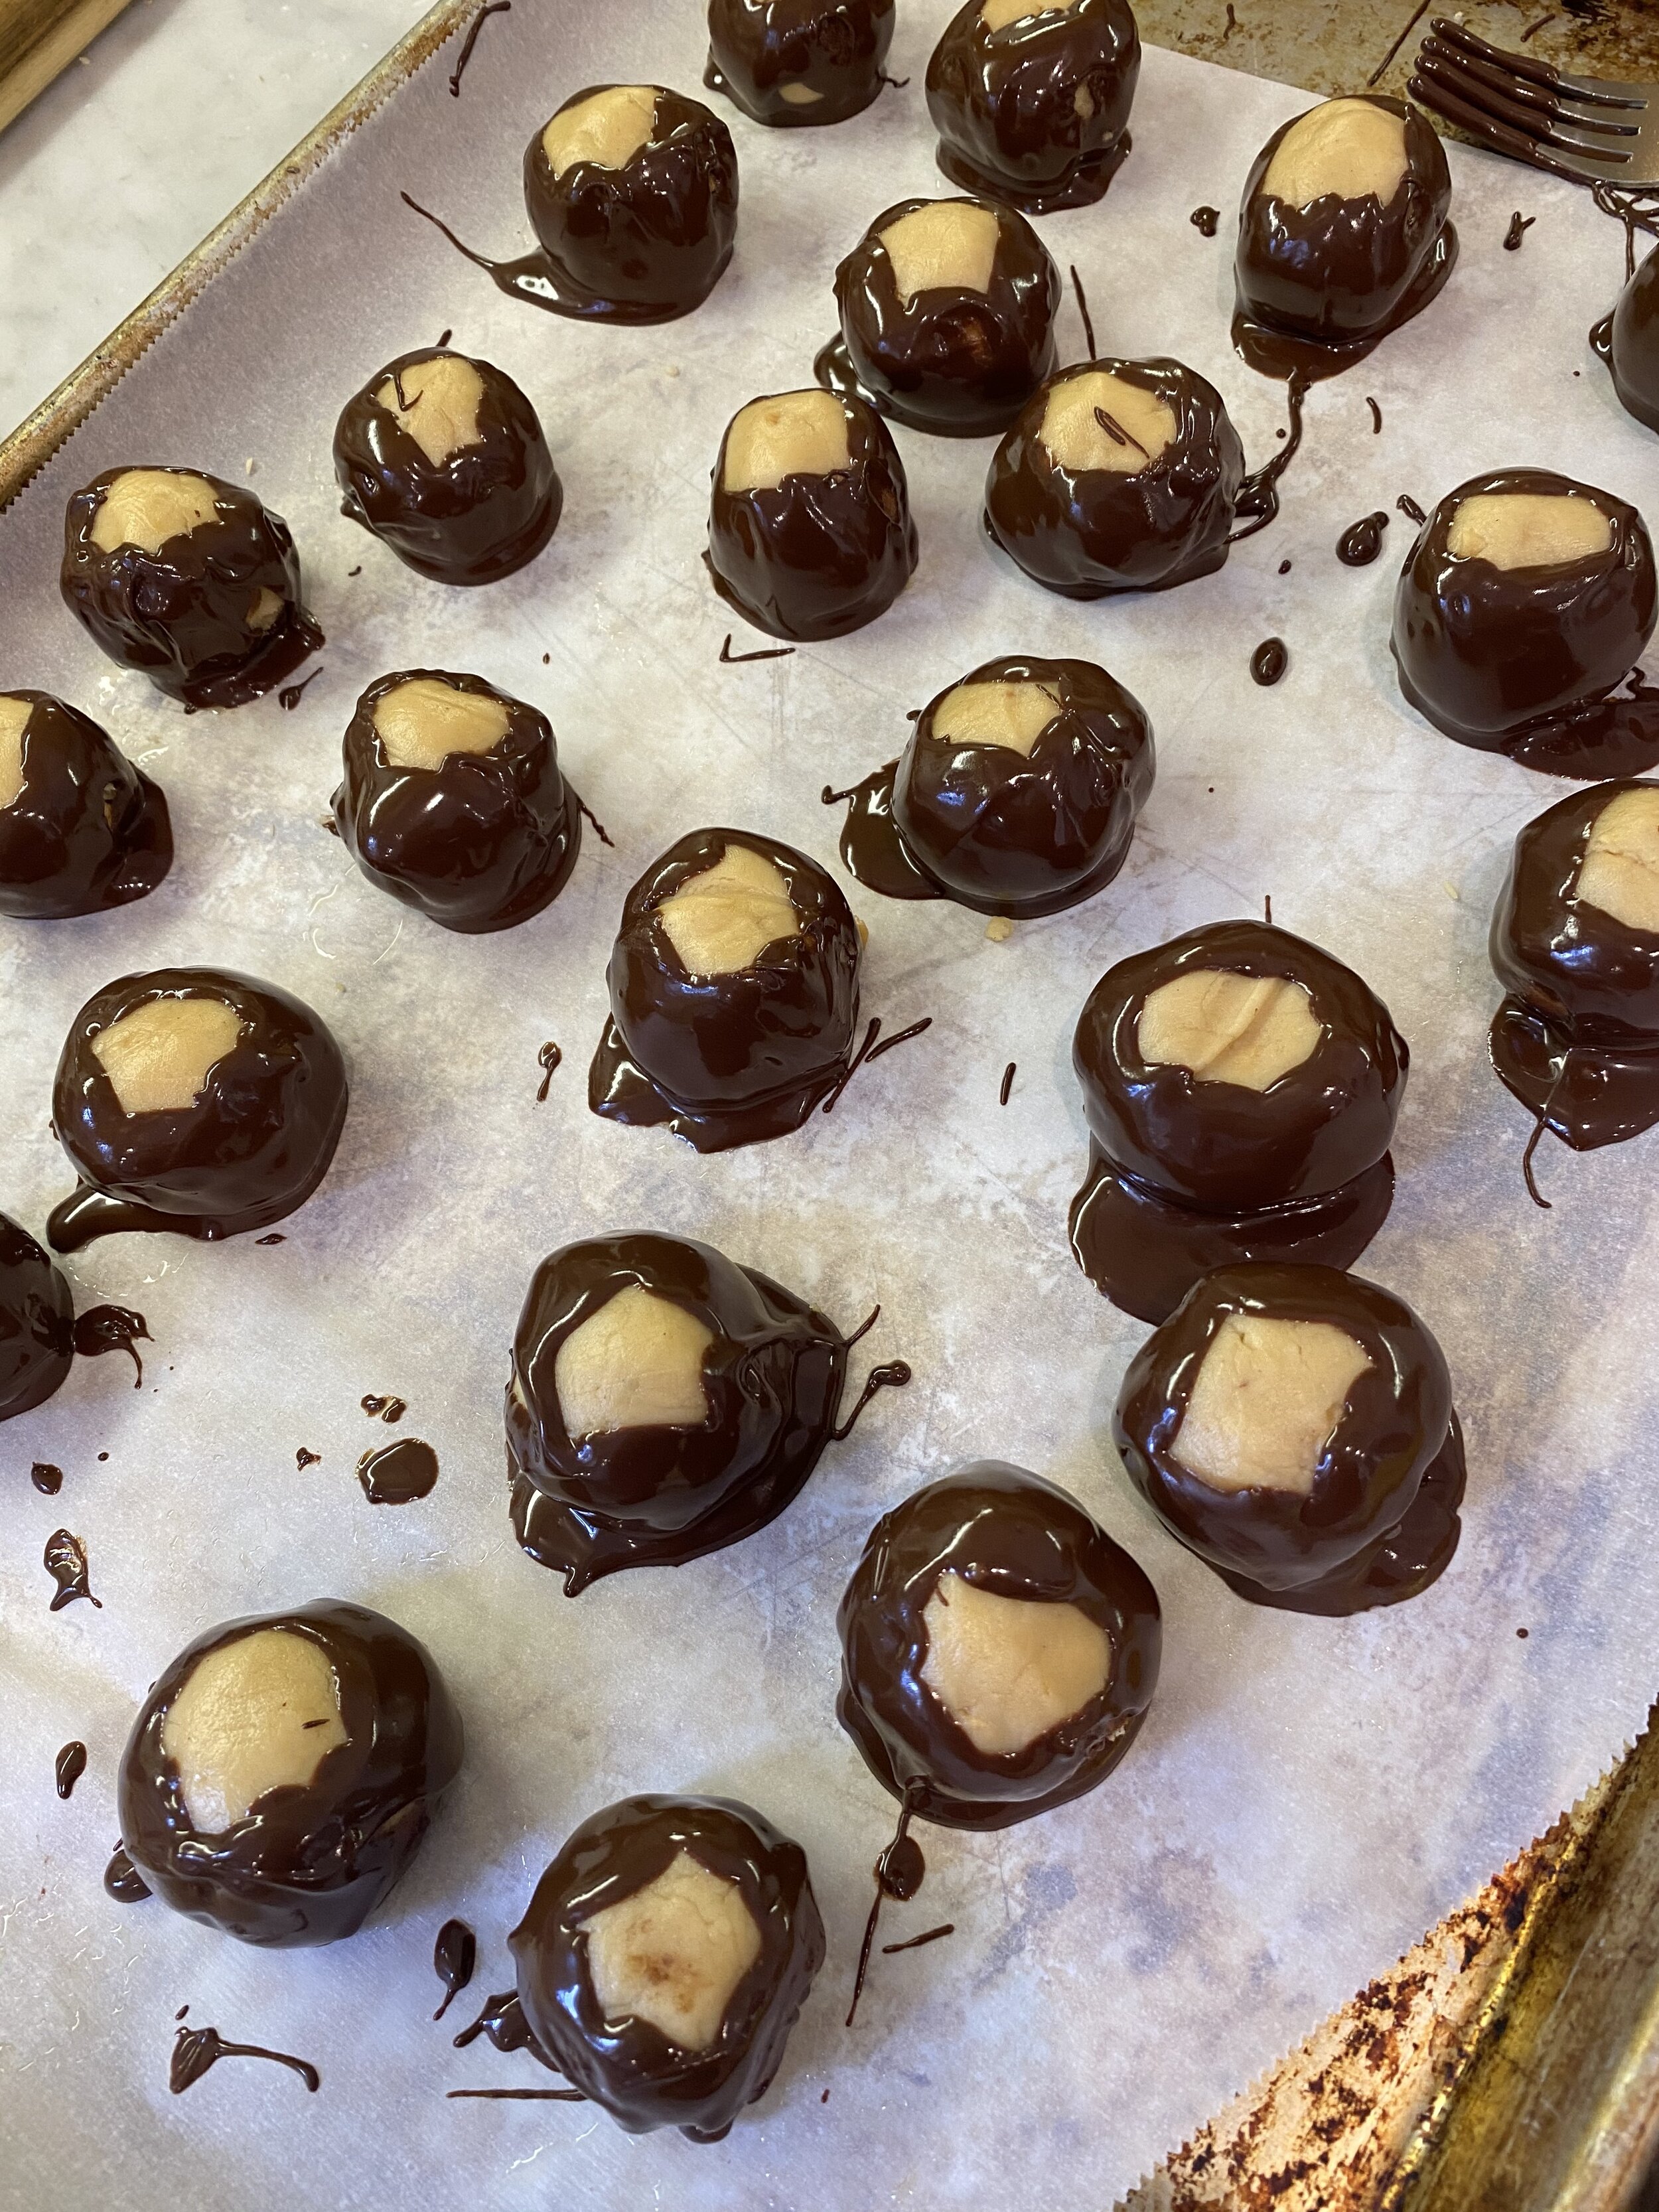
Also mine are never pretty. Like I always see pictures of perfect buckeyes, mine are NOT perfect…my ability to roll a perfect ball, and perfectly dip a vegan buckeye so that it doesn’t puddle or have drips is seriously lacking. And here I am just trying to keep it real for y’all and admit that I don’t make a perfect buckeye, but they taste amazing and THAT IS JUST FINE!!! Own your shortcomings, and do not give a flying flip if those shortcomings mean nothing in the grand scheme of things. Who cares if they are pretty, They are gonna last like point 5 seconds any ways before they are devoured!

Vegan Buckeyes. Vegan peanut butter balls. Vegan chocolate dipped peanut butter balls. Whatever you call them, just make some, eat them, share them, don’t share them, hoard them for yourself, freeze them for portion control, don’t freeze them for portion control….whatever. Just know you can make them vegan and they are mighty tasty. Everything in moderation, y’all. Thats my motto.

vegan peanut butter buckeyes

INGREDIENTS:

  • 2 1/2 cups powdered sugar

  • 1 cup peanut butter, creamy or crunchy

  • 1/4 cup plus 2 tablespoons vegan melted butter

  • 1/2 teaspoon salt

  • 1 tablespoon plant milk may be needed

  • 8 oz vegan chocolate chips, or chopped vegan chocolate

  • 1 tablespoon coconut oil


INSTRUCTIONS:

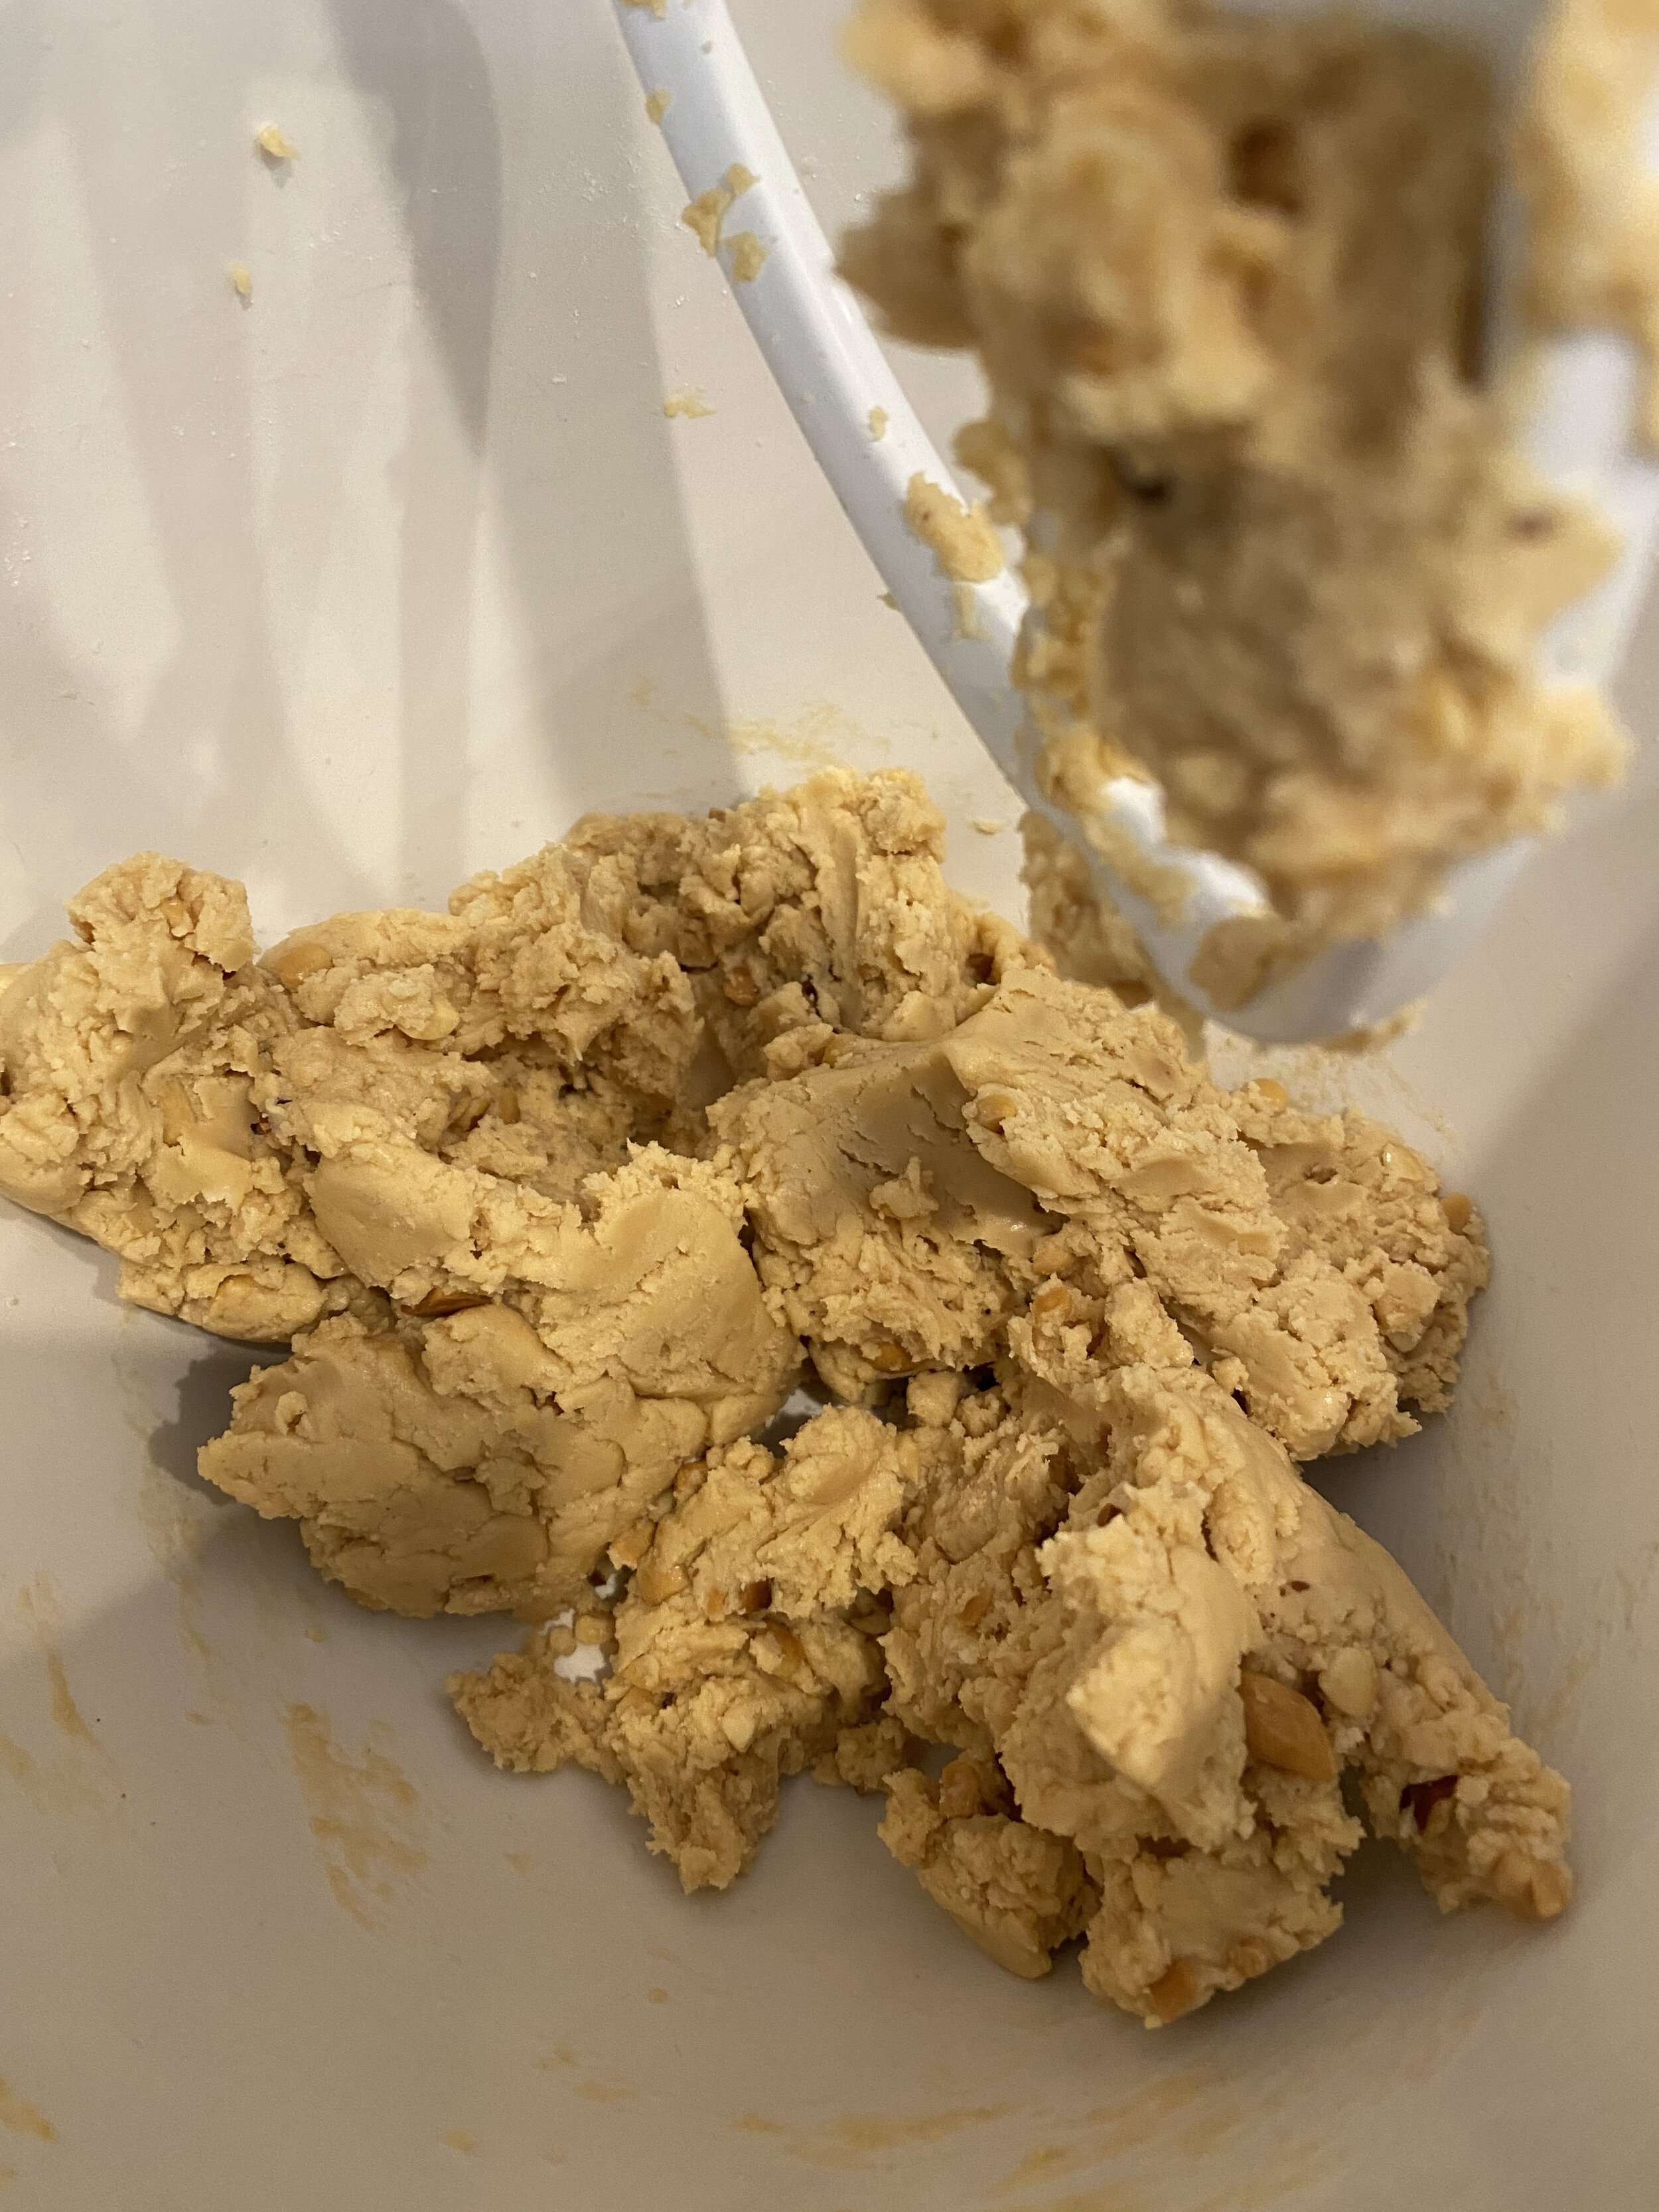
  1. In a large bowl or the bowl of your stand mixer add the powdered sugar, peanut butter, and melted butter. Beta on medium speed until the mixture resembles cookie dough. If it is crumbly and not coming together to look like the picture, add a little bit of milk, but you should not need more than one tablespoon.

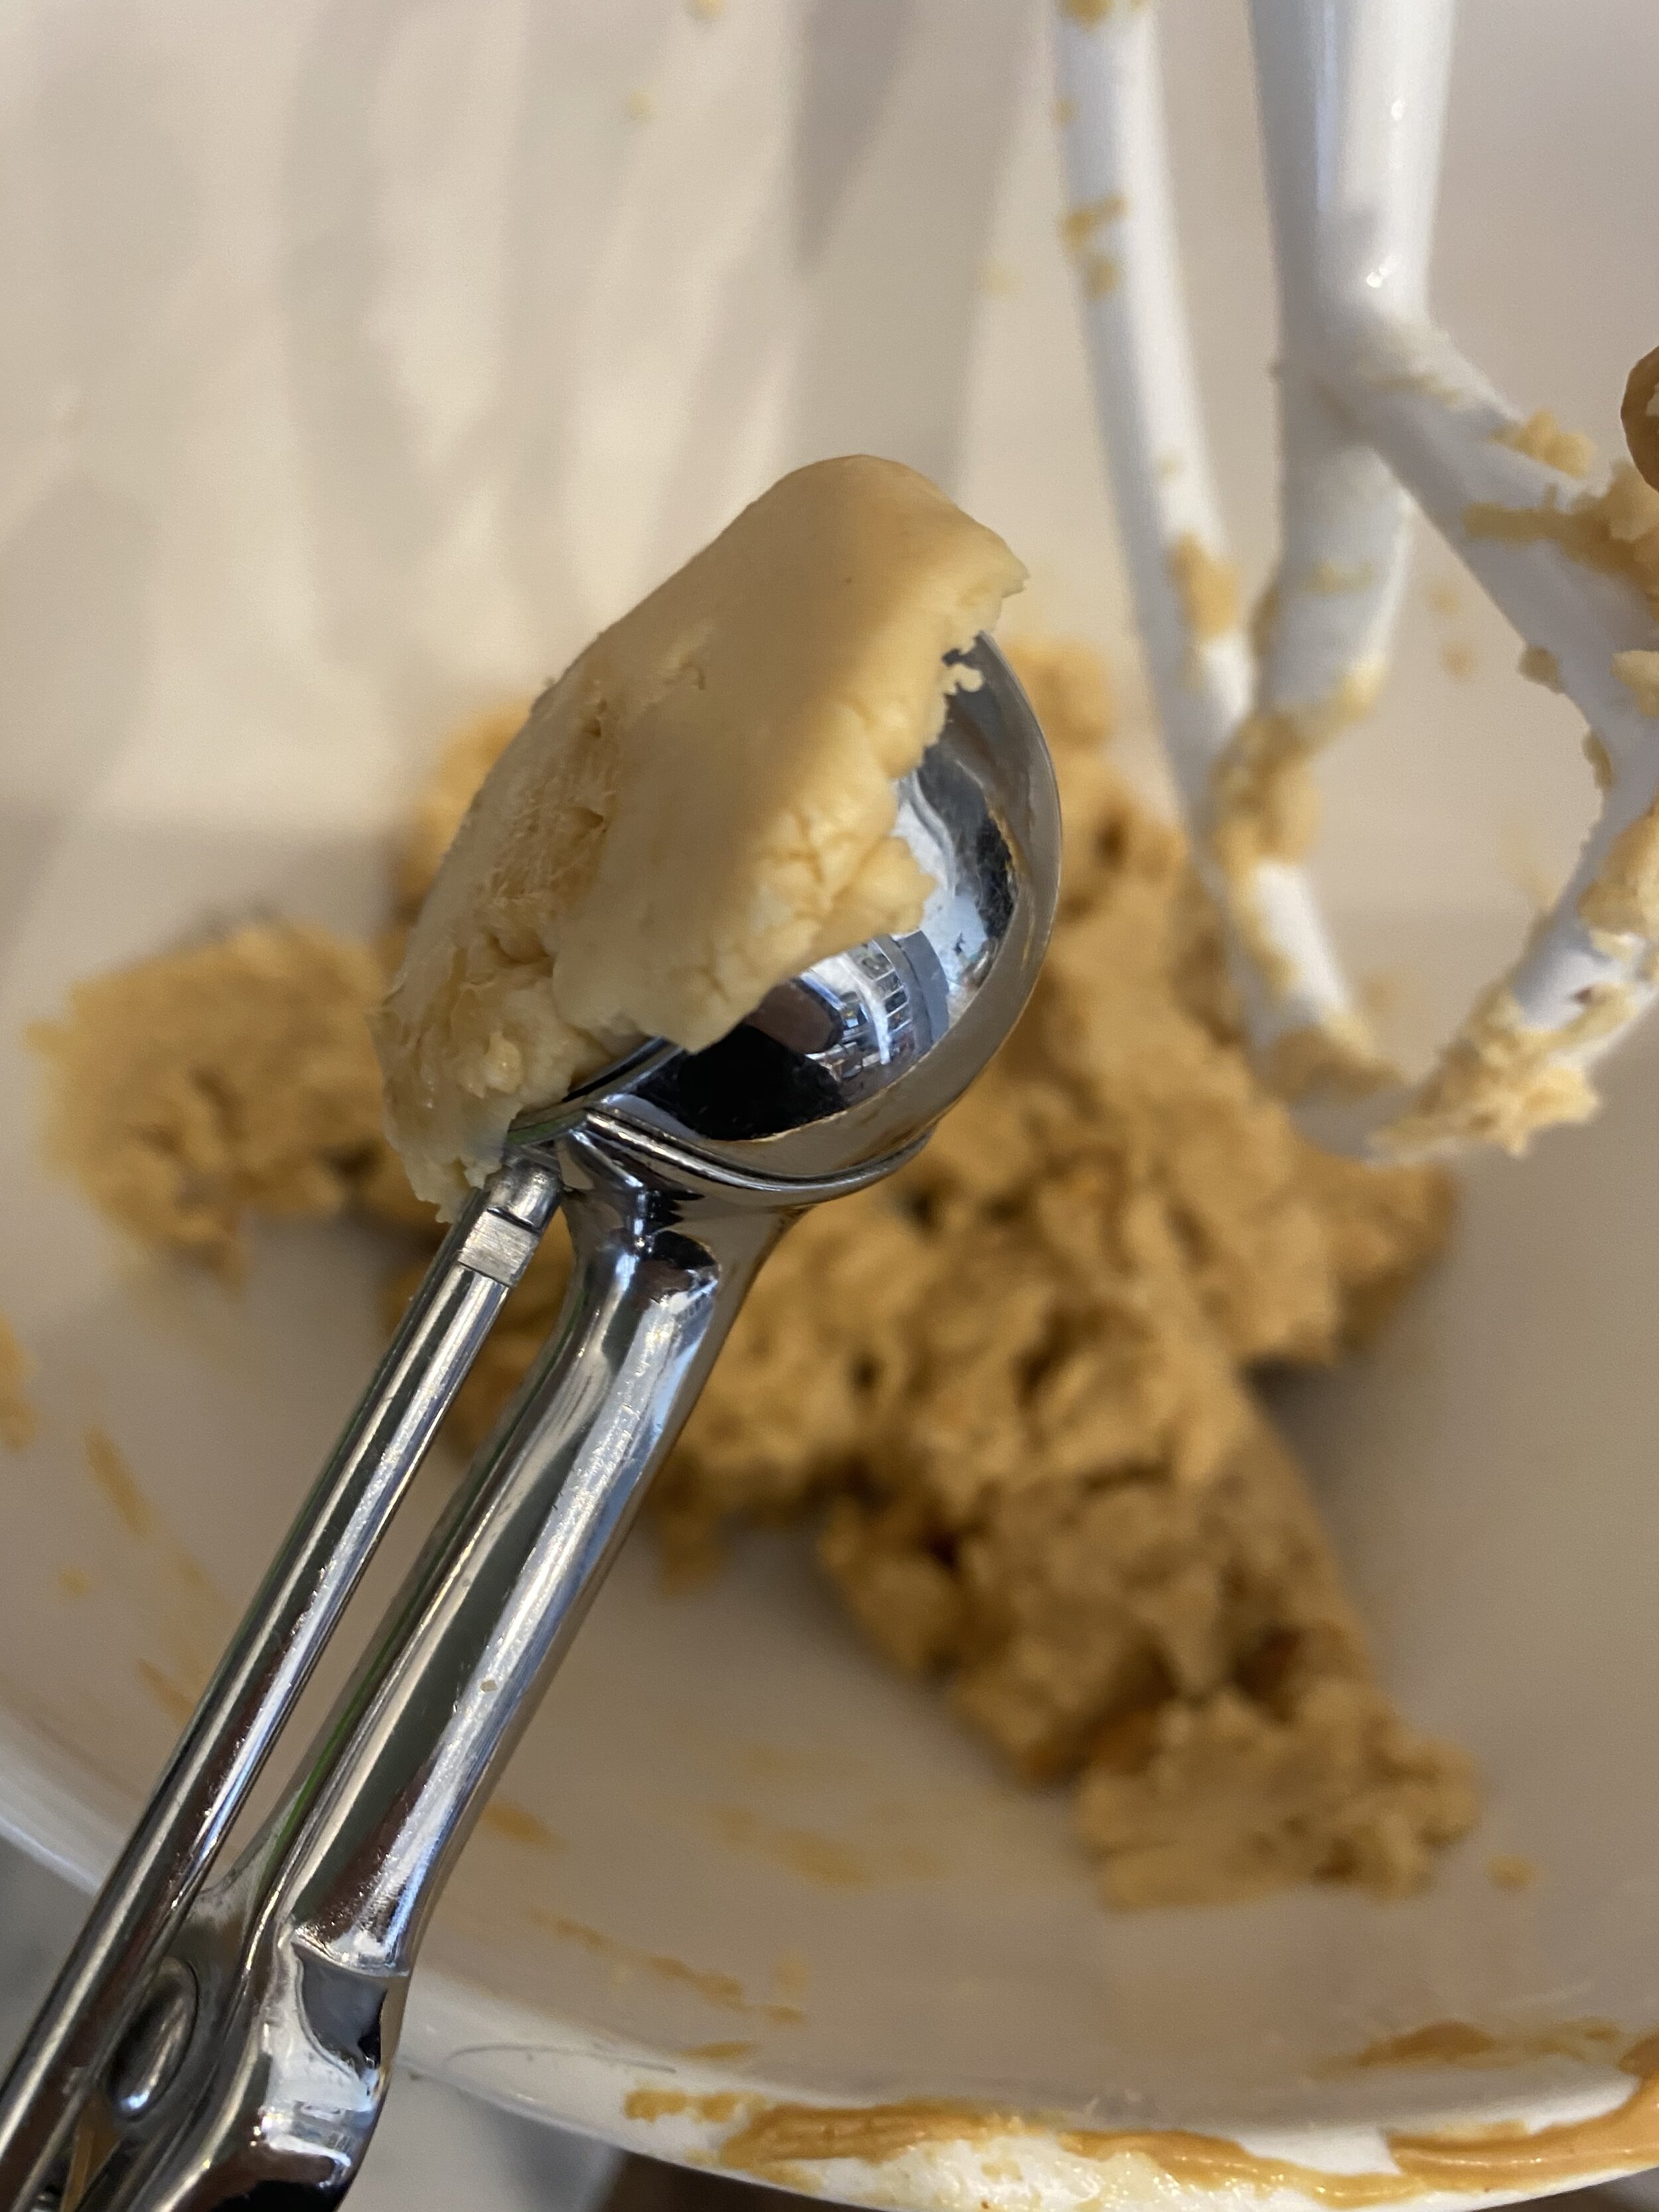
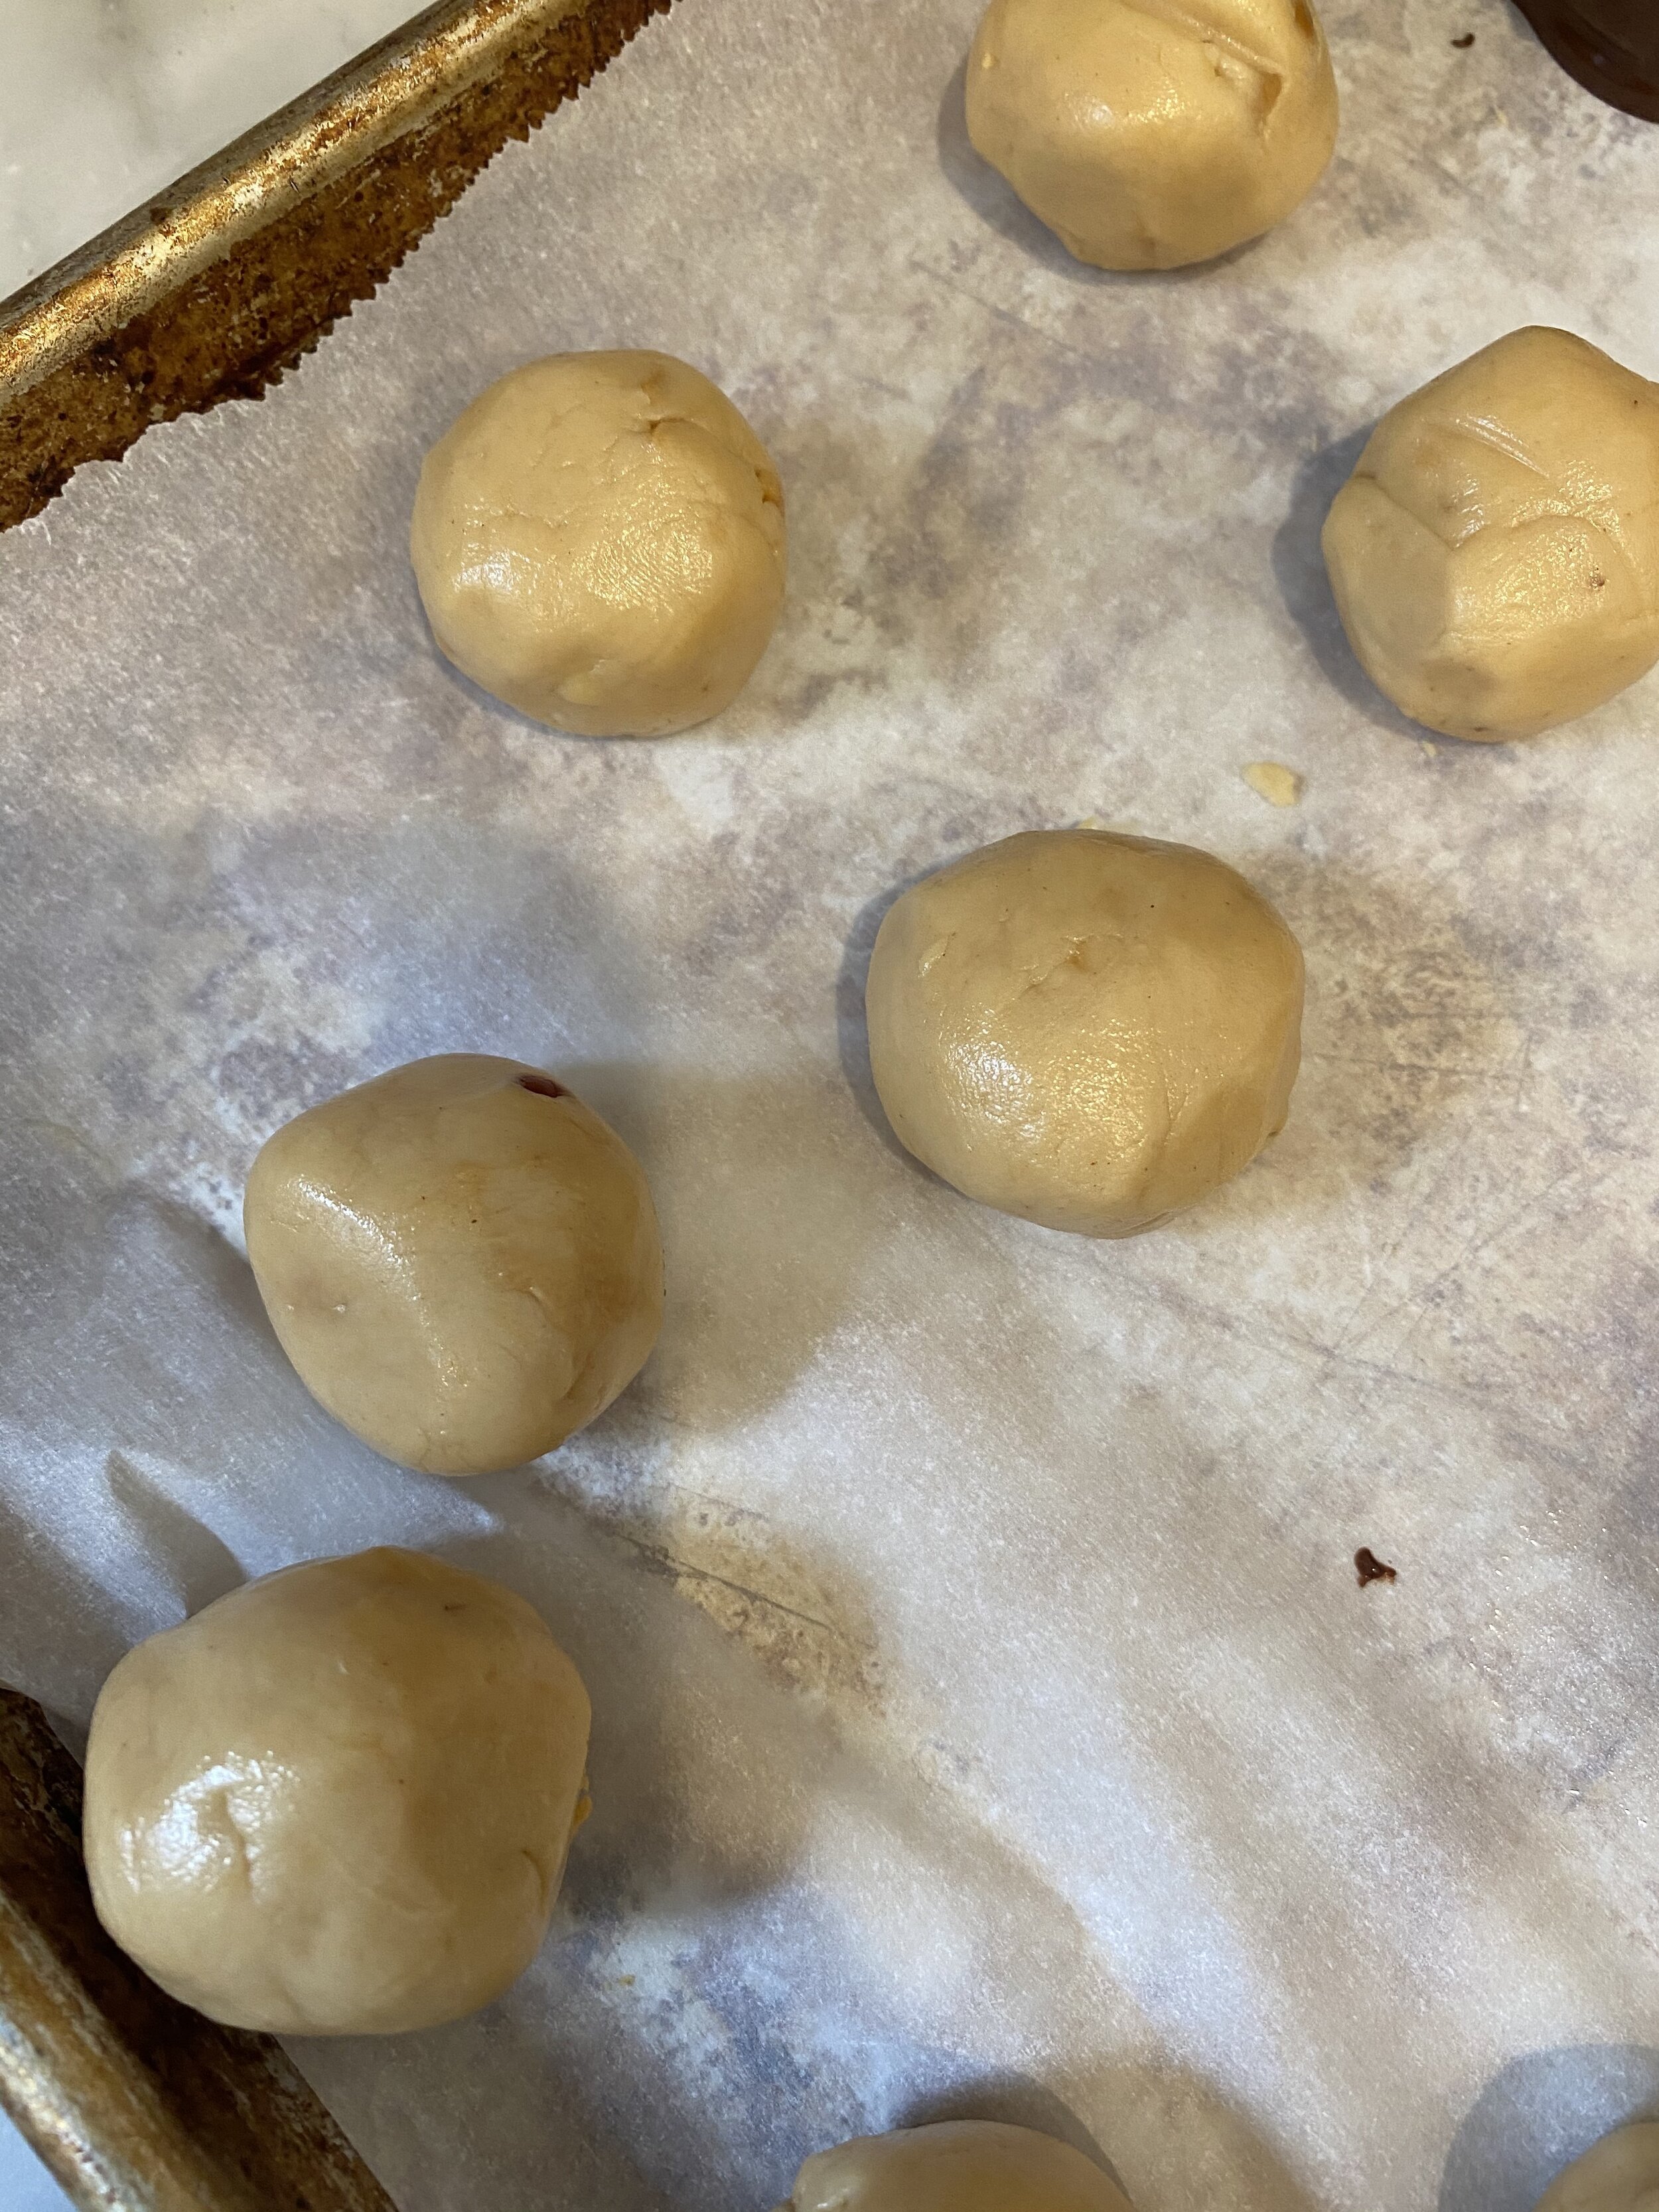
  2. Use a small cookie scoop or tablespoon to scoop out the mixture. Roll each scoop into a ball and place on parchment lined cookies sheet. Pop the cookie sheet into the fridge for about 20 minutes.

  3. After 20 minutes add the chocolate along with the talbespoon of coconut oil to a microwave safe container. Heat in 30 second intervals, stirring each time unit all of the chocolate is melted.

  4. Dip the peanut butter balls into the chocolate and place back on the parchment lined baking sheet. Place finished buckeyes back into the fridge for the chocolate to harden. Once the chocolate has hardened, place the buckeyes into an airtight container and store in the fridge.

vegan peanut butter buckeyes

If you like this recipe, then try these:
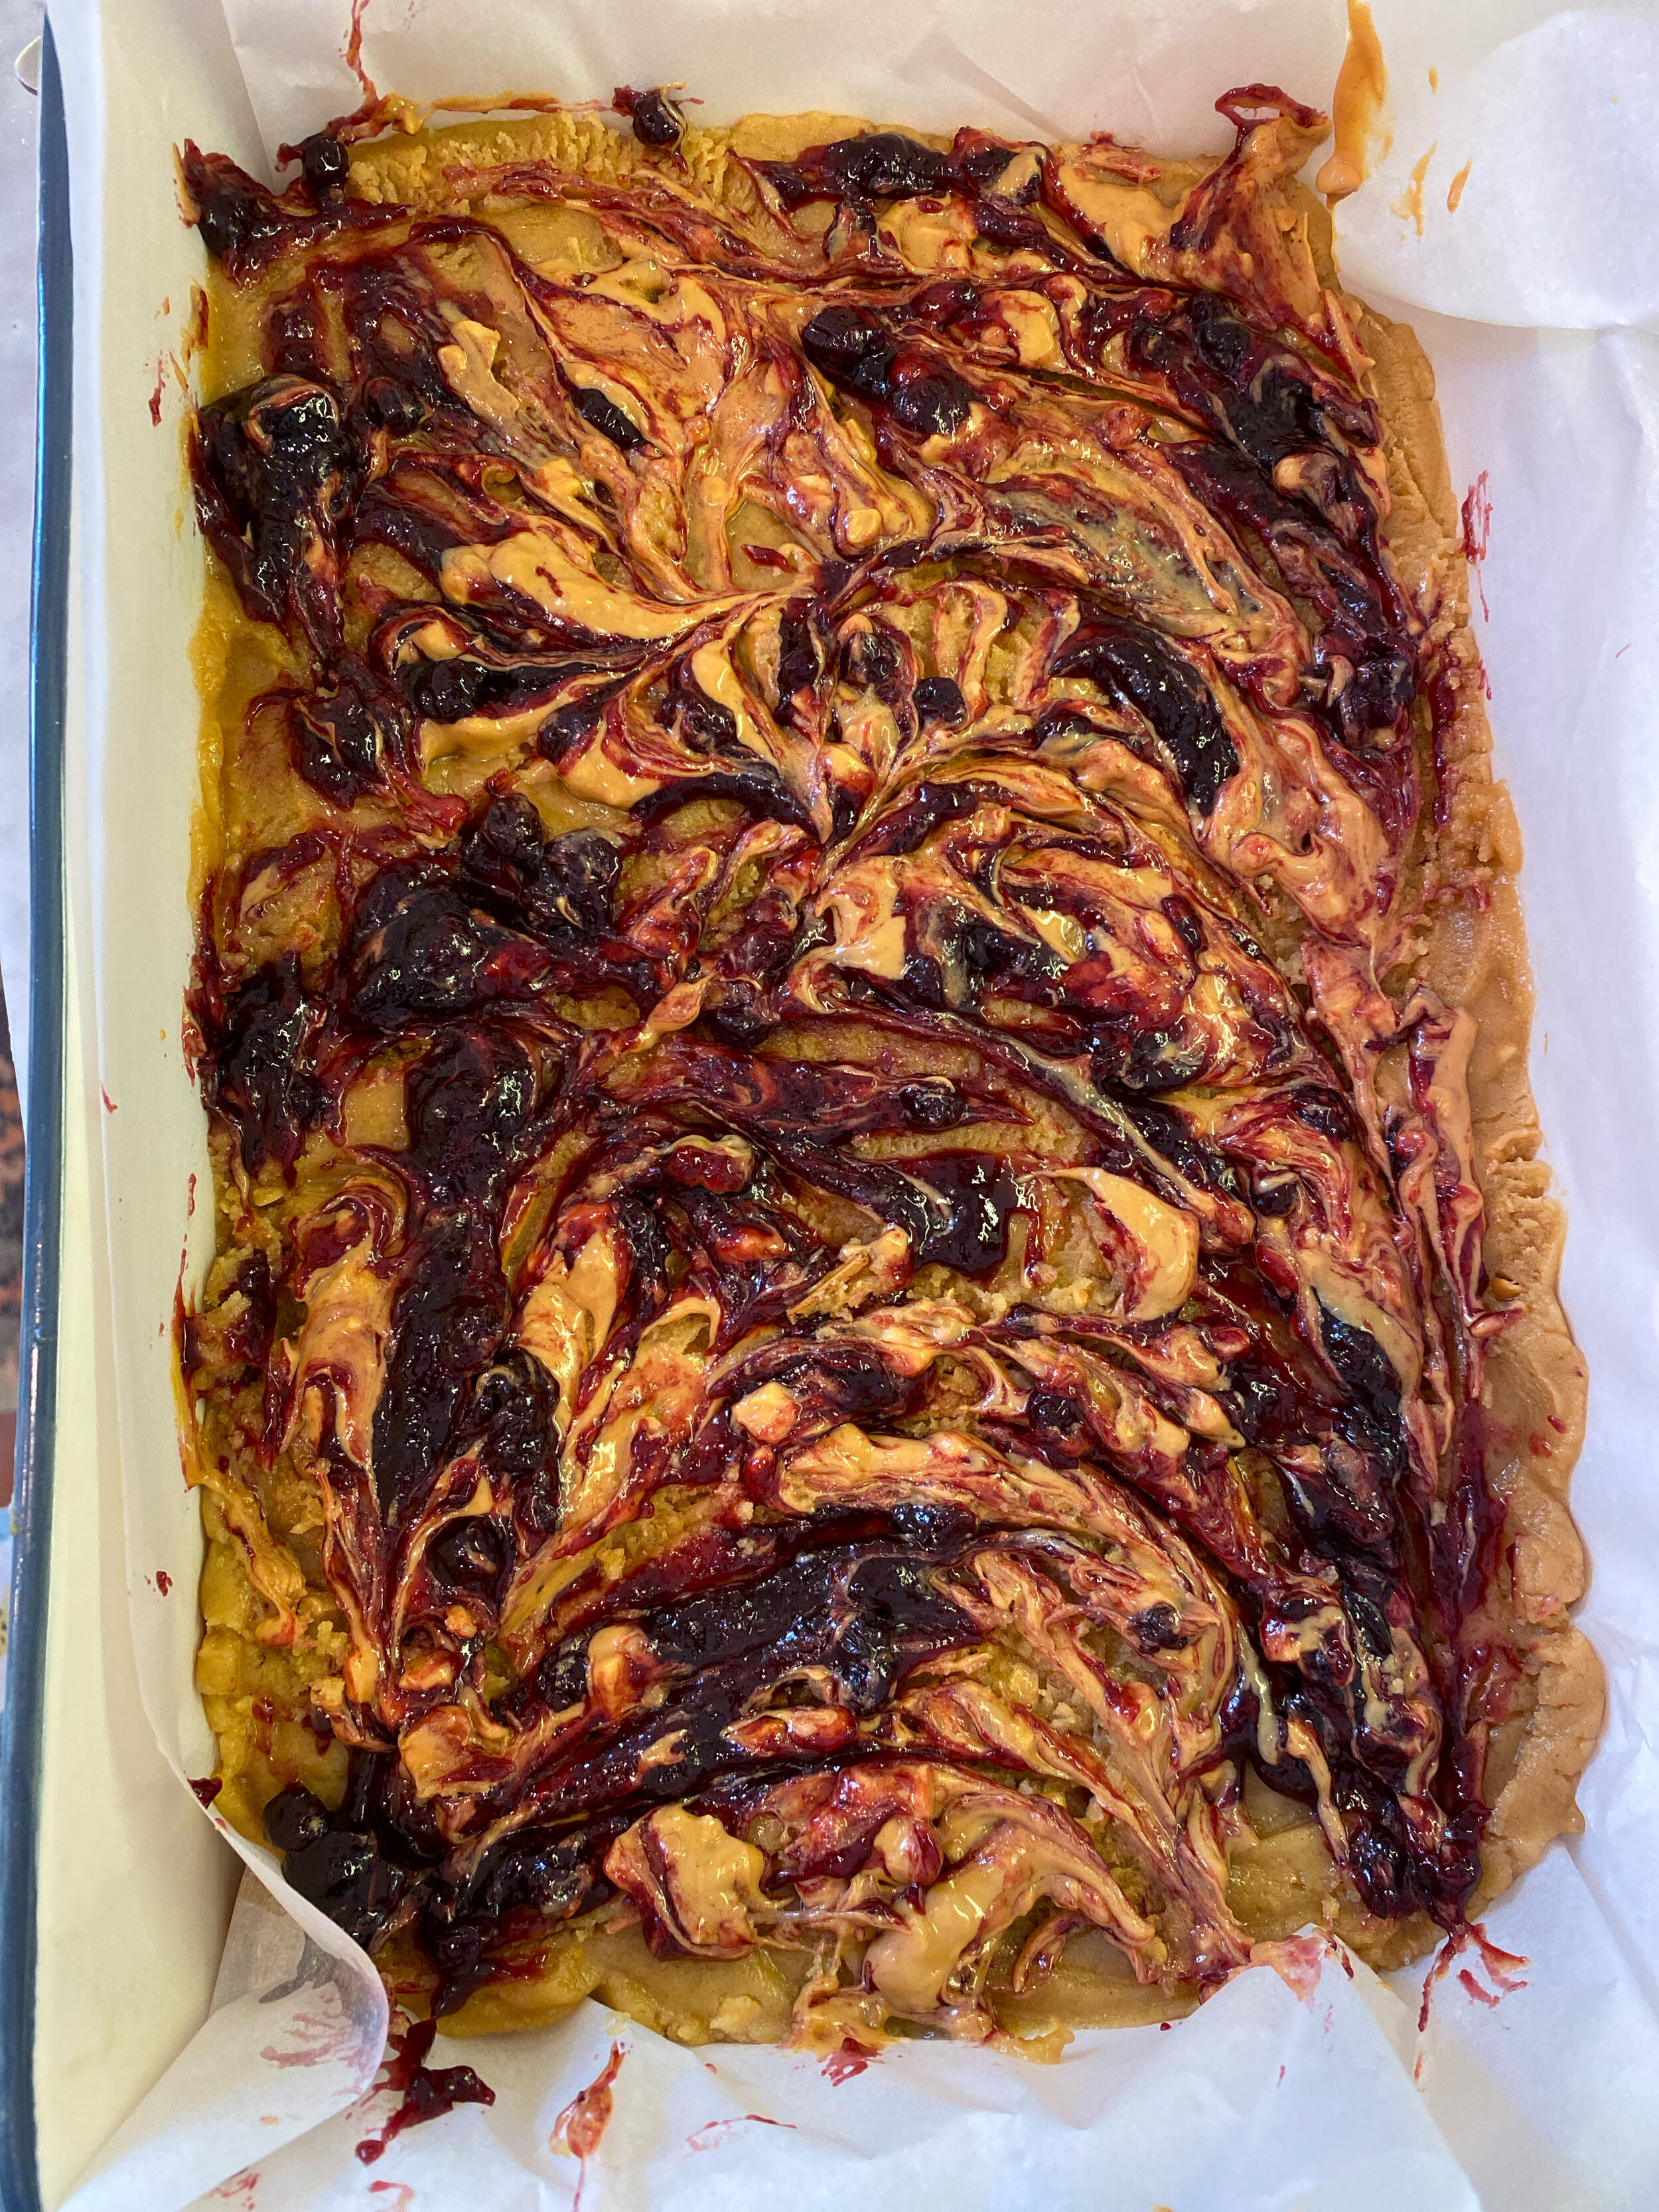
Vegan Peanut Butter and Jelly Blondies

Vegan Peanut Butter and Jelly Blondies

I will choose a vegan blondie over a vegan brownie every single time.

Don’t get me wrong, I love chocolate, love it, but I just feel like blondies are underrated and need more attention in this world.

I feel like everyone has a vegan brownie recipe. Except me. I don’t. Maybe one day I will, and that statement will be irrelevant. I don’t know. There are so many wonderful vegan brownie recipes out there, that I have never felt compelled to make my own.

Vegan blondies are another story all together. I love creating new variations of blondies and these vegan peanut butter and jelly blondies are easily a favorite.

Not just my favorite, but my kids, my husband, and anyone else I have ever shared them with!

They are gooey, chewy, buttery, and nutty. You can use any jam or jelly you or your family likes. I like raspberry. You can bake a big 9x13 pan or half the recipe and bake a smaller pan (but seriously, why would you do that?!?!?! they are too good for a half batch!) You can use creamy or crunchy peanut butter, but I prefer crunchy!

Vegan Peanut Butter and Jelly Blondies in a pan

I imagine, although I have not tired it, you could use sunflower butter as well if there is an allergy issue. I have baked SunButter cookies once for St. Patricks day because they turn green. The chlorophyll in the sunflower seeds reacts with the leavening and turns the baked good green. This is fun for St Patricks Day but maybe not everyday. So If you do use SunButter in this recipe and it looks like your blondies spent a little too much time at the pool this summer, don’t worry, they will still taste great. And if my chlorine/blonde/ green hair joke was lost on you, then you are one of the blessed few to never turned you hair green in middle school by swimming too much and not washing your hair enough.

Closeup of vegan peanut butter and jelly blondies

These vegan blondies are fun and delicious. They are also easy to make. So that can be dangerous! I suggest going ahead and making a full batch, though. Even if you don’t want them for yourself, you will earn some real big neighbor or friend points by sharing these tasty vegan peanut butter and jelly blondies!!


INGREDIENTS:

  • 2 1/2 cups all purposes flour

  • 2 cups brown sugar

  • 1 teaspoon baking powder

  • pinch of salt ( the vegan butter is normally pretty salty)

  • 1 cup vegan butter, melted and cooled ( I used Earth Balance)

  • 1 and 1/4 cup peanut butter, divided ( creamy or crunchy work fine)

  • 3/4 cups any jelly you prefer, I used raspberry

  • 2 vegan egg replacers ( I used Bobs brand) or flax eggs

  • 1 teaspoon vanilla extract

  • Optional: chopped peanuts for the top. Coarse sea salt for the top.

*you can easily half this recipe and bake in an 8x8 pan instead for a 9x13 if you want a smaller batch of blondies

INSTRUCTIONS:

Preheat oven to 350 degrees

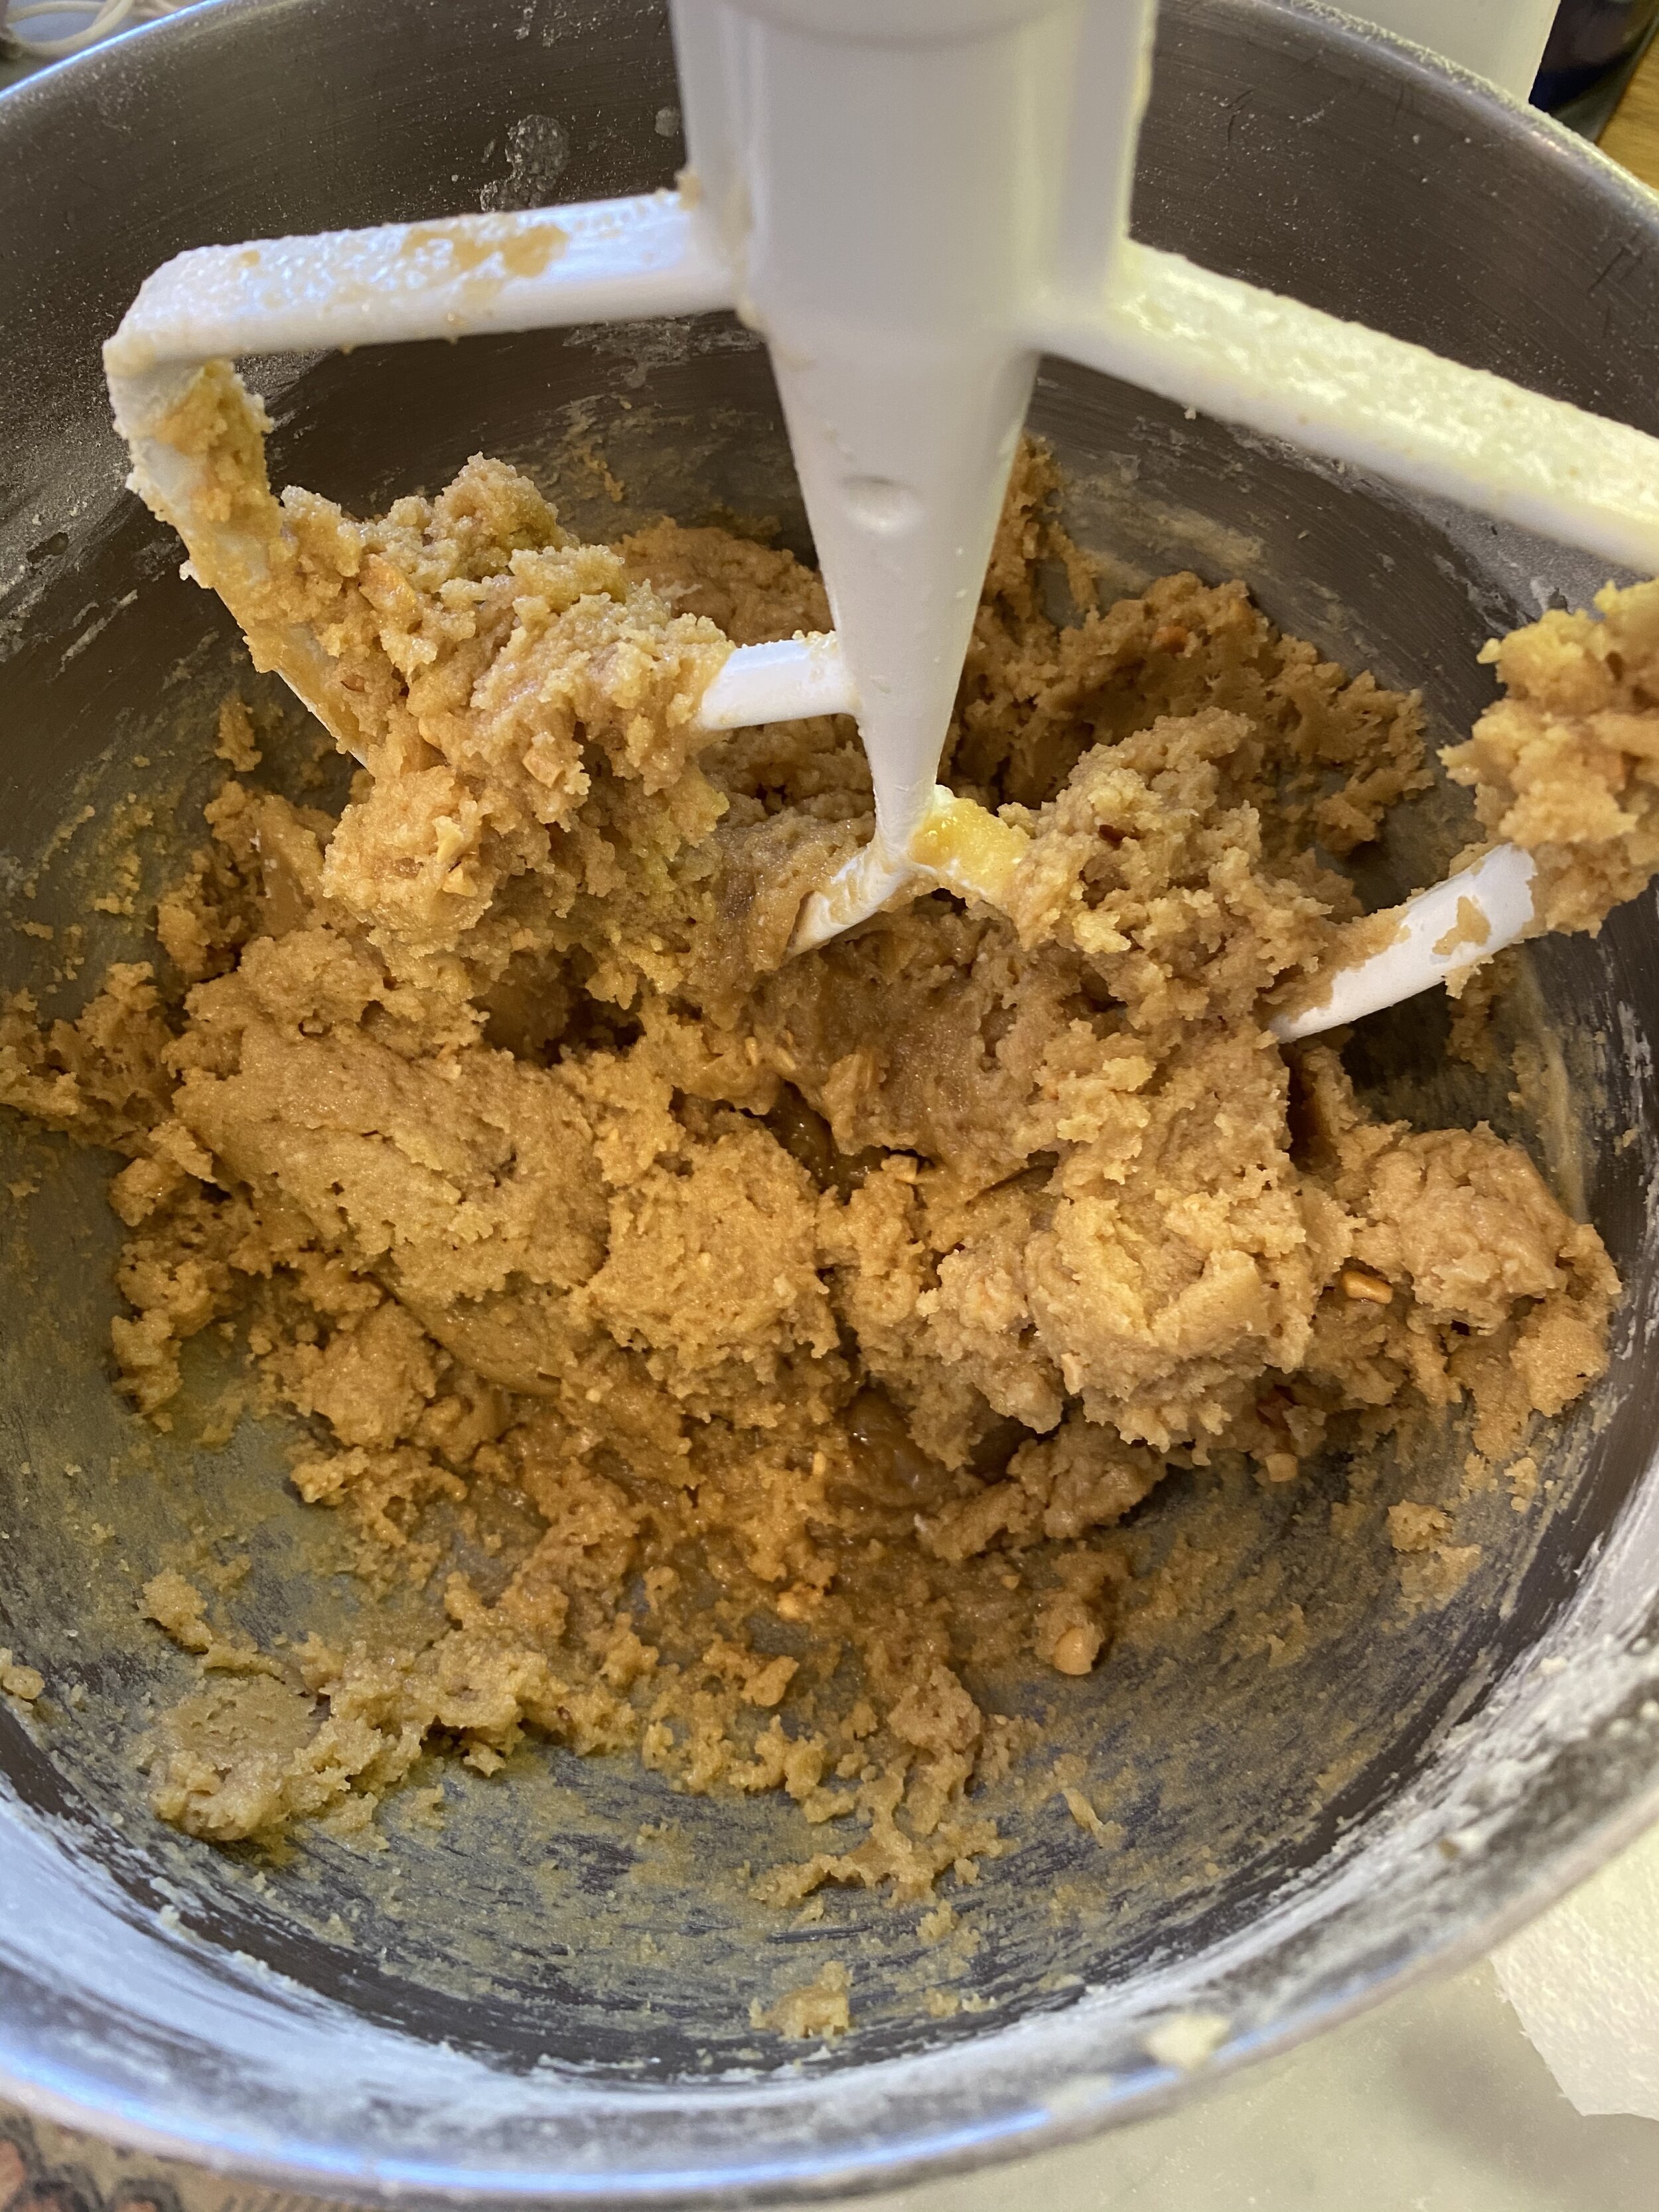
  1. In a small microwave safe bowl, heat 1/2 cup of peanut butter for a minute or so, just until it has melted. In the bowl of a stand mixer or large bowl if using a hand mixer, add the peanut butter, brown sugar, butter, baking powder, and a pinch of salt. Mix until well combined.

  2. If using powdered egg replacer, mix according to package instructions. If using fax egg, mix 2 tablespoons ground flax with 6 tablespoons water. Allow the mixture to sit for a few minutes until it has a jelly like texture. Add the egg replacers and vanilla to the above ingredients and mix until combined.

  3. Add the flour a little at a time and mix on low just until it’s all incorporated.

  4. Line a 9x13 pan with parchment paper, allow some paper to hang over the edges. If you do not have parchment you can prepare the pan by lightly coating in oil or vegan butter and giving the pan a dust of flour and shaking out any excess.

  5. Add the batter to the pan evenly.

  6. In a small bowl add the remaining 3/4 cups peanut butter. In another small bowl add the jam or jelly. If they jam is thin and spreadable already, you will not need to heat it. If not, pop the bowl in the microwave for 10 seconds or so. You just want it warm enough that it will spread easily. Do the same with the peanut butter. You just want it warm and spreadable, NOT melted!

  7. Dollop peanut butter and jelly, alternating between the two over the top of the batter. Using the edge of a butter knife, drag through the top of the dollops in a swirl motion to create a marbled effect. If you wish to sprinkle added chopped peanuts or sea salt to the top, do so now.

  8. Place the pan in the oven on the middle rack and bake for 45 mintures to one hour, or until a toothpick or cake tester inserted in the middle comes out clean.

  9. Allow the blondies to cool before cutting. Recipe yields 12 nice sized blondies. Store any leftovers in an airtight container at room temperature.

Vegan Peanut Butter and Jelly Blondies with Milk

If you like this recipe, then try these:
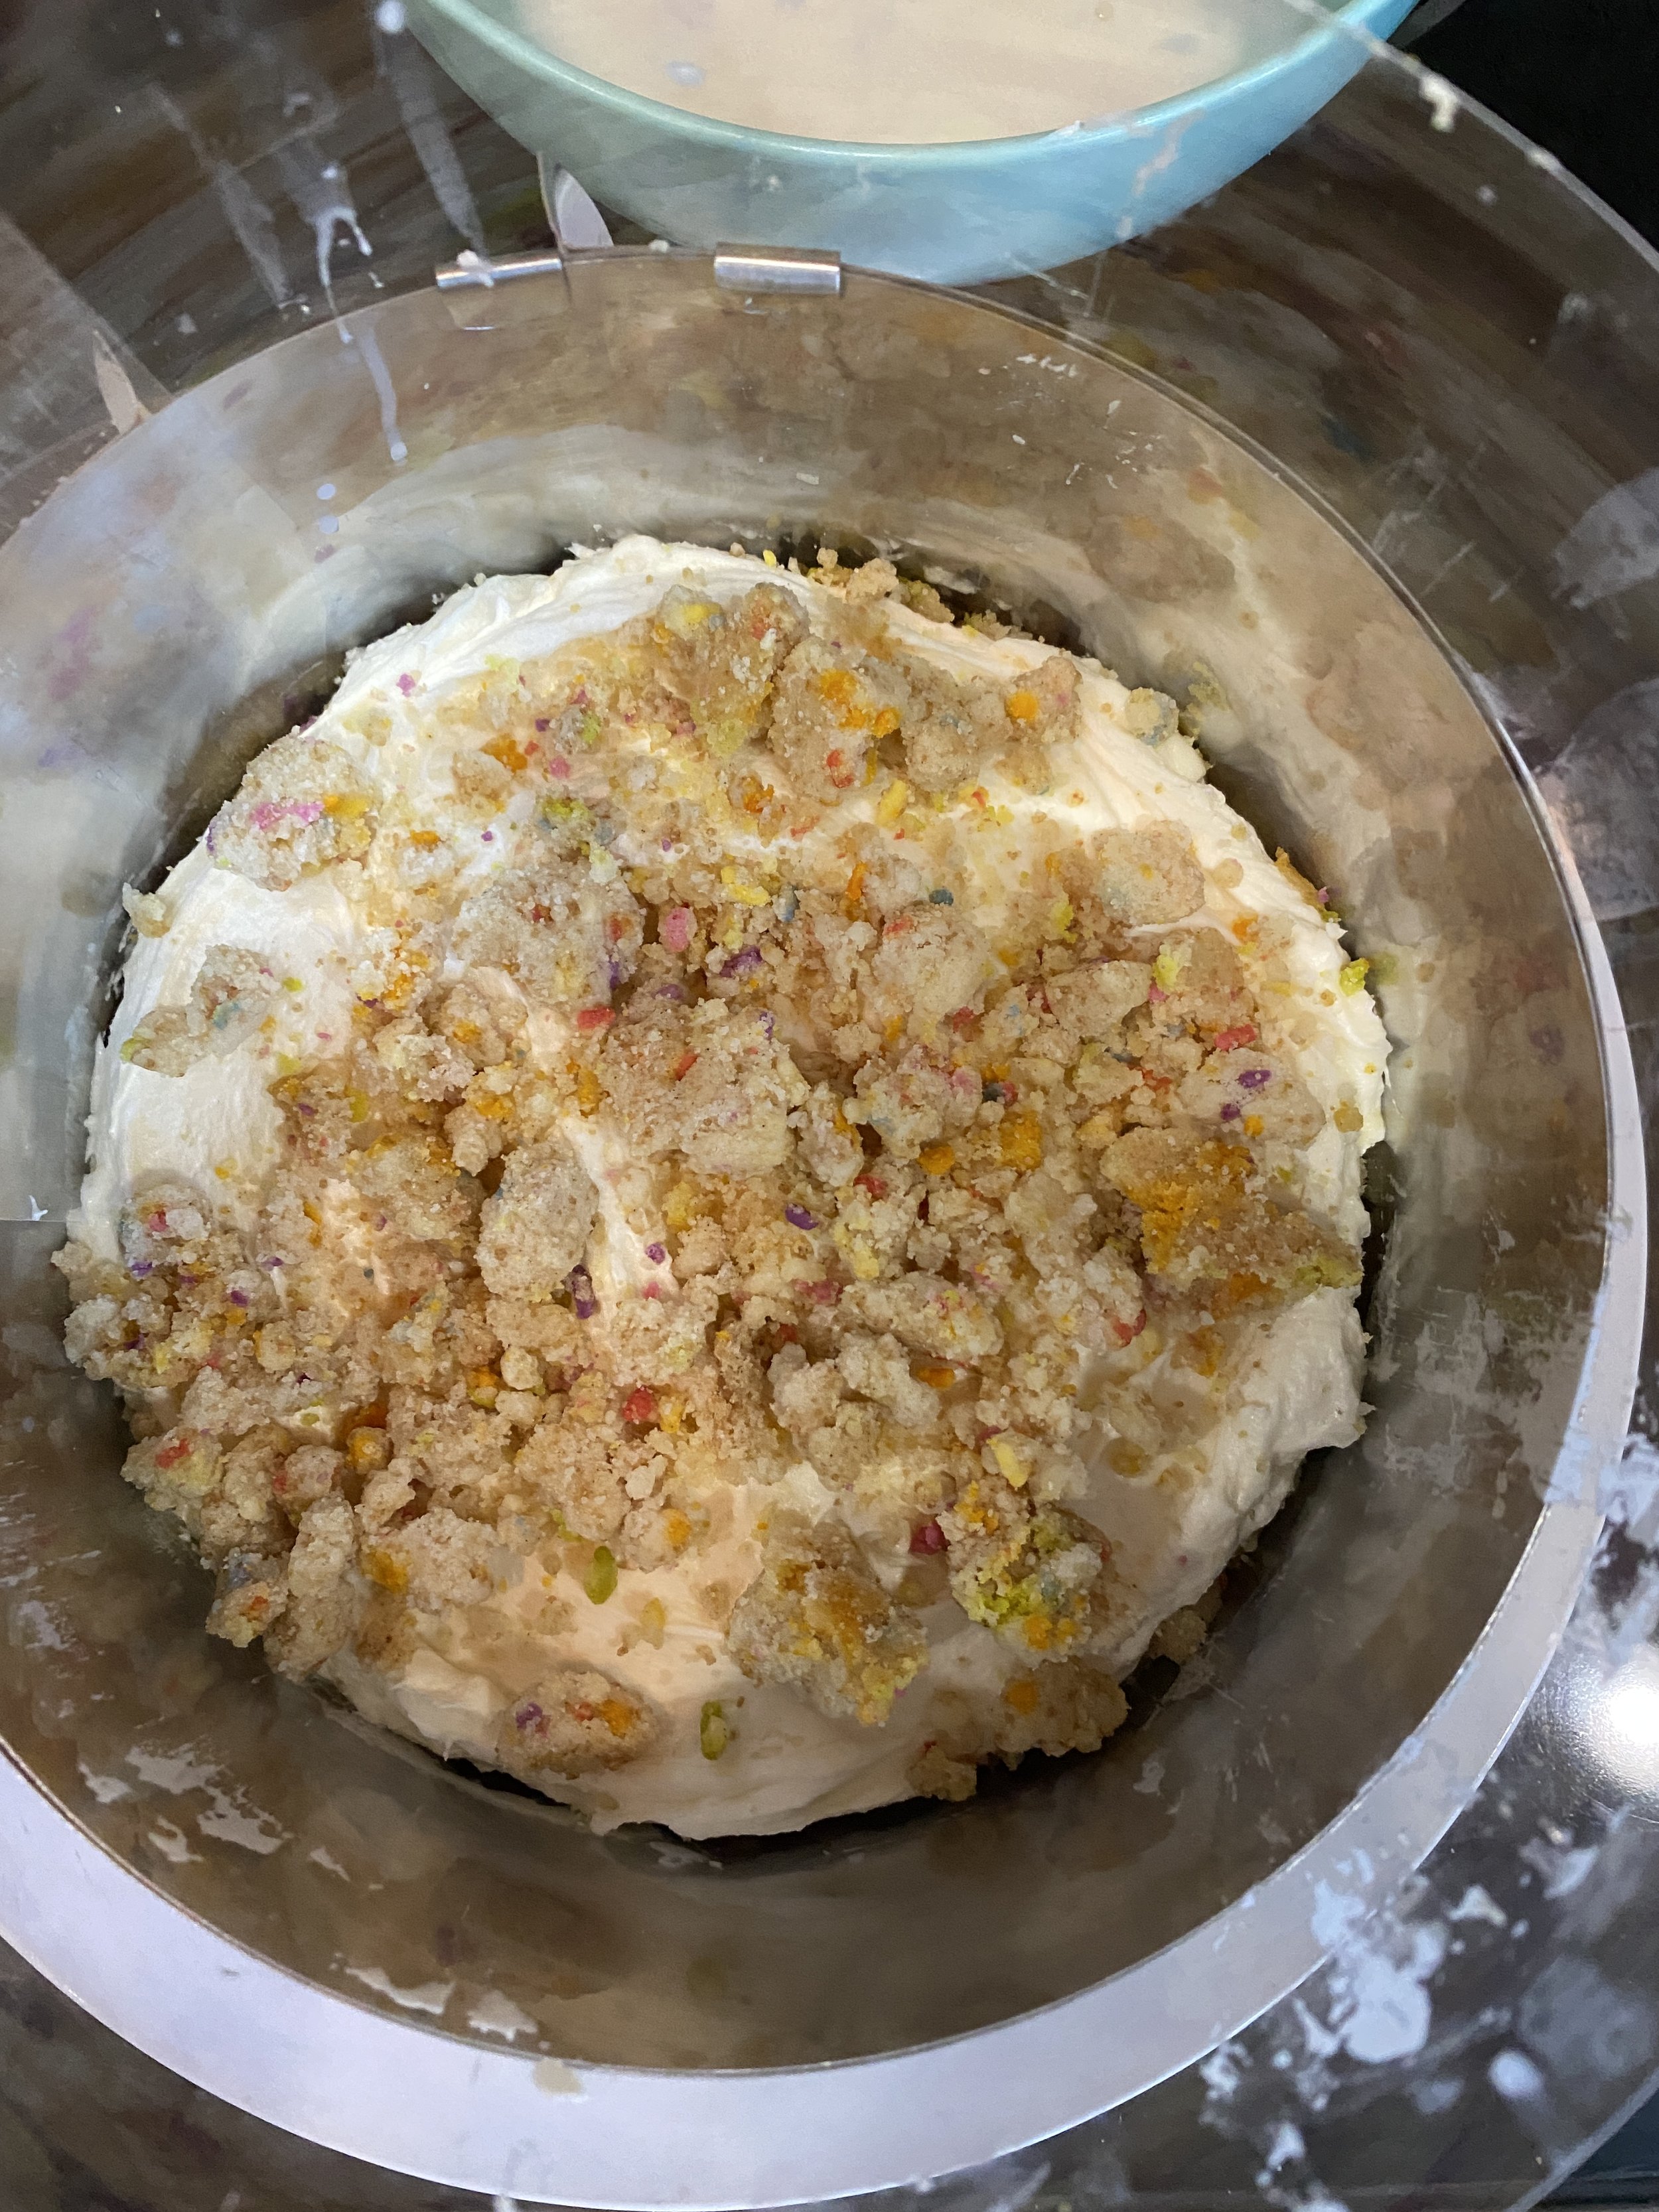
Vegan Chocolate Fudge Pie

IMG_5893.jpg

I don’t bake a lot of pies.

My middle daughter is actually a far better baker than I am, and she bakes all the pies around here.

I love to eat pie, but for whatever reason, I have never been a fan of baking them.

The problem is, she and I don’t love the same pies. I don’t like apple pie. As weird as that may seem, I just don’t like cooked apples. She and her dad adore apple pie, and that is what tends to get baked in our house.

I love chocolate everything, including pie. So when I recently stumbled upon a beautiful chocolate cream pie recipe in a non vegan magazine, I knew I wanted to try and make a vegan version. The recipe included 4 eggs so I decided I would try and substitute starch to bind it. I also decided to add some chocolate chips to bump up the chocolate in the recipe. I mean, the more chocolate the better I always say.

I did ask my daughter to make us a pie crust for this recipe, but many frozen pie crust are vegan. Just be sure to check the label. If it were up to me alone, I would have just gone and bought one. Just being honest here.

IMG_5857.jpg

So after cooking up the filling and letting it bake, I was actually really pleased with the outcome. The only thing is, it was more fudge like than silky, but I wasn't even mad about it! I love all things fudge! I will call it a happy accident! This pie is so easy to make, I think I will baking it up fairly often.

I also topped this pie with our sweet aquafaba whip recipe. You can use it as is, OR you can top the pie with the whip, and pop it in the oven on broil for a few minutes to toast up a perfectly golden meringue. If you are not in the mood to whip up some perfectly sweet aquafba, then use whatever vegan whipped topping you like. They even make a vegan cool whip these days, or use canned coconut or almond whipped cream, or you could whip up some coconut milk whipped cream if you like. I personally find making aquafaba whip the easier and tastiest option. One can of chickpea liquid will give you big, beautiful, fluffy batch of the tastiest vegan whipped topping around. If you have never made it before, I strongly suggest giving it a try! All you need is an electric hand mixer, or a stand mixer.

So If you are in the the mood for a simple, tasty, vegan chocolate pie recipe, this is the one. Bake it for yourself. Bake it for a friend. Bake it for a party. Bake it on a Monday because Monday’s are not the most fun day of the week, but pie would be help. I don’t care why you bake it, I just really think you will be happy if you do!

IMG_5891.jpg

INGREDIENTS:

  • 1 9 inch vegan pre-made or homemade pie crust

  • 1 1/4 cup granulated sugar

  • 1/2 cup all purpose flour

  • 1/4 cup dark cocoa powder

  • 1/4 cup tapioca starch

  • 2 cups almond or oat milk

  • 1/4 cup vegan butter

  • 1/2 cup vegan chocolate chips or chopped vegan chocolate

  • 1 teaspoon vanilla extract

  • 1 batch Sweet Aquafaba whip, or any other vegan whipped topping you prefer


INSTRUCTIONS:

Preheat oven to 325 degrees

  1. Pre-bake the pie crust for 10 minutes. Remove from oven.

  2. In a medium sauce pan add all of the dry ingredients and whisk together. Add the butter and milk and heat over medium low heat, whisking continuously until the mixture thickens and the chocolate has melted.

  3. Once the mixture is thick and silky, whisk in the vanilla extract and remove from heat.

  4. Pour the filing into the crust and place on the middle oven rack for 25-30 minutes. Bake just until the center seems set.

  5. Allow pie to cool at room temperature for a bit then transfer to the fridge to finishing cooling.

  6. Top with whipped sweet aquafaba or any vegan whipped topping you prefer to serve. You can also add shaved chocolate on top for garnish.

  7. Store leftovers covered in the fridge.

If you like this recipe, try these:

 
IMG_5865-Edit.jpg

Chocolate Covered Boozy Cherries

Chocolate Covered Boozy Cherries

Raise you hand if you like chocolate covered cherries!?!

Now raise your hand if you like Whiskey or Bourbon!?!

If you raised your hand to both, then man do I ever have a super boozy, super easy, super delicious treat for you!

I for one love whiskey. I love whiskey and ginger ale. I love an old fashioned. I love whiskey neat in a glass in my hand, headed toward my mouth. These days I don’t drink whiskey very often, except on the rare occasion my husband and I go out to dinner and cocktails are an option. Of all the booze, I’m a whiskey girl.

Growing up my dad and I shared an affection for cheap boxes of chocolate covered cherries. My dad always bought them around the holidays and he and I were the only ones in the house that liked them. Score for me because I didn’t have to fight my brother for them!

My daughter has since perfected making vegan chocolate cordials and I am ever so grateful, but she doesn't make them often enough!

Chocolate Covered Boozy Cherries

So when I recently ran across a recipe for something called a cherry bomb, I was like “WHAT?!?!?” In this non vegan recipe they cover them in white chocolate and suggested you soak them in any booze you like. So first of all white chocolate is not my fave. Secondly, as mentioned before, my go to is whiskey, so I naturally decided my vegan version would be soaked in nothing else. Also whiskey and chocolate are best friends. Everyone knows that, so I knew my version would be dipped in vegan chocolate and coated in festive sanding sugar!

Like a perfect adult only version of a chocolate covered cherry cordial!

Y'all! OH MY GOODNESS! These little boozy soaked bites are so good! So good that I took them to our local brewery the other night, where I go to play Mah Jong once a week, (don’t laugh, I’m old and I love game night!) and passed these treats out. Everyone, and I mean everyone, loved them! Am I surprised? No, no I am not. I basically made boozy chocolate candy and passed them out to patrons at a bar. Who’s gonna argue with that?

soaking-booze.jpg

Also whatever you do, SAVE THE SOAKING BOOZE. It can be used for delicious cheery infused cocktails later! Hello old fashioned, my old friend!

I am gonna say that these 100% need to be made for any holiday party you have coming up, or if you are lame like me, maybe make a batch for your game night or book club. They will 100% make it a little more lively and fun! Cherry bombs for everyone (21 and up obviously). Cheers y’all, and happy boozy snacking.

INGREDIENTS:

  • 2 (10 oz) jars maraschino cherries with stems

  • Whisky, or Bourbon of choice

  • 1/2 cup vegan chocolate chips or chopped vegan chocolate

  • 2 teaspoons coconut oil

  • sprinkles, optional

INSTRUCTIONS:

  1. Drain juice from cherries and pour them into a medium sized bowl.

  2. Pour enough whiskey or bourbon to cover the cherries and pop them into the fridge. Let the cherries soak for several hours, or overnight.

  3. Lay out a few paper towels and remove the cherries from the bowl, placing them onto the paper towels. This will help remove some of the liquid from the outside so the chocolate will stick.

  4. Place chocolate in a microwave safe dish along with the coconut oil. Heat in 30 second intervals, stirring in-between unit chocolate has melted.

  5. Dip the cherries into the chocolate and then into some sanding sugar If you like.

  6. Place cherries onto a parchment lined baking sheet and place in the fridge long enough that the chocolate can harden.

  7. Eat and be merry!

If you like this recipe, try these:

 
Chocolate Covered Boozy Cherries

Vegan Cranberry Orange Cupcakes

Vegan Cranberry Orange Cupcakes

When I think about the holidays, I always think about all things cranberry and orange. I love sweet citrus and the bright tartness of cranberries together.

So when I recently made a batch of candied cranberries I knew I needed to come up with a delicious cake or cupcake to use them for garnish!! I mean I guess that is kind of working backwards, but this delicious cupcake was a result of that backward thinking so who cares.

These sweet orange cupcakes are filled with tart cranberry filing, topped with more orange flavor in the butter cream, and topped with a pretty little candied jewel of a cranberry. These cupcakes are so pretty and so tasty! They would be perfect on any holiday table this fall or winter, or as long as you can find fresh cranberries in season.

I used homemade cranberry sauce for the filling but canned will work just as well. I really do encourage you not to skip out on making the candied cranberries. They are great for garnishing desserts, using in cocktails, or just as at sweet and tart little snack.

Tis the season to make cranberry everything, while the getting is good so to speak!!! So go stock up on some fresh cranberries, and add these cupcakes to your holiday “to make” list! You won’t regret it!


INGREDIENTS:

  • 3 cups all purpose flour

  • 2 cups white sugar

  • 1 1/2 teaspoons baking powder

  • 1 teaspoon baking soda

  • 1/2 teaspoon salt

  • 2/3 cups fresh orange juice juice

  • zest from 1 large orange

  • 2 cups plant milk (I like to bake with oat milk)

  • 1/2 cup melted vegan butter

  • 1 teaspoons vanilla extract

CRANBERRY FILLING

  • 6 tablespoons Homemade or canned cranberry sauce

  • 1 tablespoon sugar

  • 2-3 tablespoons orange juice (use the orange you zest for the frosting)

VEGAN ORANGE FROSTING:

  • 1/4 cup vegan butter

  • 1/4 cup shortening

  • 3-4 cups powdered sugar

  • Zest from one orange

  • juice from orange to thin out the frosting

  • candied cranberries for garnish

Vegan Cranberry Orange Cupcakes Filling

INSTRUCTIONS:

Preheat oven to 350 degrees

  1. In a large bowl, whisk together dry cake ingredients. In a smaller bowl, whisk together the wet ingredients along with the zest.

  2. Combine the wet ingredients into the dry and mix until well combined.

  3. Line a muffin tin with 24 cupcake liners. We actually have a tin that holds 2 dozen cupcakes, but if yours holds 1 dozen, you will need to bake in batches.

  4. Fill the cups 3/4 of the way full. Bake for 25 to 30 minutes or until a toothpick inserted in the middle of one of the cupcakes comes out clean.

  5. Allow the cupcakes to cool completely.

  6. Make a small hole in the center of each of the cupcake. You can use a small knife or turn a large piping tip upside down, twisting it into the cupcake and puling out a perfect little bit of cake from the center. Mix the cranberry sauce, sugar and juice in a small blow. My homemade cranberry sauce is super thick. If the sauce you are using is kind of thin, you likely won’t need the juice or as much juice. You need the sauce just thin enough to pipe into the cupcake, but not too thin. Fill a piping bag, or zip lock bag with the corner cut with the cranberry filling and pipe a little into each cupcake.

  7. In a stand mixer, or using a hand mixer, cream together the butter and shortening. Add in the vanilla and orange zest. Begin adding the powdered sugar a little at a time and beat it in until the frosting is the desired stiffness. If the frosting is too thick you can use some juice from the orange to thin it out.

  8. Pipe or spread frosting onto cooled cupcakes and garnish with a candied cranberry

If you like this recipe, try these:

 
Vegan Cranberry Orange Cupcakes

Easy Candied Cranberries

Easy Candied Cranberries

Cranberry season makes me happy.

I love cranberry everything and these pretty little jeweled or candied cranberries are no exception.

These little beauties are so easy to make and add a little fancy sparkle and burst of flavor to so many holiday recipes. You can add them garnish cocktails, top desserts, or just snack on them.

They are sweet, and super tart, and pretty to look at. They store well in the fridge so if you are like me, once you make a batch, you will find as many ways as you can to use them. They are too pretty, and too tasty to let go to waste!

And if you are concerned about white sugar being vegan, just give the brand you use a quick google, or check this list . I use Florida Crystals brand and know they are for sure vegan but give the list a look and check your brand!


INGREDIENTS:

  • 12 oz fresh cranberries

  • 1/2 cup water

  • 1 1/2 cup sugar divided

  • optional, 2 large pieces of orange peel

INSTRUCTIONS:

  1. Bring 1/2 cup sugar, 1/2 cup water, and orange peel to a boil in a medium pot over medium heat, until sugar has dissolved. Remove from heat. Stir in the cranberries.

  2. Place a wire cooling rack on top of a cookie sheet. Transfer cranberries to the wire rack to dry for about an hour. Fill a large bowl with 1/2 to 1 cups of sugar and toss the cranberries in the sugar to coat. Transfer the cranberries back to to the cooling rack to dry for another half hour before storing in an airtight container in the fridge. You can optionally add half 1/2 orange worth of zest to the sugar for an extra citrus pop.

  3. Use cranberries as a garnish for cocktails, or desserts, or just as a tasty snack!

If you like this recipe, try these:

 
Easy Candied Cranberries

Buttery Vegan Pecan Bundt Cake

Butter Vegan Pecan Bundt Cake

I don’t hate any cake. That said, I don’t really love a ton of frosting on a cake and have always preferred more of a glazed bundt or pound cake.

I would almost say this cake is a cross between the two. It is light and buttery inside, not dense like a pound cake, but it sort of has that buttery thick pound cake exterior, which is my favorite part!

This cake is perfect with a hot cup of coffee or a glass of almond milk, just about any time of day. Yes, fine. I eat cake for breakfast if it’s here and staring at me. Don’t judge me.

This cake would also work great for any gathering or pot luck. It comes together pretty easily and always turns out pretty if you are asking me. You could always add some extra toasted pecans on top of the glaze if you like, I just tend to keep it simple. It is packed with pecans on the inside and has just the right amount of crunch

. If you are into bundt or pound cakes, and are a fan of butter and pecans, then you gotta give this one a try. I will also promise you that nobody will ever guess it’s vegan!


INGREDIENTS:

  • 2 cups vegan butter (I use Earth Balance)

  • 1 1/4 cups granulated sugar

  • 1 1/4 cups light brown sugar

  • 2 starch eggs (2 tablespoons tapioca starch, 6 tablespoons water)

  • 1 1/2 cups whipped aquafaba (measure the whipped product, not the liquid)

  • 2 teaspoons vanilla extract or vanilla bean paste

  • 2 teaspoons baking powder

  • pinch of salt

  • 4 cups all purpose flour, divided

  • 1 cup unsweetened almond or oat milk

  • 3 cups chopped, toasted pecans

GLAZE:

  • 1 cup powdered sugar

  • 1-2 teaspoons plant milk

  • 1/2 teaspoons vanilla extract or vanilla bean paste

buttery-vegan-pecan-bundt-cake-closeup.jpg

INSTRUCTIONS:

Preheat oven to 325 degrees.

  1. In the bowl of a stand mixer, or large bowl if using a hand mixer, beat the butter with both sugars for 3 - 5 minutes on high speed, until light and fluffy. Whisk the starch and water together to make the starch eggs, and add to the butter mixture. Beat in along with the vanilla.

  2. In a medium bowl mix 3 3/4 cups flour, baking powder, and salt. Begin by adding 1/3 of the flour and then 1/3 of the milk at a time to the mixing bowl, alternating between the two, mixing in each addition at a low speed. Mix until all ingredients are well incorporated.

  3. Toss the pecans in the reserved 1/4 cup of flour to coat. Add them to the batter and beat them in.

  4. Carefully fold in the 1 1/2 cups of whipped aquafaba with a rubber spatula. You just want to fold it in until it is well incorporated. Be careful not to over mix!

  5. Prepare a bundt pan by giving it a good spray with some cooking oil, or a good wipe down with some vegan butter. Toss a few tablespoons of flour into the pan and shake it around really well, making sure the pan is fully coated. Shake out excess flour. Fill the pan with batter. Place the bundt pan on a cookie sheet and onto the middle rack of your oven. Bake for 1 hour and 15 minutes. Check to see if the cake is done by inserting a cake tester or wooden skewer into the cake. If it comes out clean, its done, if not, let it bake another 10 - 15 minutes or util the skewer comes out clean.

  6. Let the cake cook in the pan on a wire cooling rack. Once cake is completely cool, turn it over onto a serving plate and tap the bottom to release the cake from the pan. As long as you greased and floured the pan well, it should come out pretty easily.

  7. For the glaze, whisk powdered sugar, milk and vanilla together. Drizzle over the cooled cake. If the glaze seems too thin, you can whisk in a little more powdered sugar. Slice cake and serve.

  8. Store any leftovers in an airtight container at room temperature.

Buttery Vegan Pecan Bundt Cake Glaze

If you like this recipe, try these:

 
Buttery Vegan Pecan Bundt Cake